Christmas Papercraft · Gift Card Holders · Papercraft Projects

Poinsettia Teapot Gift Card Holder

If you’ve ever struggled to know what to buy someone as a gift, you will have undoubtedly opted for a gift card at some point. But how can you turn that gift into something fun and memorable? By making your very own unique gift card holder, of course!

A papercraft gift card holder in the style of a vintage cream teapot with a dark red handle and spout. It is decorated with red and green paper poinsettias on the front.

Disguised as a vintage teapot, this stunning poinsettia gift card holder is designed to hold a standard credit card sized gift card, and can also be used for home decor!
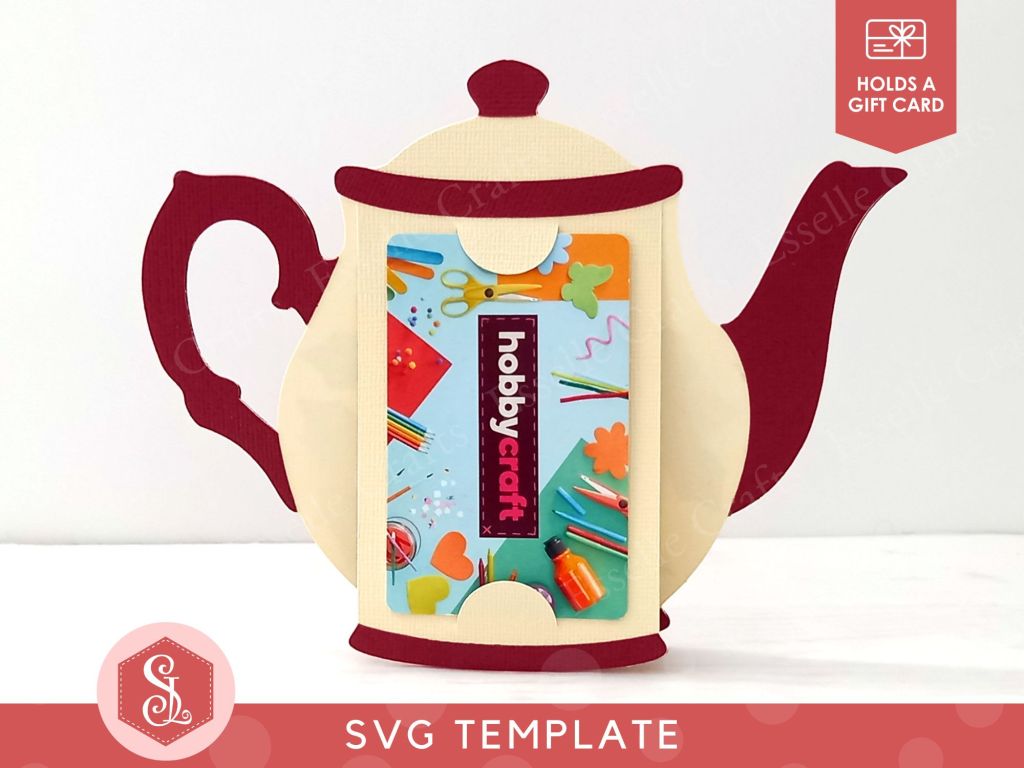
A papercraft gift card holder in the style of a vintage cream teapot with a dark red handle and spout. It is holding a Hobbycraft gift card in the back.

The template for this gift card holder comes as a single SVG cut file, and can be found in my Etsy shop.

To make one, you will need:

* Poinsettia Teapot Gift Card Holder template (available as an SVG cut file)
* Computer and printer to print the PDF instructions
* Digital cutting machine
* Double-sided cardstock (220-250gsm / 80-92lb recommended)
* Craft glue

Watch my video tutorial showing how to assemble the gift card holder, and be sure to follow the tips below:

TIP 1 : When attaching the green leaf pieces, carefully line up the base so that it’s just up from the teapot base.

A papercraft gift card holder in the style of a vintage cream teapot with a dark red handle and spout. It is decorated with red and green paper poinsettias on the front.

TIP 2 : Gently curl the red poinsettia leaves upwards, then offset the layers like this to give them added dimension.

A papercraft gift card holder in the style of a vintage cream teapot with a dark red handle and spout. It is decorated with red and green paper poinsettias on the front.

TIP 3 : When attaching the back piece, only apply glue to the top part (the lid and rim section).
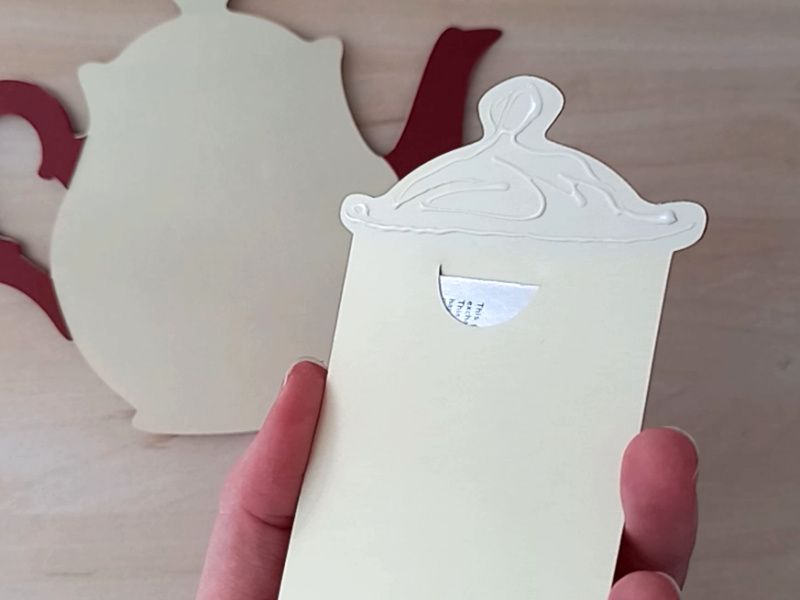
A papercraft gift card holder in the style of a vintage cream teapot with a dark red handle and spout. It is decorated with red and green paper poinsettias on the front.

TIP 4 : Fold the base tab in half and apply glue to the last part only so that it attaches to the base of the teapot piece.

A papercraft gift card holder in the style of a vintage cream teapot with a dark red handle and spout. It is decorated with red and green paper poinsettias on the front.

Once assembled, your little poinsettia teapot gift card holder is ready to go and, because it folds flat, it can easily be popped into an envelope for posting!

A papercraft gift card holder in the style of a vintage cream teapot with a dark red handle and spout. It is decorated with red and green paper poinsettias on the front.

When opened up, it becomes freestanding, and will even rock, making it perfect for Christmas cards, Mother’s day, birthday greetings or as a unique housewarming gift!

A papercraft gift card holder in the style of a vintage cream teapot with a dark red handle and spout. It is decorated with red and green paper poinsettias on the front.

Happy crafting!
Suzanne
3D Papercraft Projects · Christmas Papercraft · Favour Boxes

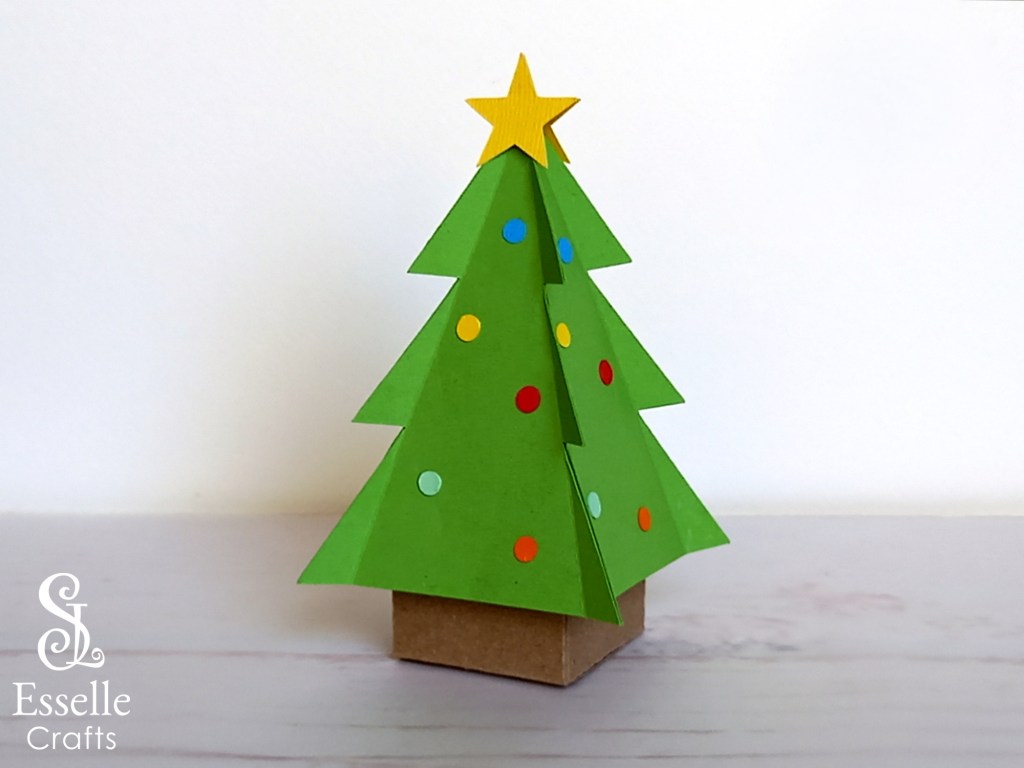
Papercraft Christmas Tree Favour Box

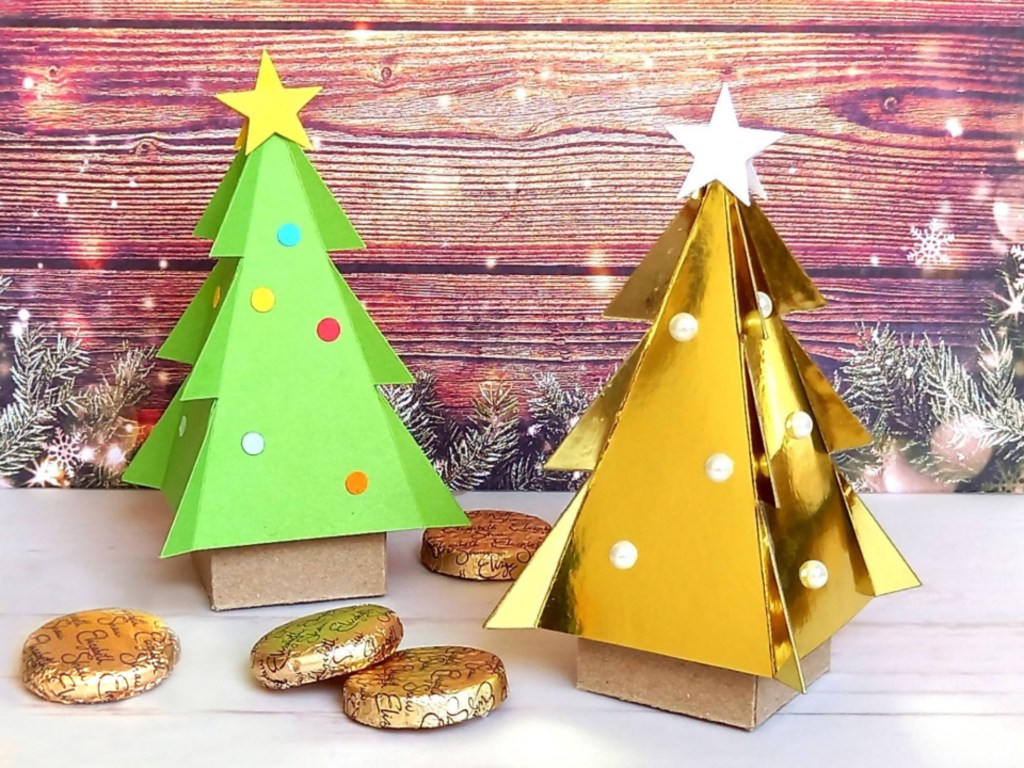
This stunning little Christmas tree favour box is so easy to assemble and will hold a surprising amount of sweets or small treats!๐ŸŽ„

A papercraft Christmas tree favour box with a gold star topper. Perfect for filling with sweets or small treats.

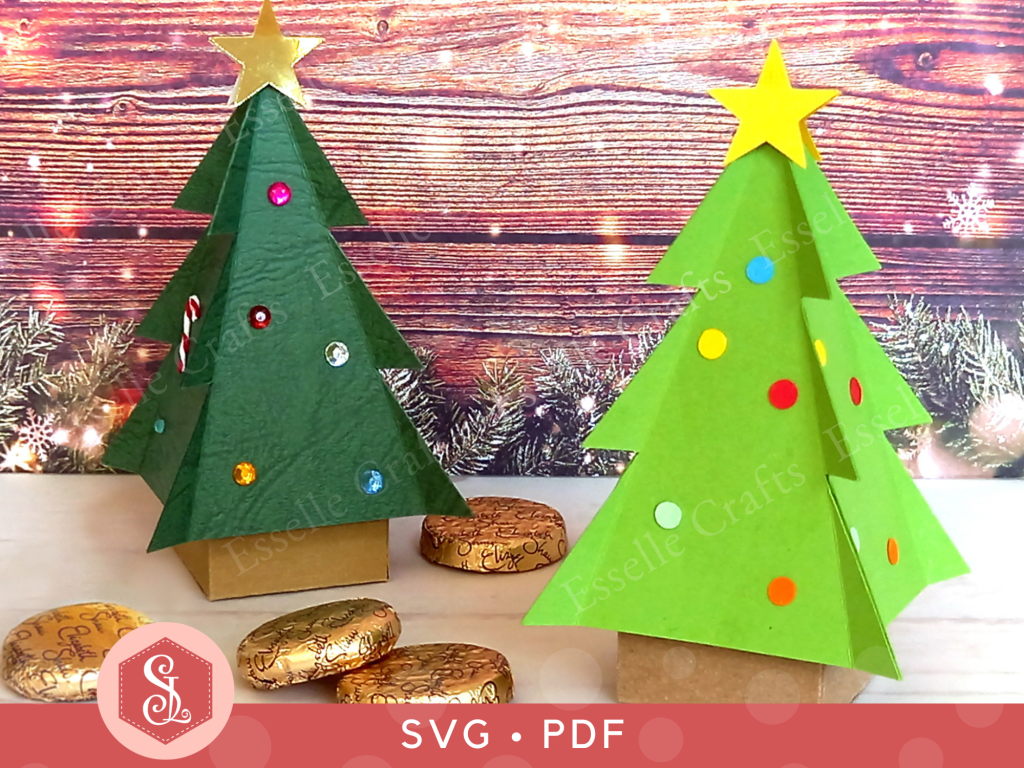
Perfect for Christmas parties and table favours, you can find the template for this box in myย Etsy shop, available as both SVG and PDF.

Two papercraft Christmas tree favour boxes, one light green and one dark green, with gold star toppers. Perfect for filling with sweets or small treats.

To make one, you will need:

*ย Christmas Tree Box templateย (PDF and SVG available)
* Computer and printer to print the PDF templates and instructions
* Digital cutting machine
* Double-sided or patterned cardstock (220-250gsm / 80-92lb recommended)
* Thinner card for the star and baubles (160-200gsm 60-80lb recommended)
* Craft glue / double-sided tape
* Embellishments (optional)

If you are not using a cutting machine you will also need:

* Craft knife / scissors
* Scoring tool
* Ruler

Watch my video tutorial showing how to assemble the box, and be sure to follow the tips below:

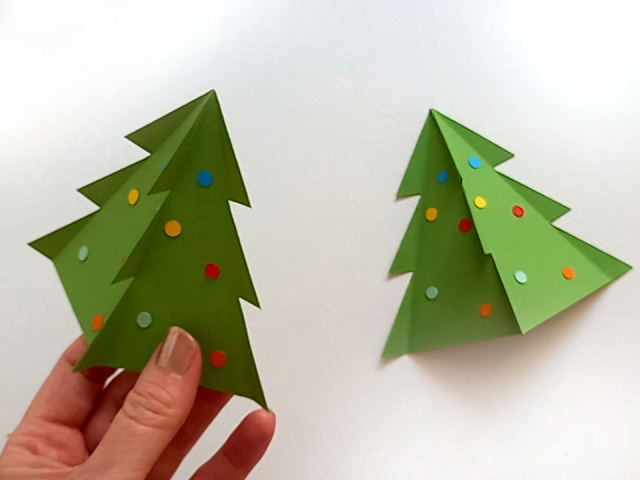
TIP 1 : Glue the tree pieces together in pairs first, then glue the two pairs together. This makes it easier to line them up.

Two papercraft Christmas tree favour boxes. Perfect for filling with sweets or small treats.

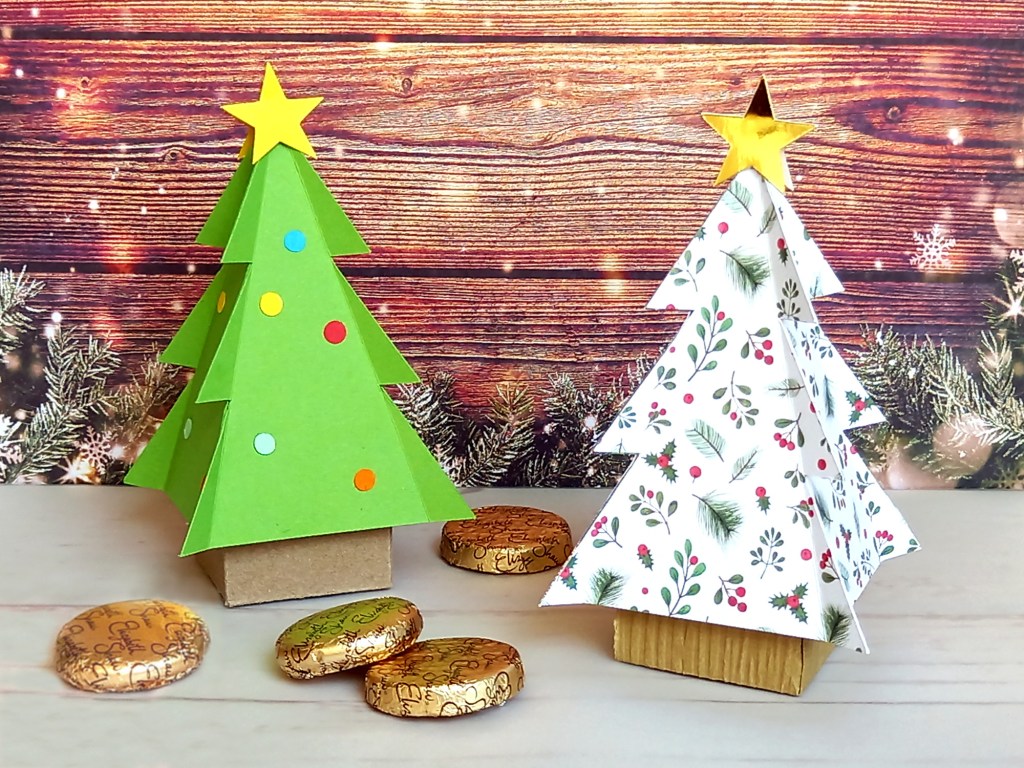
TIP 2 : Instead of adding separate decorations to plain cardstock, try using patterned cardstock for the tree and adding a shiny gold star on the top!

Two papercraft Christmas tree favour boxes. Perfect for filling with sweets or small treats.

TIP 3 : Try adding some sparkly gems to the tree or some half pearls, like on this super shiny gold mirror card version!

Two papercraft Christmas tree favour boxes. Perfect for filling with sweets or small treats.

However you choose to decorate your little Christmas tree boxes, have fun with them and experiment with different materials. Just like I did with this miniature candy cane that I made from baker’s twine!ย 

Two papercraft Christmas tree favour boxes. Perfect for filling with sweets or small treats.
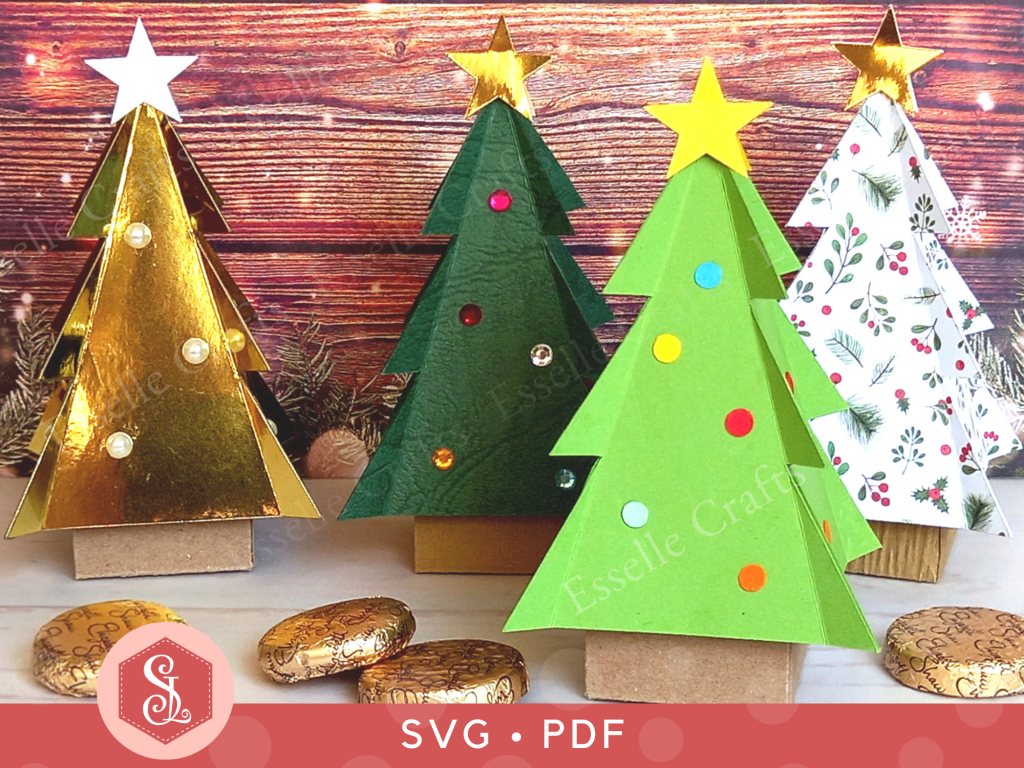
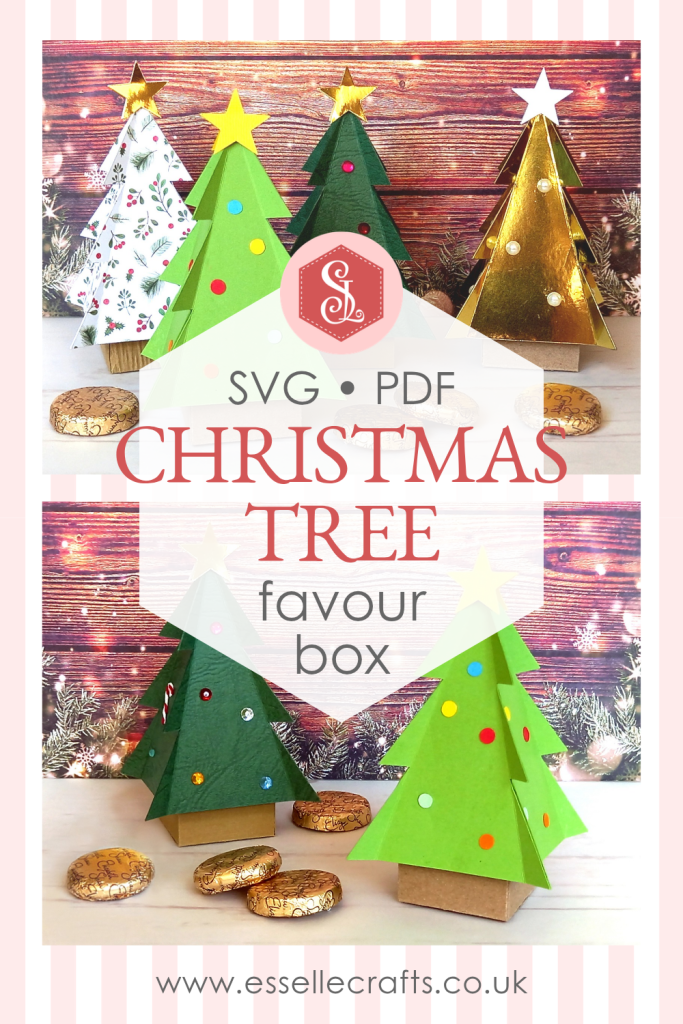
Four papercraft Christmas tree favour boxes, one light green, one dark green, one white and one gold, all with gold star toppers. Perfect for filling with sweets or small treats.

What will you fill your little Christmas tree boxes with? Let me know in the comments below!

Four papercraft Christmas tree favour boxes, one light green, one dark green, one white and one gold, all with gold star toppers. Perfect for filling with sweets or small treats.

Happy crafting!
Suzanne ๐ŸŽ„
3D Papercraft Projects · Christmas Papercraft · Favour Boxes · Papercraft Projects · wedding favour boxes

Double Bow Favour Box Template

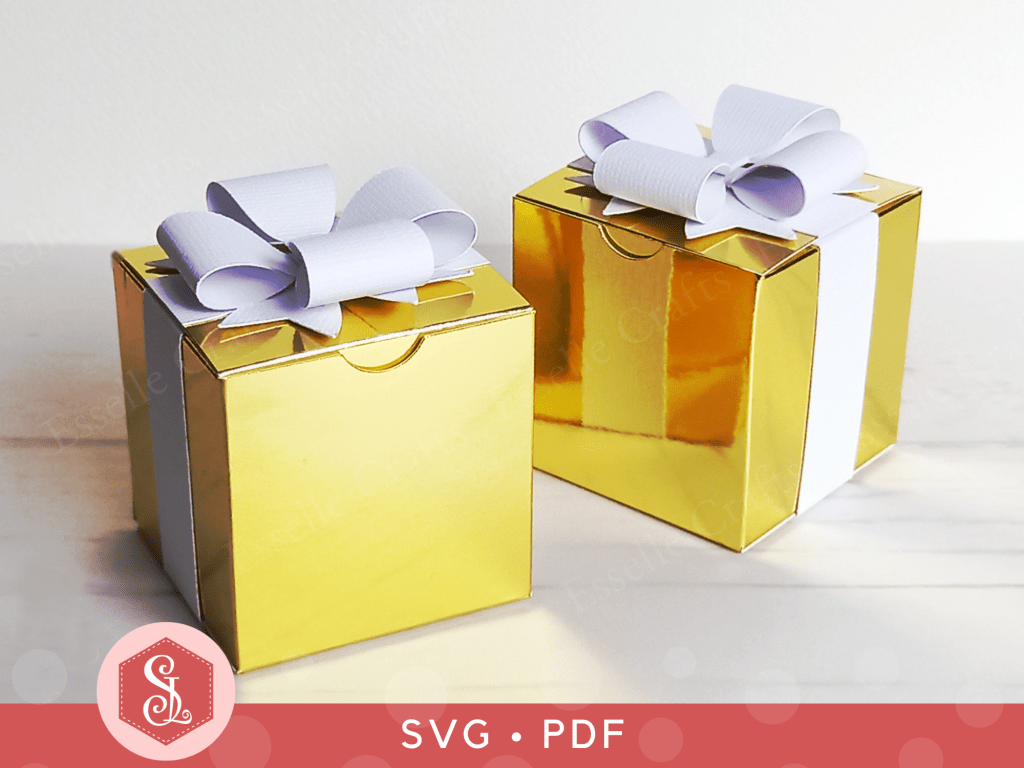
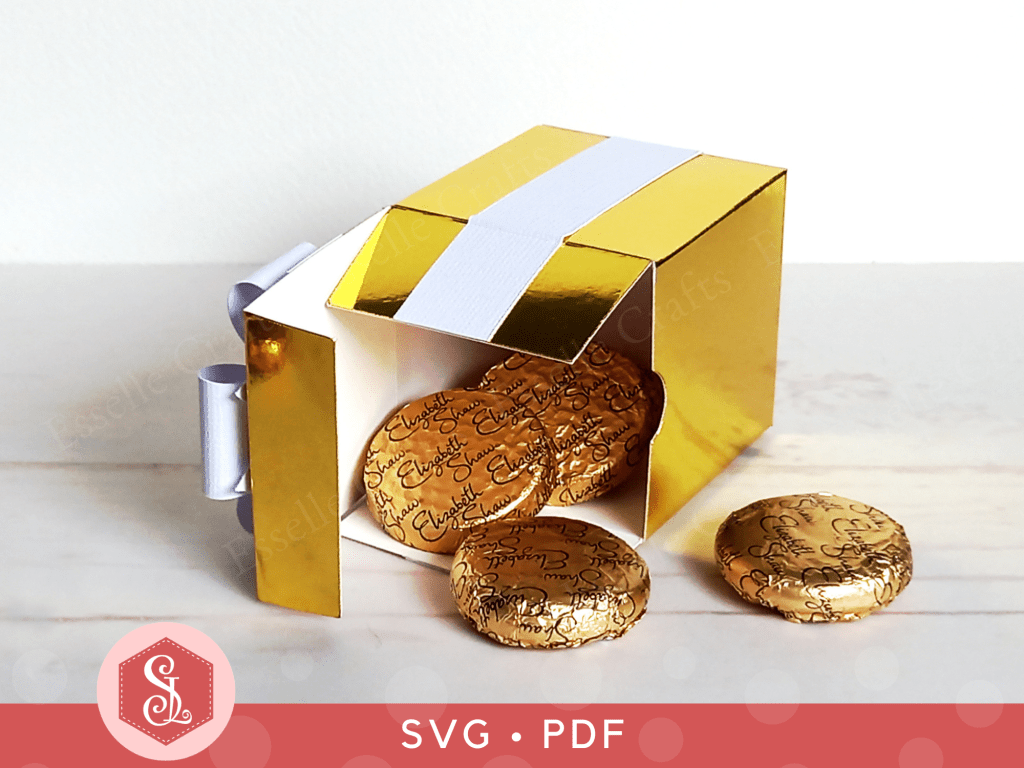
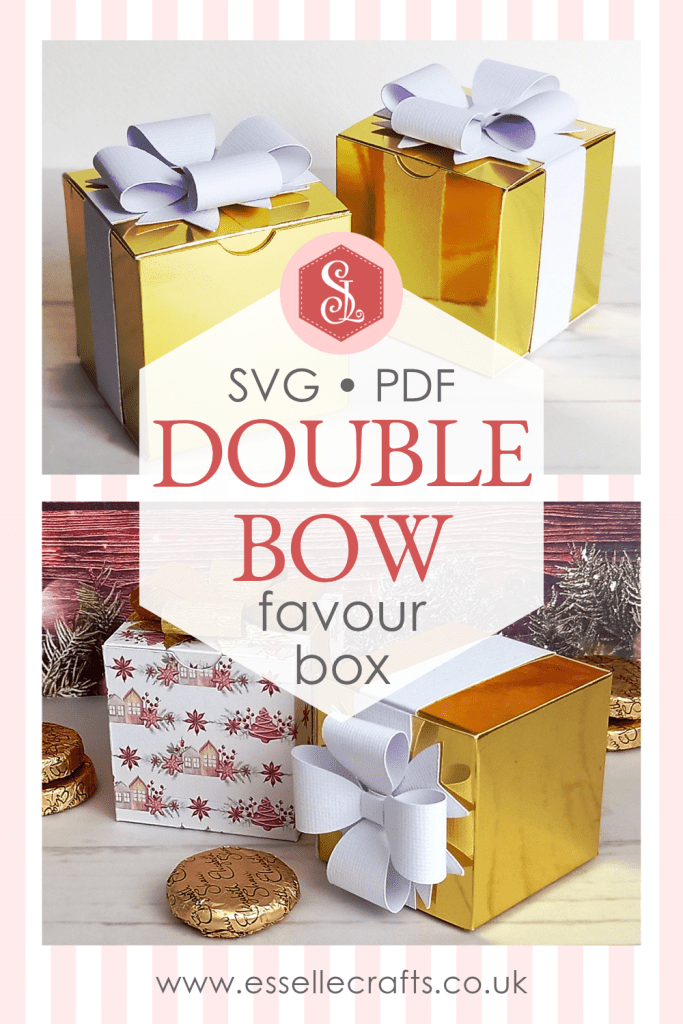
This adorable cube favour box has a double bow detail on the lid, and is perfect for wedding favours, bridal showers, Christmas gifts and so much more!

Two cube favour boxes made from shiny gold card, finished with a white paper ribbon and a white double bow on top.

Easy to assemble, the template for this box is available through my Etsy shop as an SVG cut file, as well as a PDF if you prefer to cut out by hand.

A cube favour box made from shiny gold card, finished with a white paper ribbon and a white double bow on top.

To make one, you will need:

* Double Bow Box template (PDF and SVG available)
* Computer and printer to print the PDF templates and instructions
* Digital cutting machine
* Patterned or coloured cardstock (220-250gsm / 80-92lb recommended)
* Thinner card for the ribbon and bows (160-200gsm / 60-80lb recommended)
* Craft glue / double-sided tape

If you are not using a cutting machine you will also need:

* Craft knife / scissors
* Scoring tool
* Ruler

Watch my video tutorial showing how to assemble the box:

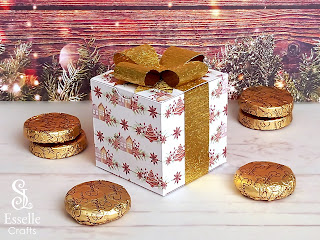
These boxes can be made for any occasion, and here is a super cute Christmas version, which I made using sparkly gold paper for the ribbon and bows.

A cube favour box made from patterned card, finished with a gold paper ribbon and a gold double bow on top.

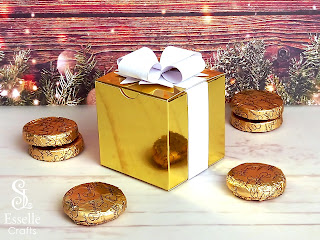
The gold mirror card on this one looks so elegant teamed with its white textured ribbon and bows.

A cube favour box made from shiny gold card, finished with a white paper ribbon and a white double bow on top.
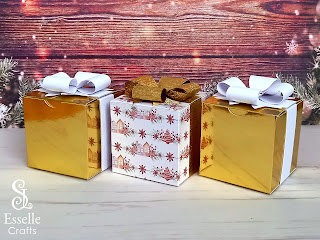
Three cube favour boxes made from shiny gold card, finished with a white paper ribbon and a white double bow on top.

A set of these cube favour boxes would look amazing on any Christmas table, filled with little treats!

Three cube favour boxes made from shiny gold card, finished with a white paper ribbon and a white double bow on top.

Happy crafting
Suzanne

3D Papercraft Projects · Christmas Papercraft · Favour Boxes · Papercraft Projects

Star Treat Box Papercraft Template

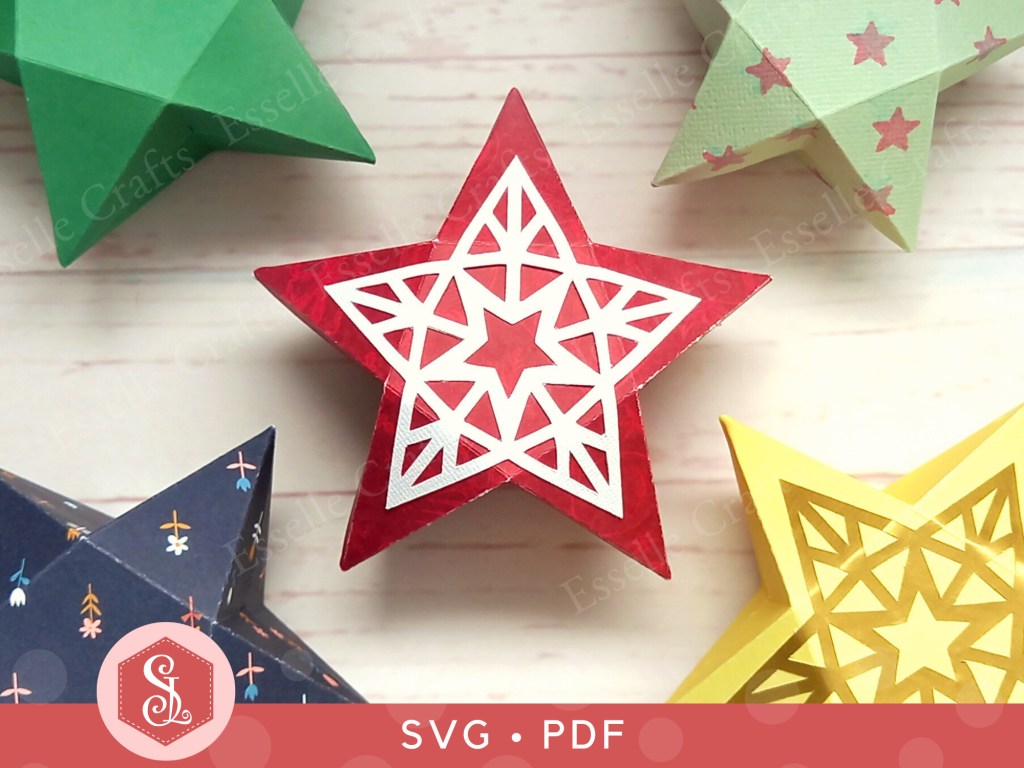
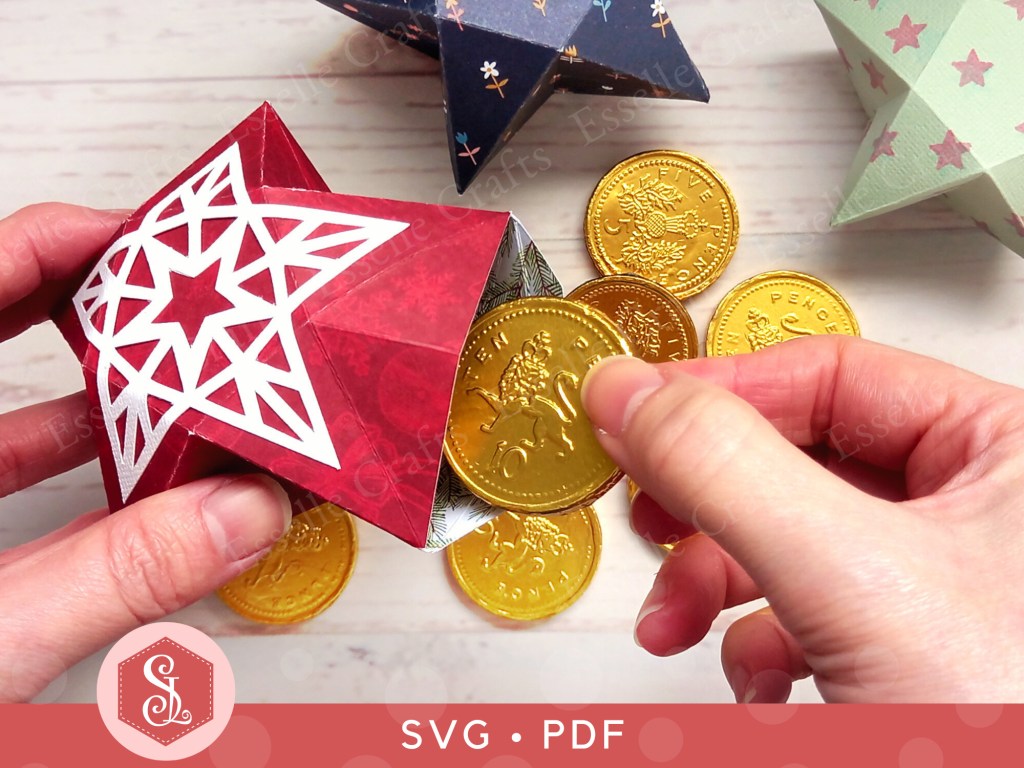
This 3D papercraft star treat box is quick and easy to make for last minute stylish gift giving! Featuring an optional pattern detail, it can be made to match any theme or colour scheme, and can be filled with sweets or small treats โญ

A red papercraft favour box in the shape of a star with a white decorative panel on top used for gifting sweets or small treats.

Perfect for birthday parties, wedding favours, Christmas table treats and so much more, the template for this box is available through my Etsy shop as an SVG cut file, as well as a PDF if you prefer to cut out by hand.

A red papercraft favour box in the shape of a star with a white decorative panel on top used for gifting sweets or small treats.

To make one, you will need:

Star Treat Box template (SVG and PDF available)
* Computer and printer to print the PDF template and instructions
* Digital cutting machine
* Coloured / patterned cardstock (220-250gsm / 80-92lb recommended)
* Craft glue / double-sided tape

If you are not using a cutting machine, you will also need:

* Craft knife / scissors
* Scoring tool
* Ruler

Watch my video tutorial showing how to assemble the box and be sure to follow the tips below:

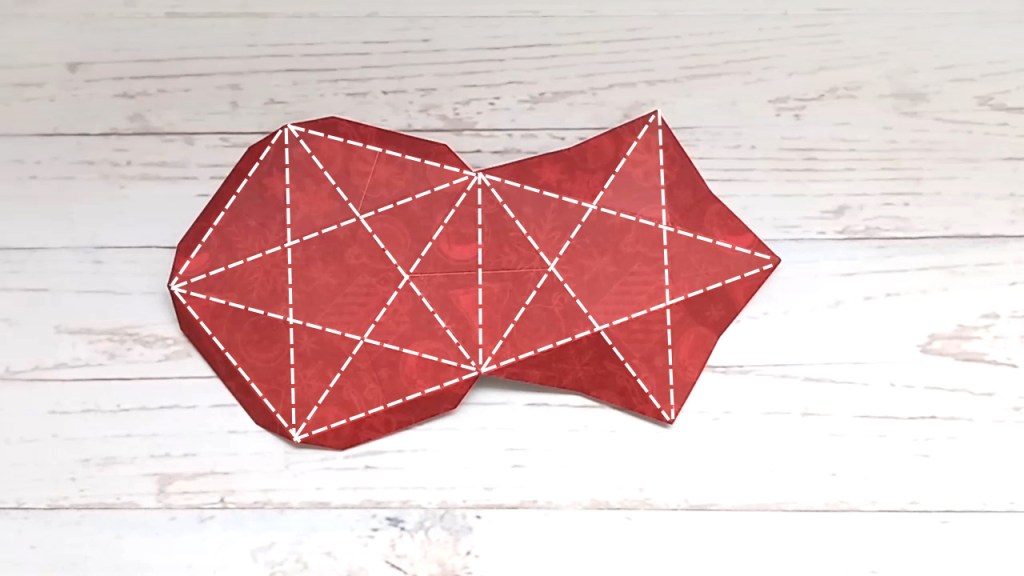
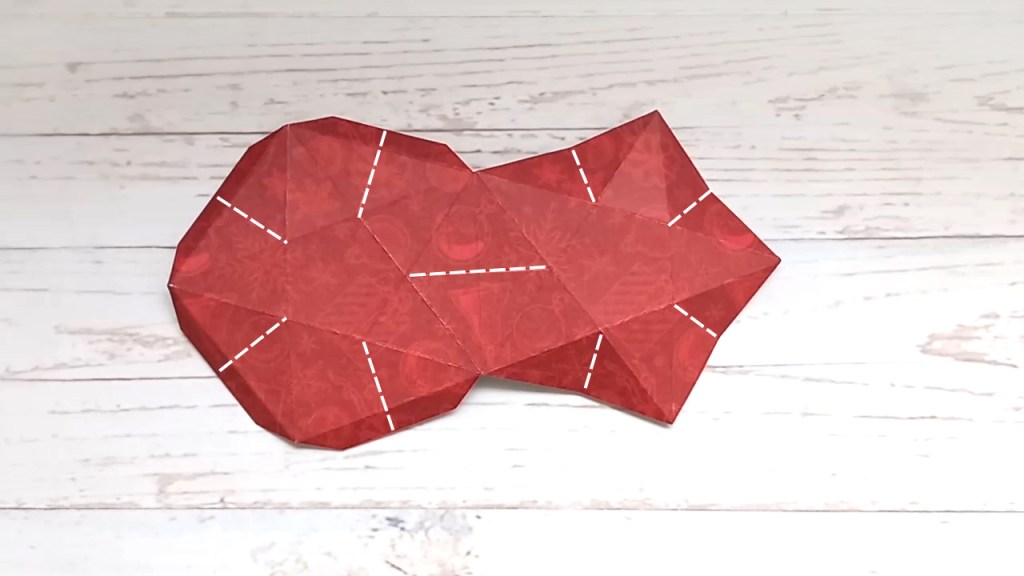
TIP 1 : Following the diagrams below, mountain fold the first lot of score lines, then valley fold the second lot of score lines.

Making a red papercraft star treat box from a template.

TIP 2 : Fold three of the tabs inwards, then glue them and fold the piece in half, carefully lining up the outer edges.

Making a red papercraft star treat box from a template.

TIP 3 : Allow the glue to dry, then gently push the centre of each side inwards to create the 3D star shape.

These are such useful little boxes for gifting small treats, but how about using them as Christmas tree ornaments or maybe as decorative storage boxes! However you use them, I hope that I have inspired you to make your own little star treat boxes โญ

A red papercraft favour box in the shape of a star with a white decorative panel on top used for gifting sweets or small treats.

Happy crafting โญ
Suzanne

3D Papercraft Projects · Christmas Papercraft · Gift Card Holders · Papercraft Projects

Christmas Stocking Gift Card Holder

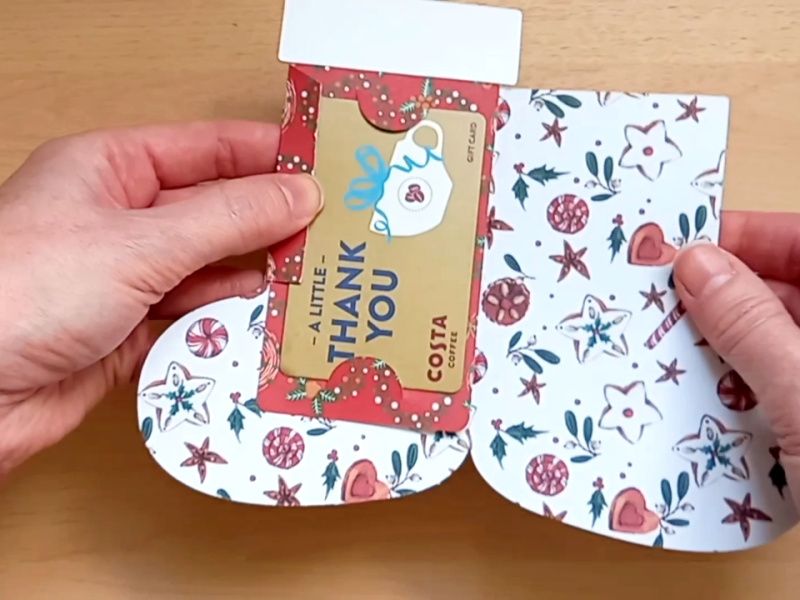
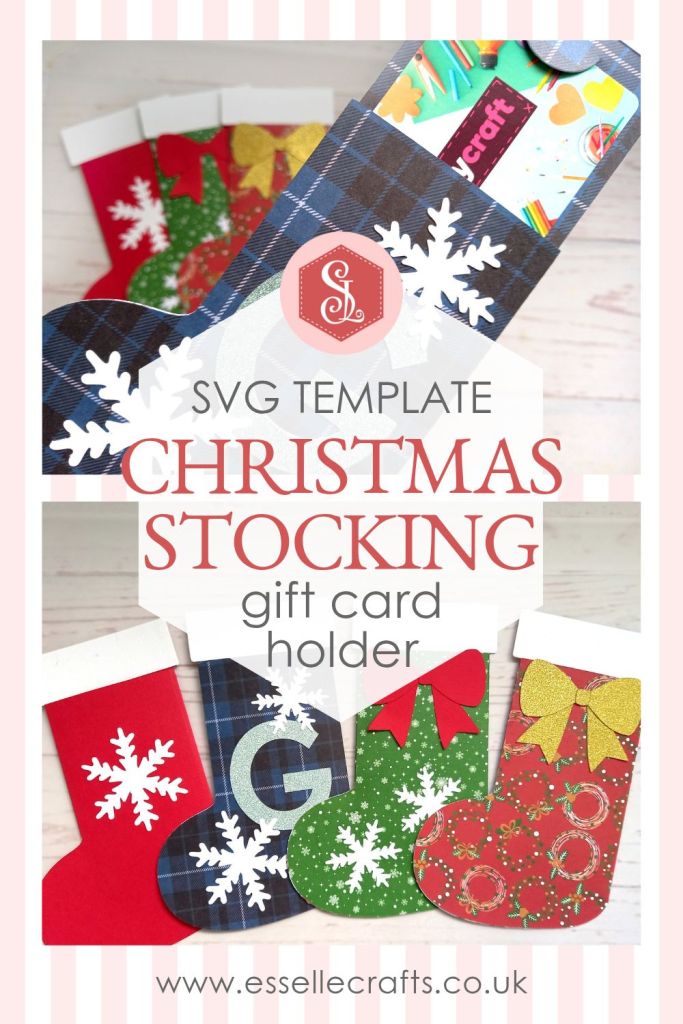
If you’ve ever struggled to know what to buy someone as a gift, you will have undoubtedly opted for a gift card at some point. But how can you turn that gift into something fun and memorable? By making your very own personalised gift card holder, of course! ๐ŸŽ

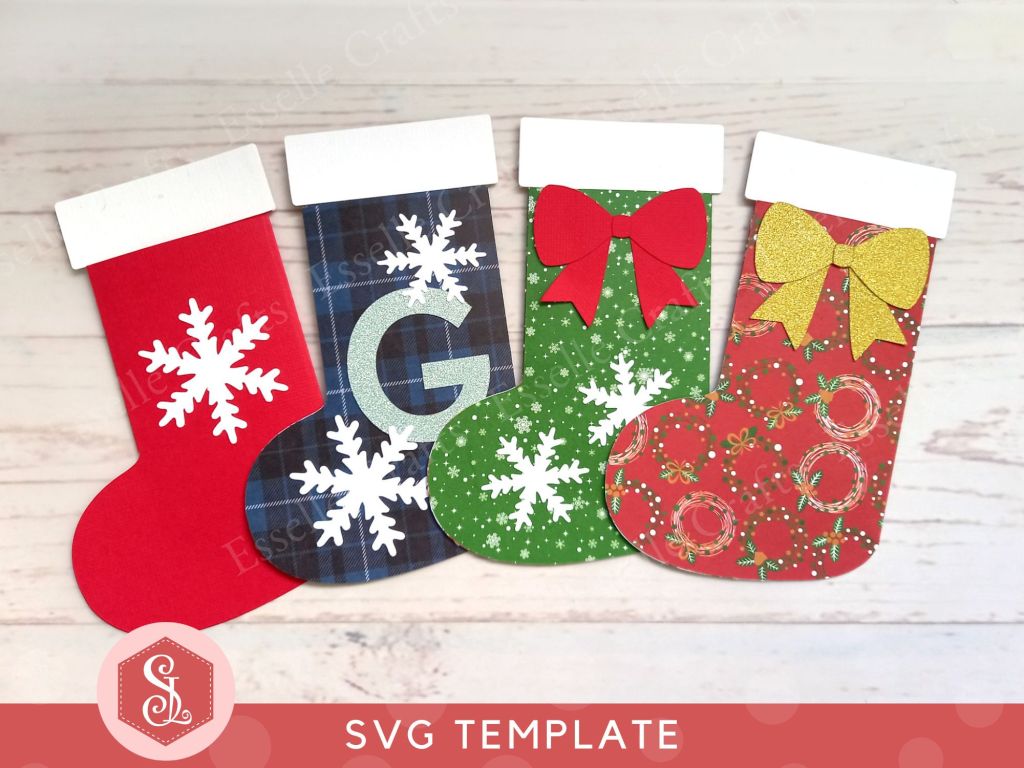
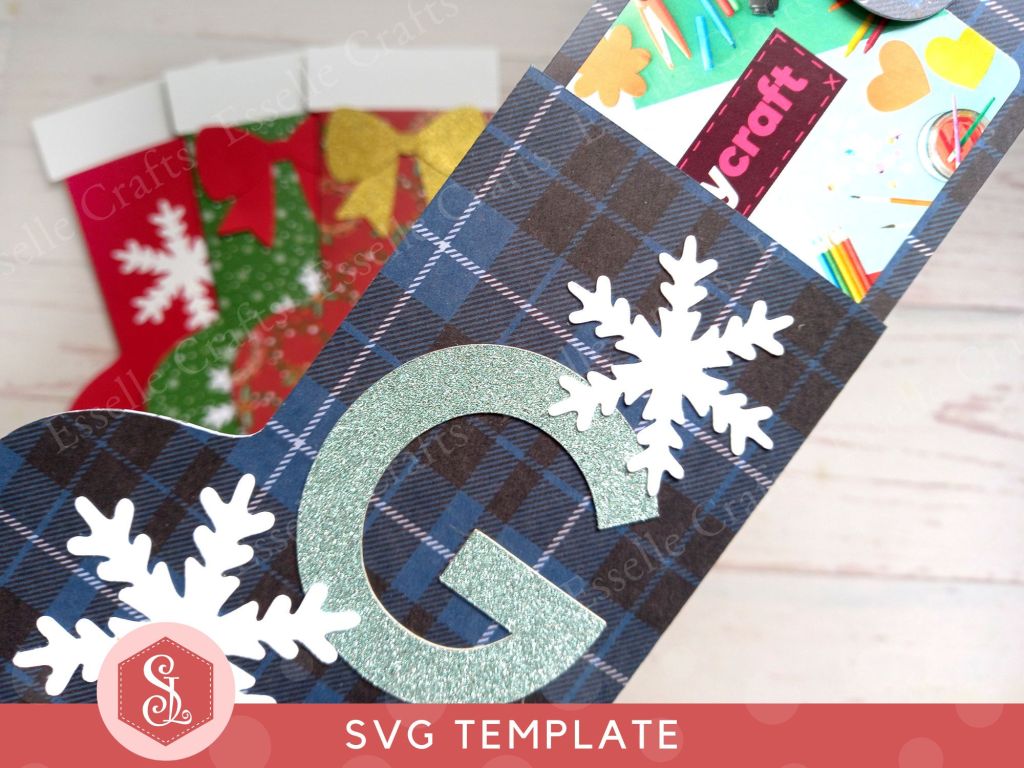
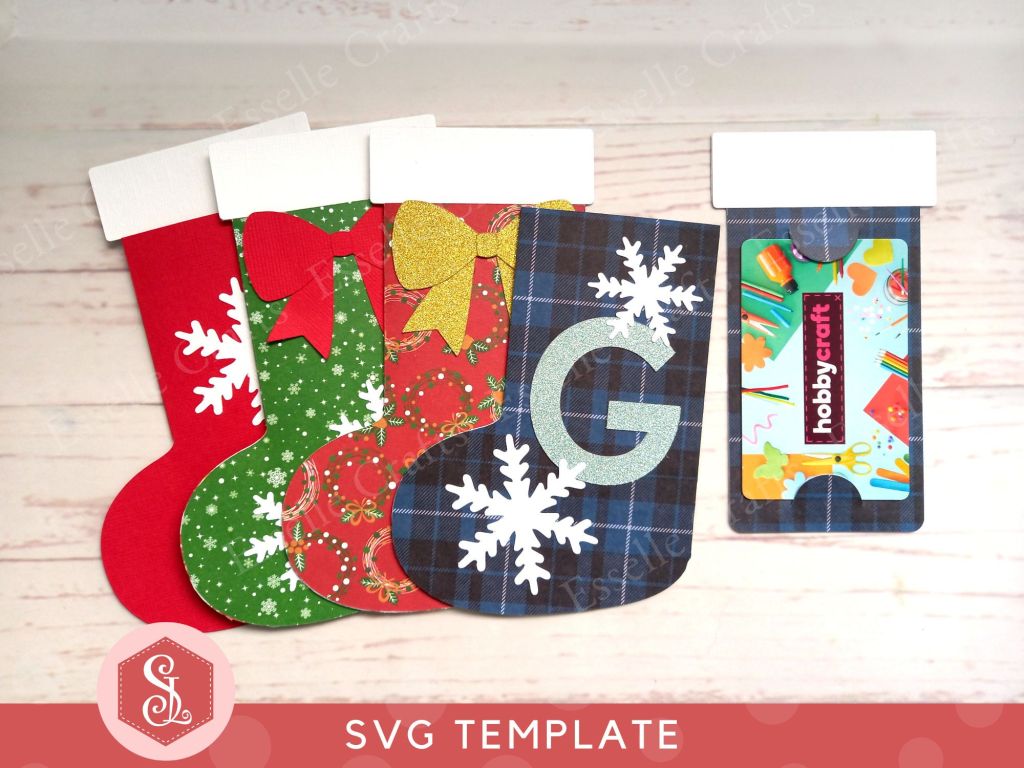
Four festive paper craft gift card holders in the shape of Christmas stockings decorated with snowflakes and bows

Disguised as a Christmas stocking, this interactive gift card holder is super easy to assemble and will bring an element of surprise to your gift recipient! ๐ŸŽ

Four festive paper craft gift card holders in the shape of Christmas stockings decorated with snowflakes and bows

Theย templates for this gift card holder come as SVG cut files, and can be found in my Etsy shop.

Four festive paper craft gift card holders in the shape of Christmas stockings decorated with snowflakes and bows

To make one, you will need:

* Christmas Stocking Gift Card Holder template (available as an SVG cut file)
* Computer and printer to print the PDF instructions
* Digital cutting machine
* Double-sided cardstock (220-250gsm / 80-92lb recommended)
* Craft glue / double-sided tape

Watch my video tutorial showing how to assemble the gift card holder, and be sure to follow the tips below:

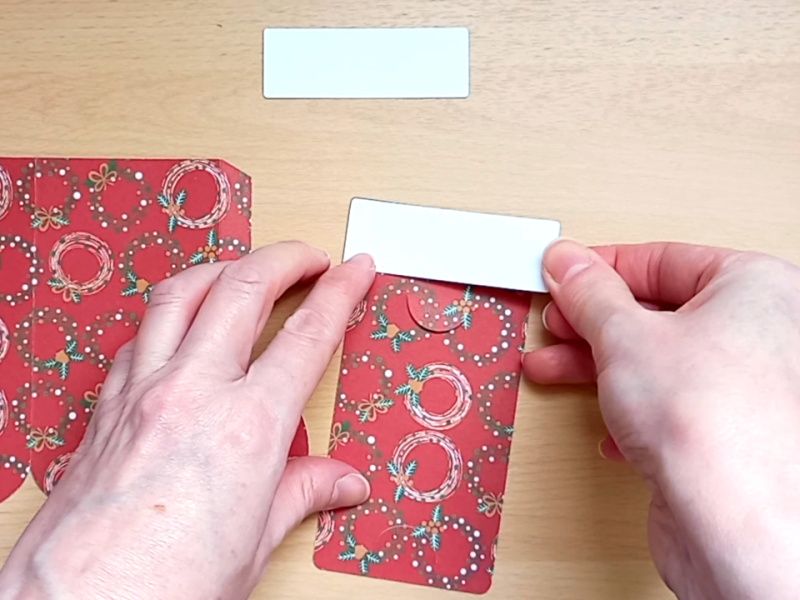
TIP 1 : When attaching the two rectangular pieces to the insert, make sure they are lined up neatly along the top edge.

Making a festive paper craft gift card holder in the shape of a Christmas stocking

TIP 2 : After slotting the gift card into place, slide the insert into the holder, then apply glue to the tab and around the curved edges. Once assembled, check that the insert slides in and out freely.

Making a festive paper craft gift card holder in the shape of a Christmas stocking

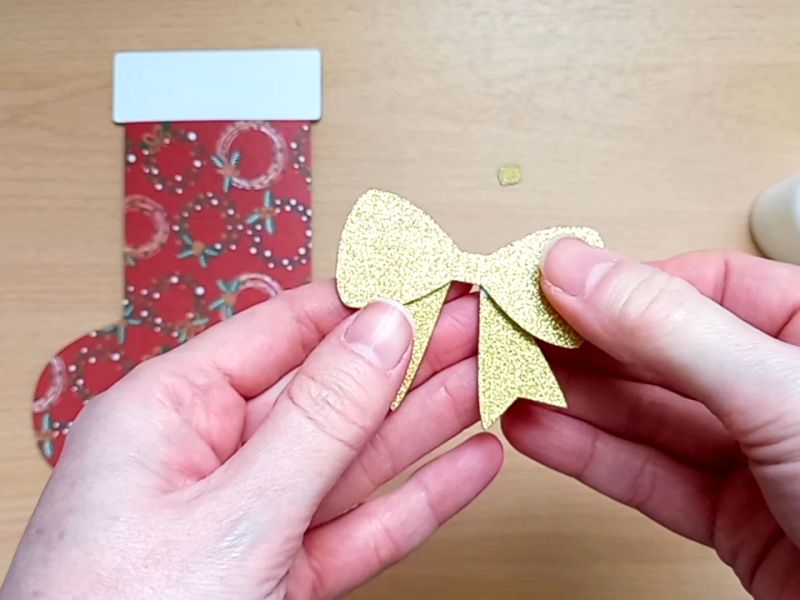
TIP 3 : If you wish to decorate your stocking with a bow, simply layer the three bow pieces and glue it on.

Making a festive paper craft gift card holder in the shape of a Christmas stocking

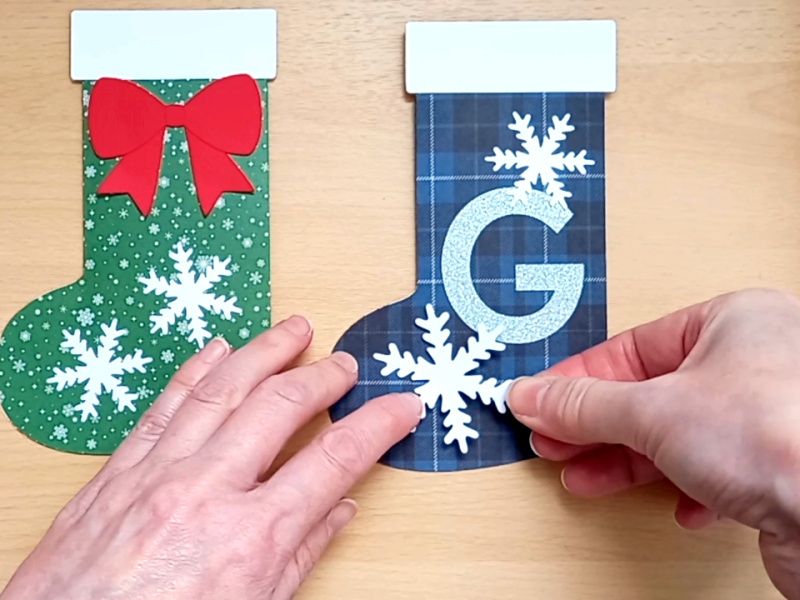
TIP 4 : There’s also the option to add snowflakes (which you can duplicate if you need more) and if you wish to personalise your stocking, the download also comes with a bonus full set of capital letters. Just choose your letter and size it to approximately 5.5cm / 2.16″ high.

Making a festive paper craft gift card holder in the shape of a Christmas stocking

Once assembled, your little stocking gift card holder is ready to go – it doesn’t need to be wrapped – and because it’s fairly flat, it can easily be popped into an envelope for posting! โœ‰๏ธ๐Ÿ“ฎ

Four festive paper craft gift card holders in the shape of Christmas stockings decorated with snowflakes and bows

You could also try punching a hole in the top of the insert, adding a length of ribbon or festive twine and hanging it on the Christmas tree or mantelpiece ๐ŸŽ„

Paper Craft Christmas Stocking Gift Card Holders

Happy crafting!
Suzanne ๐ŸŽ
3D Papercraft Projects · Christmas Papercraft · Favour Boxes · Papercraft Projects · Teapot Favour Boxes

Gingerbread House Teapot Gift Box

During one of the hottest weeks of the year so far, here I am thinking about Christmas!

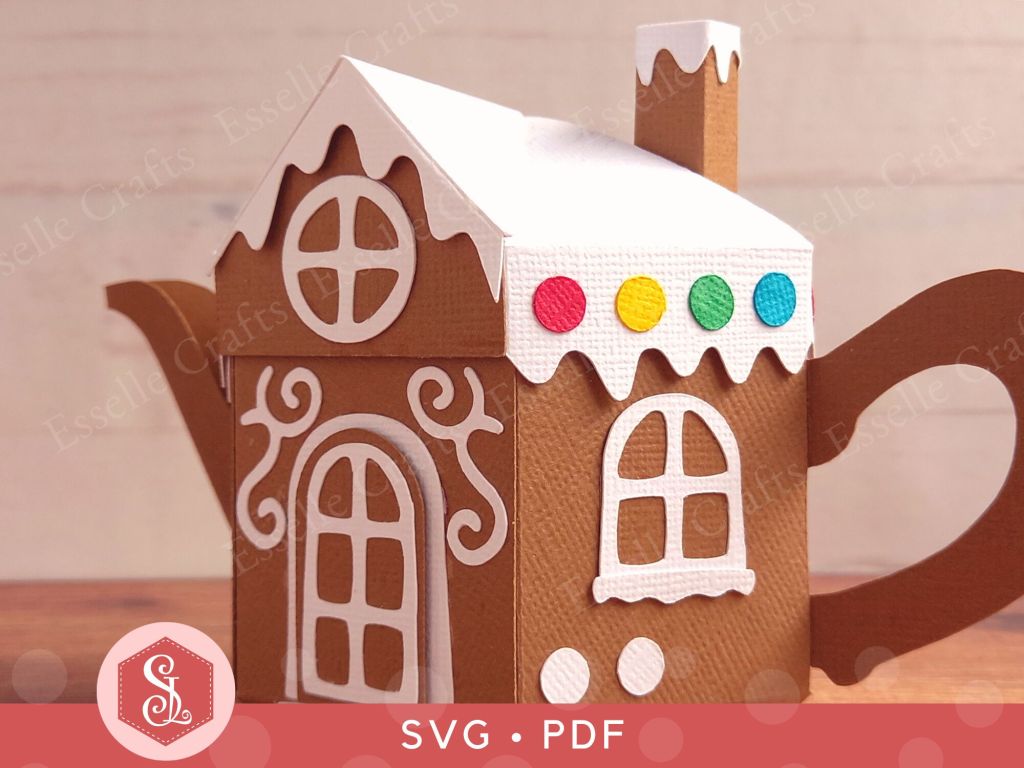
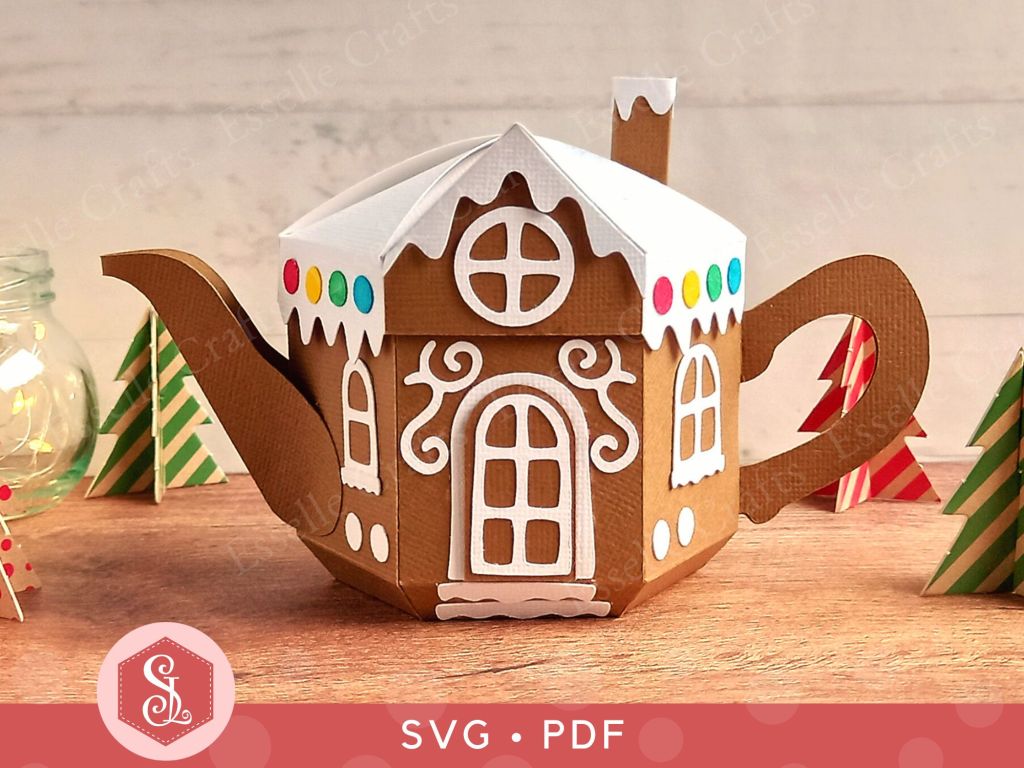
I had such lovely feedback following the launch of my Cottage Teapot Box design last month that I decided to continue with the house-shaped theme and create one in the style of a classic gingerbread house!

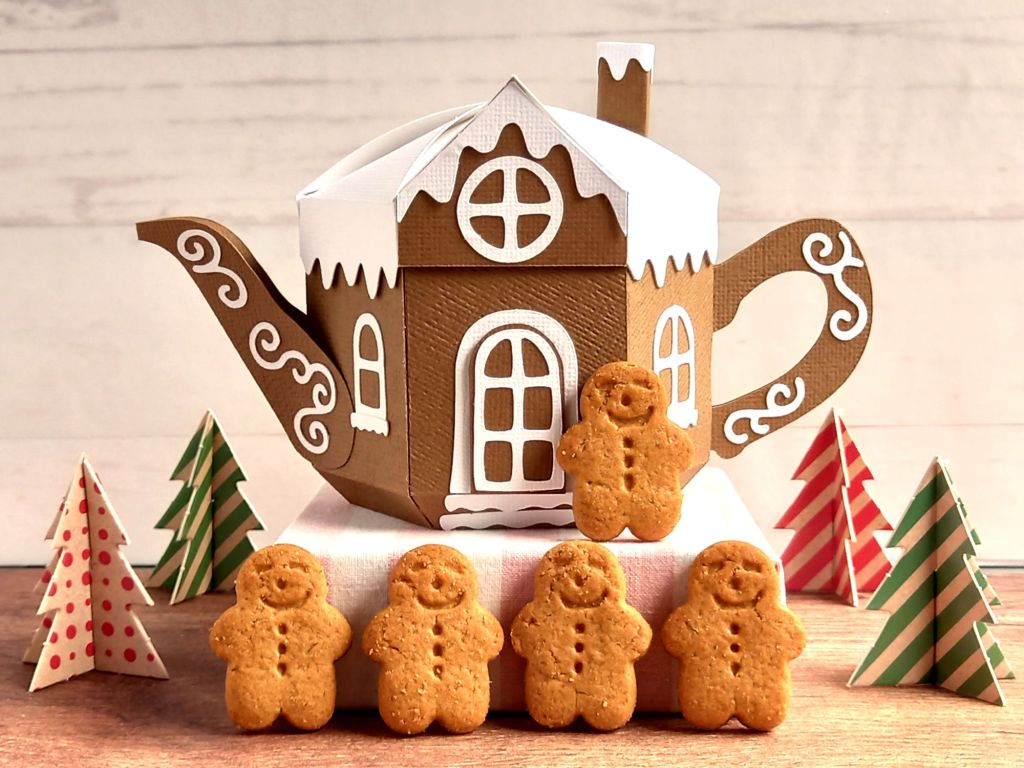
A brown paper craft teapot gift box in the style of a classic gingerbread house with a white icing lid white icing door and windows and white icing swirls

If you’re ready to sprinkle some early Christmas magic, then these charming little boxes are perfect to make for table favours, teacher gifts or seasonal home decor. Fill them with sweet treats or small gifts and they’re guaranteed to deliver warm memories to anyone who receives one!

A brown paper craft teapot gift box in the style of a classic gingerbread house with a white icing lid white icing door and windows and white icing swirls

The templates come as both SVG cut files and printable PDFs, making them accessible for a variety of crafting needs.

A brown paper craft teapot gift box in the style of a classic gingerbread house with a white icing lid white icing door and windows and white icing swirls

To make one, you will need:

* Gingerbread House Teapot Box template (SVG and PDF available)
* Computer and printer to print the PDF templates and instructions
* Digital cutting machine
* Double-sided cardstock (220-250gsm / 80-92lb recommended)
* Craft glue / double-sided tape

If you are not using a cutting machine you will also need:
* Craft knife / scissors
* Scoring tool
* Ruler

Watch my video tutorial showing how to assemble the box, and be sure to follow the tips below:

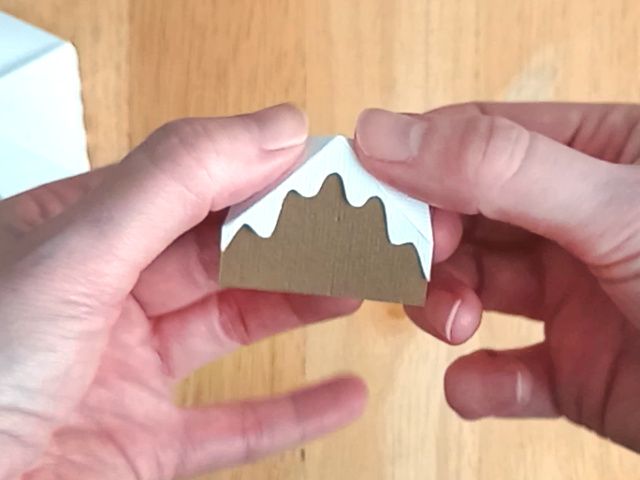
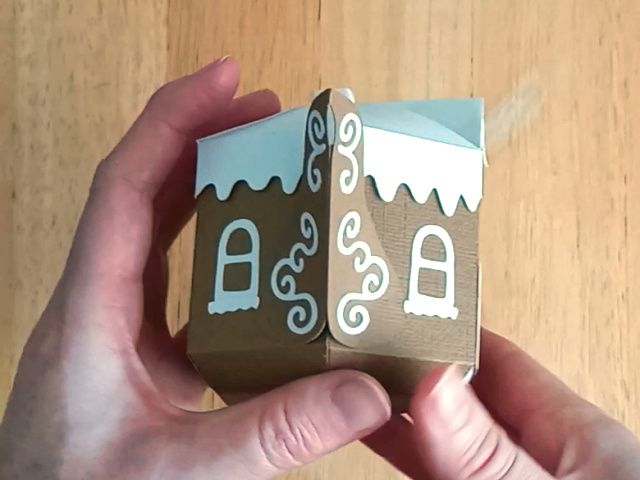
TIP 1 : Glue the white icing piece to the front pitched window piece using the two triangular tabs only. Do this before attaching it to the inside of the pitched roof.

Making part of a brown paper craft teapot gift box in the style of a classic gingerbread house

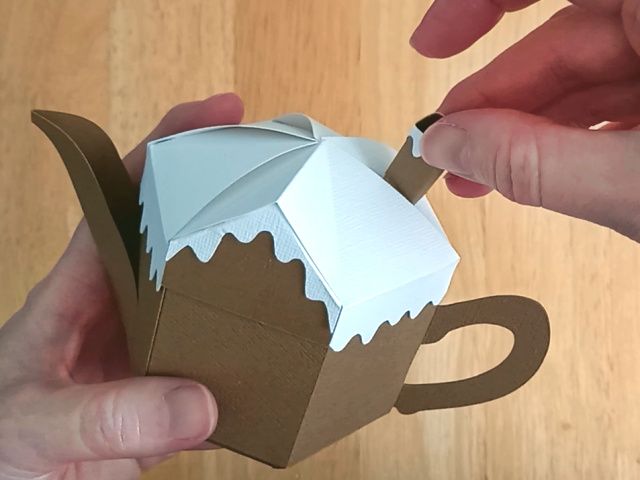
TIP 2 : Assemble the chimney before gluing the icing to the top. The chimney icing piece has no score lines, but will simply wrap around the chimney. Just remember to keep the join at the back.

A brown paper craft teapot gift box in the style of a classic gingerbread house

TIP 3 : The decorative icing swirls can be placed anywhere around the teapot box. The designs are mirrored (flipped), so if you add them to the handle and spout, they will be the same on both sides.

A brown paper craft teapot gift box in the style of a classic gingerbread house with a white icing lid white icing windows and white icing swirls

Once assembled, your little teapot boxes are ready to be filled with delicious sweet treats! These packets of mini gingerbread men fit perfectly!

A brown paper craft teapot gift box in the style of a classic gingerbread house with white icing door and windows and white icing swirls with some mini gingerbread men around it

One teapot box will hold a surprising amount of mini gingerbread men! But they may not last long!

A brown paper craft teapot gift box in the style of a classic gingerbread house with white icing door and windows and white icing swirls with some mini gingerbread men around it

A brown paper craft teapot gift box in the style of a classic gingerbread house with white icing door and windows and white icing swirls with some mini gingerbread men around it

What do you think of this new teapot box design? Would you like to see more house-shaped designs? Let me know in the comments! 

A 3D paper craft teapot gift box made in the style of a gingerbread house with a white lid and white iced door and windows decorated with white icing swirls

Happy crafting!
Suzanne
3D Papercraft Projects · Christmas Papercraft · Upcycling Projects

Upcycled Greeting Cards: Winter Tree Box Card

As you know, I’ve been saving used Christmas cards for quite a few years now, and a lot of the older ones have elements on them that can’t be recycled, like glitter. So here’s another fun idea for upcycling some used Christmas cards – a winter tree box card!

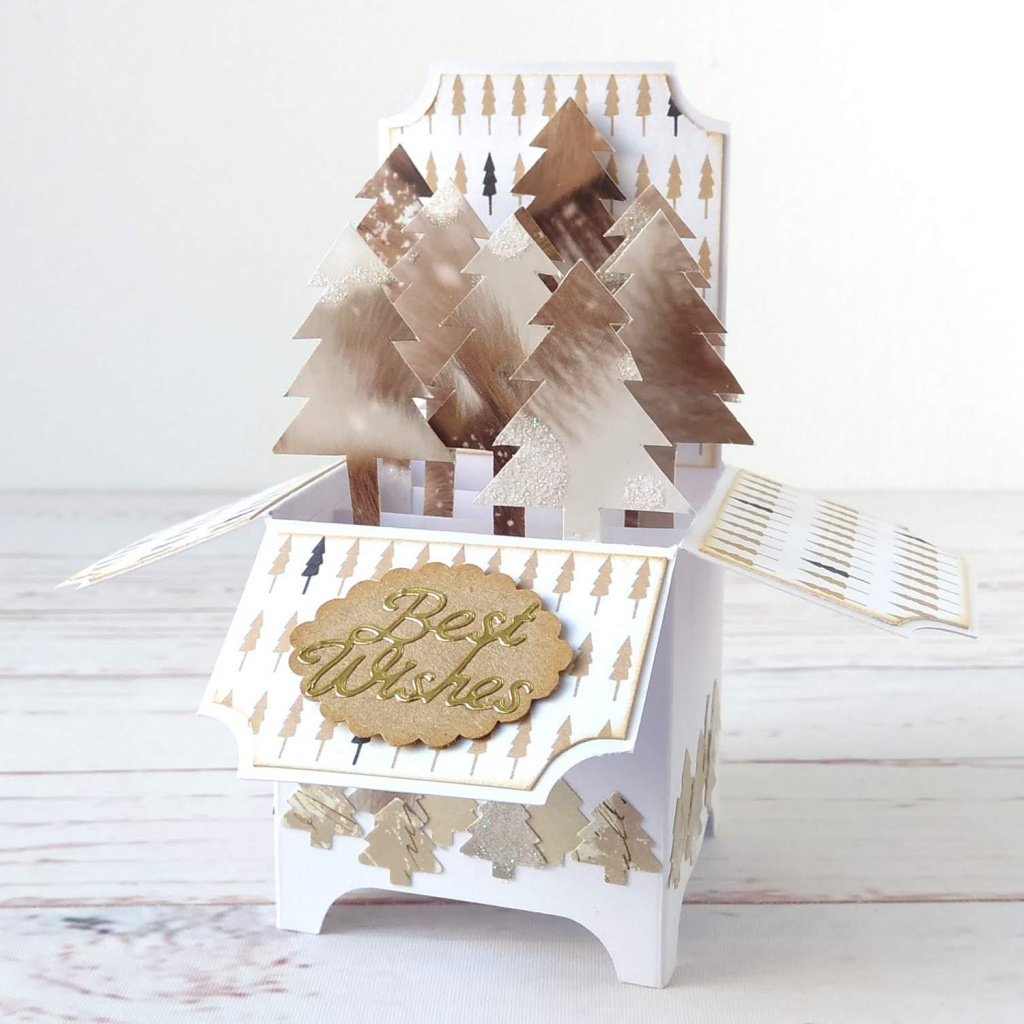
Upcycled Winter Tree Box Card by Esselle Crafts

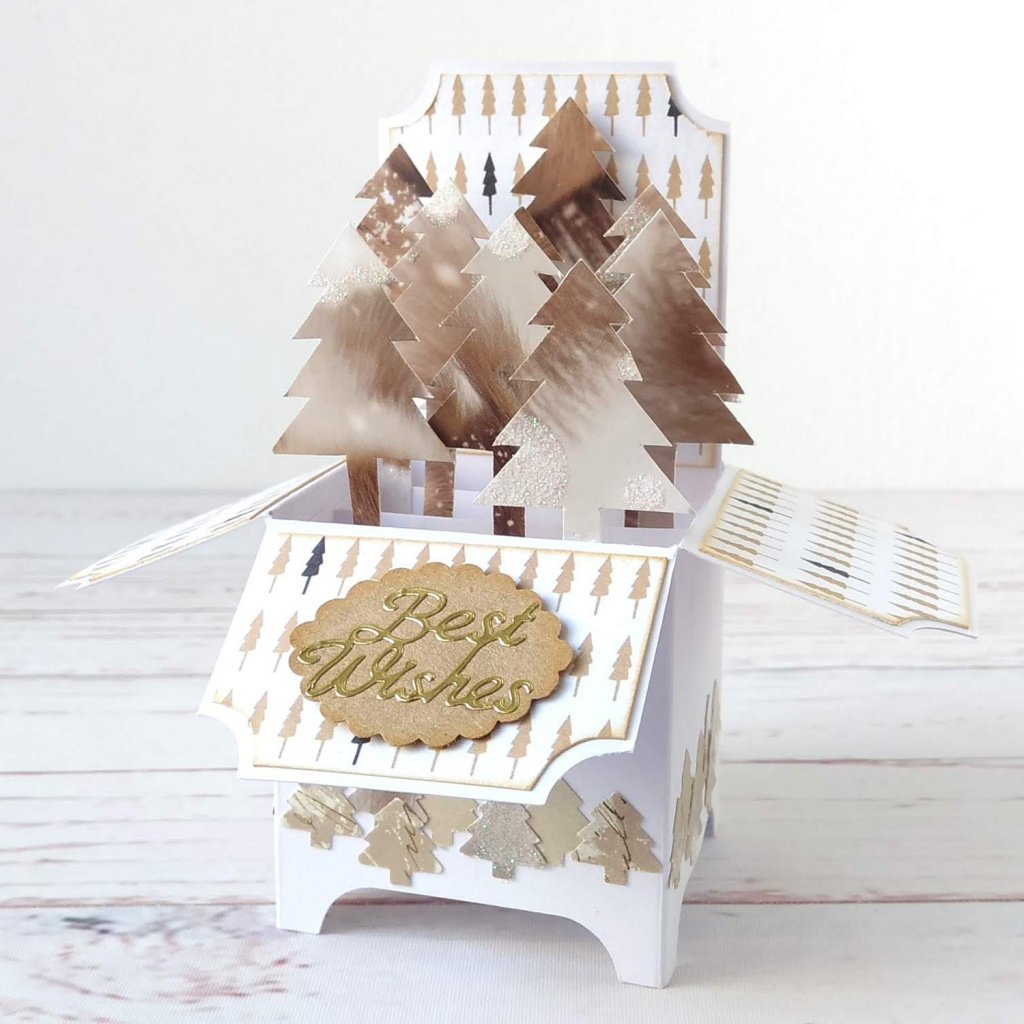
All of the elements, including the main box card itself, were made from upcycled Christmas cards. I used my Cricut Explore to cut the box card out, together with a simple tree template, then cut the remaining pieces out by hand.

The four decorative panels came from the front of a large Christmas card. There were lots of embellishments stuck to it with foam pads, so I tried to save as much of the lovely little tree pattern as I could.

Upcycled Winter Tree Box Card by Esselle Crafts

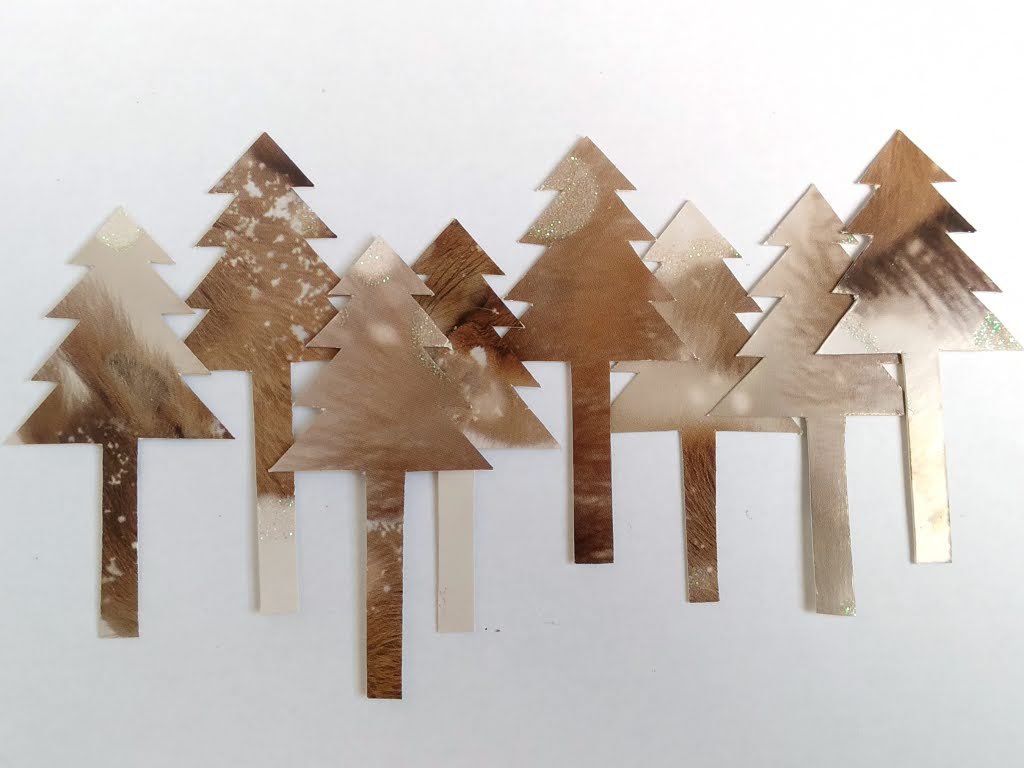
The larger trees started life as a picture of a red squirrel! Hard to believe, I know, but here is the card as I was cutting them out using the tree template.

Upcycled Winter Tree Box Card by Esselle Crafts

The reddish-brown colours are so rich and earthy, and the little sprinkling of snow makes them perfect for this winter card.

Upcycled Winter Tree Box Card by Esselle Crafts

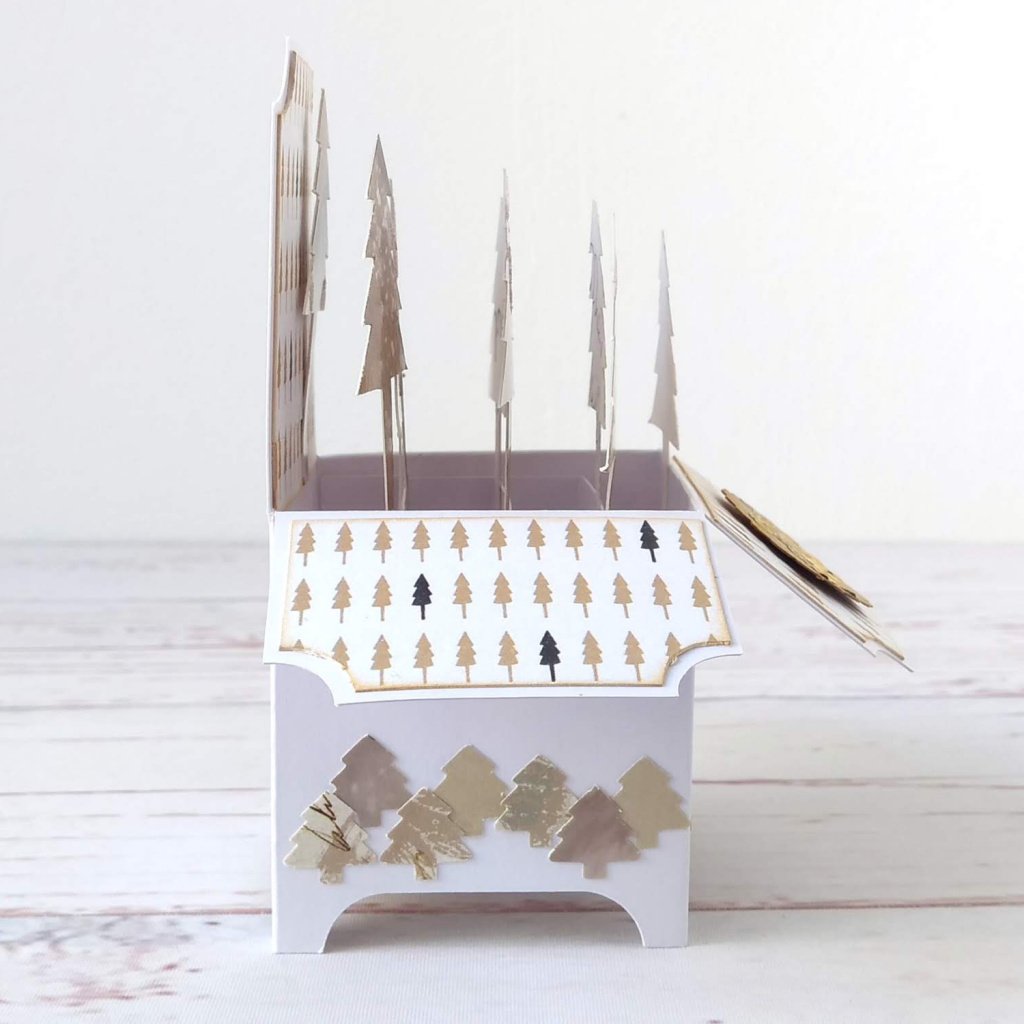
With the scraps of card that I had leftover, I cut some little tree shapes out using a craft punch, then glued them around the base of the box card.

Upcycled Winter Tree Box Card by Esselle Crafts

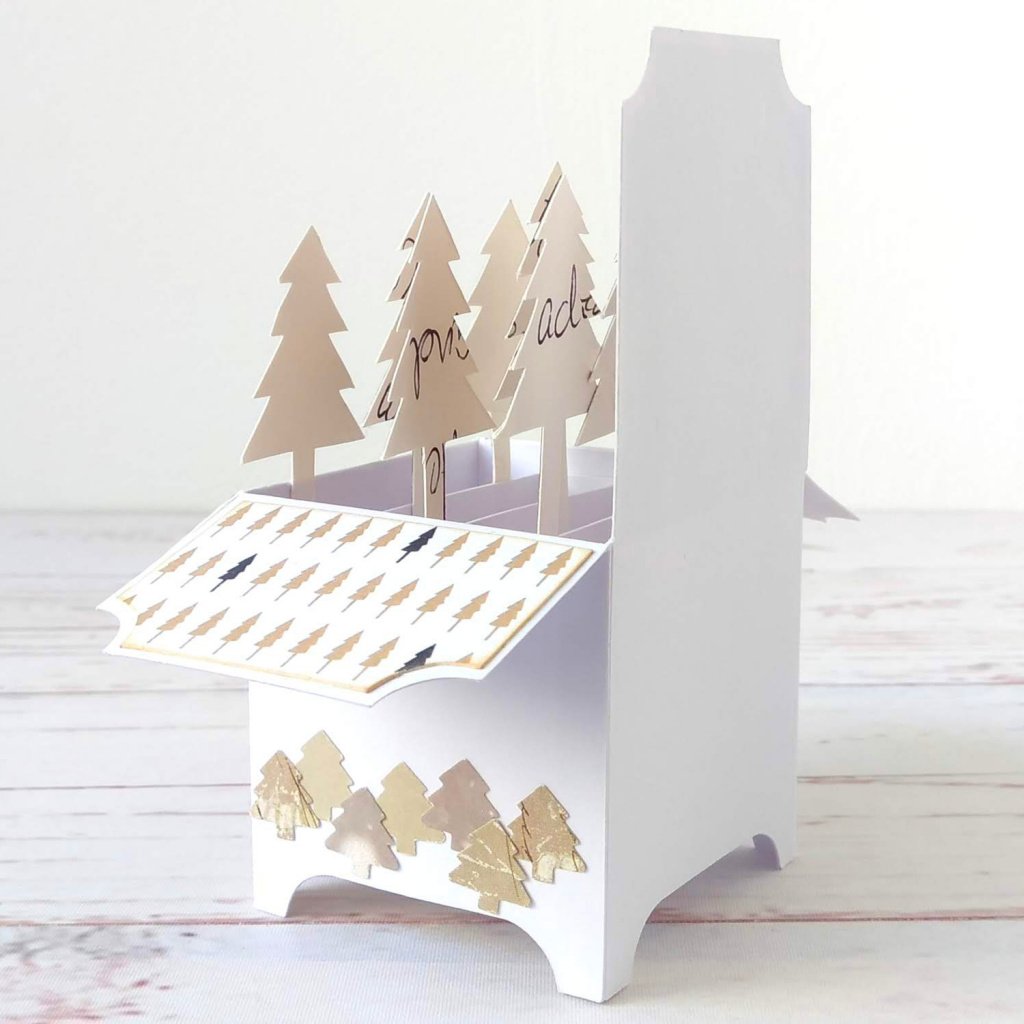
I glued a white panel to the back of the box card, and left it blank, so that it could be used for a handwritten message.

Here is a view of the back, where you can see some of the handwriting from the original Christmas card. I chose to leave it like this to show that it is upcycled and totally unique!

Upcycled Winter Tree Box Card by Esselle Crafts

I took the gold ‘best wishes’ lettering from another Christmas card, which I first had to soak in warm water to remove it. Then I punched a scalloped oval out of another card, inked around the edges with vintage brown ink and glued the gold lettering on.

Upcycled Winter Tree Box Card by Esselle Crafts

I am really pleased with how this box card has turned out; 100% upcycled and 100% unique! Will you try something like this?

Upcycled Winter Tree Box Card by Esselle Crafts

Happy crafting!
Suzanne
3D Papercraft Projects · Christmas Papercraft · Upcycling Projects

Upcycled Greeting Cards: 3D Box Card Idea

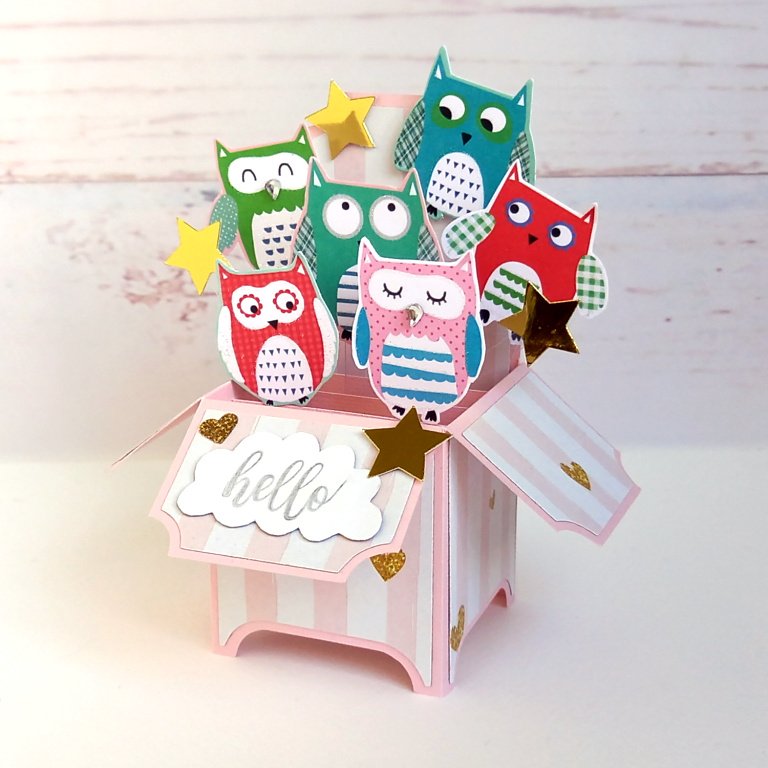
I love upcycling. I love being able to turn something that would otherwise be thrown away into something else and giving it a whole new lease of life. Take this adorable owl pop-up box card for example!

Upcycled Owl Greeting Card, 3D Pop-Up Box Card

I created the card from used greeting cards, gift tags and other repurposed materials. This is the front of the original greeting card, and as soon as I saw it, I knew exactly what I needed to do!

Upcycled Owl Greeting Card, 3D Pop-Up Box Card

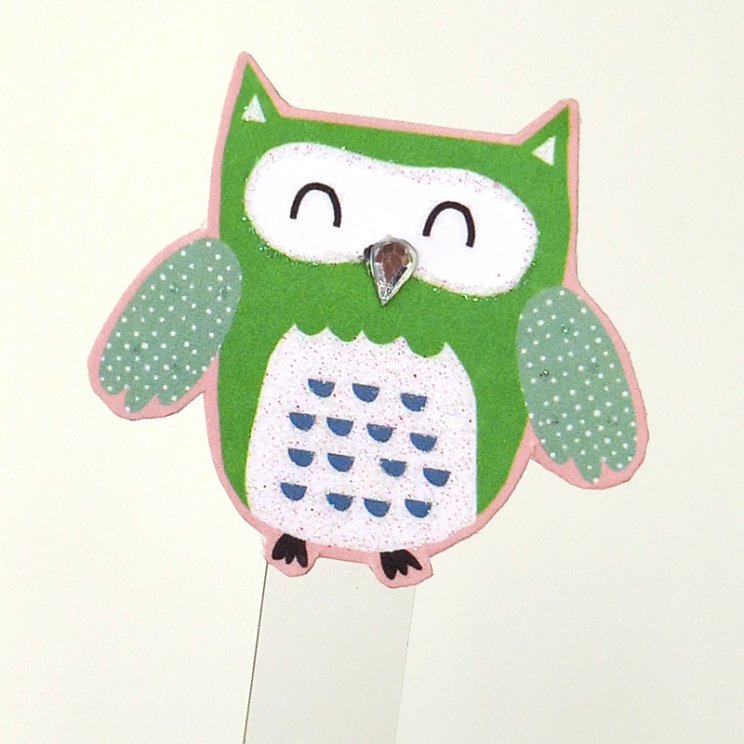
On the original card, the owl in the top right corner was already cut out and raised up on dimensional foam. I carefully removed the owl from the card with the foam still in tact, then carefully cut around the other five owls.

Upcycled Owl Greeting Card, 3D Pop-Up Box Card

I then used red-liner tape on the back of those five owls to attach them to strips of repurposed acetate (food packaging). 

Upcycled Owl Greeting Card, 3D Pop-Up Box Card

For the box card, the main structure was originally an old book cover and the decorative panels were scraps from another project. 

Upcycled Owl Greeting Card, 3D Pop-Up Box Card

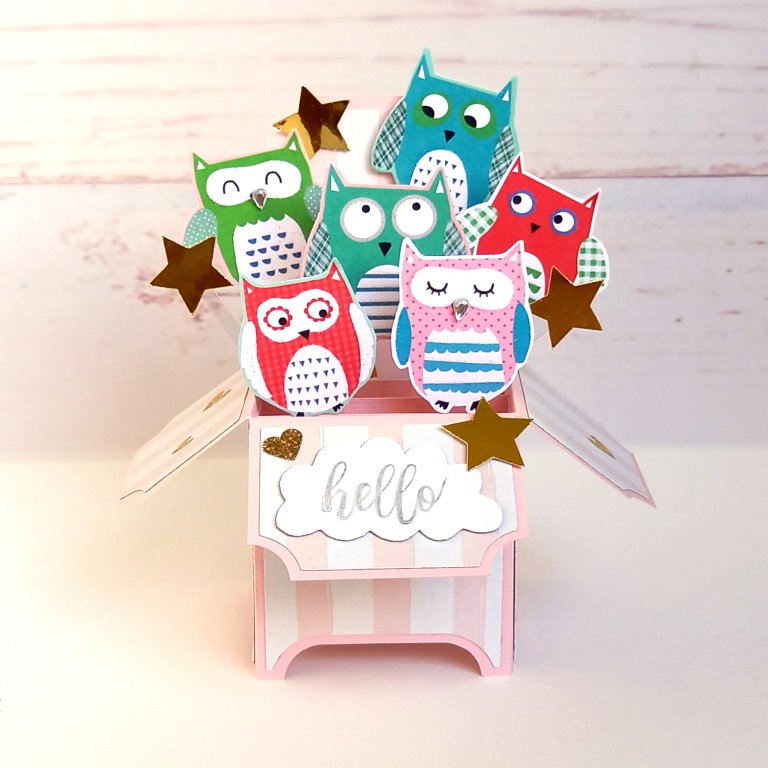
After carefully arranging the position of the owls, I attached them securely to the box card using red-liner tape. I then positioned the owl with the foam right at the back so that he’s looking down over the other owls.

I then cut out four shiny gold stars from a used gift tag and attached two of them to thinner strips of repurposed acetate. I placed one on each side, then glued another one to the back panel using several layers of scrap card to raise it up.

I just love how the owls seem to be looking at each other! They are such characters!

Upcycled Owl Greeting Card, 3D Pop-Up Box Card

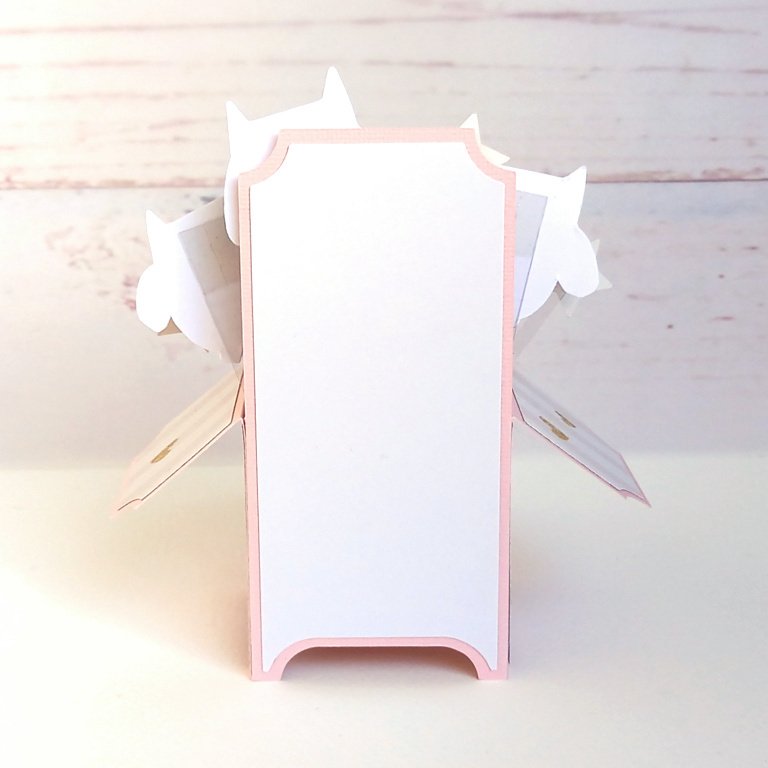
I glued a white panel to the back of the box card and left it blank so that it can be used for a handwritten message.

Upcycled Owl Greeting Card, 3D Pop-Up Box Card

I then stamped a ‘hello’ sentiment onto a scrap of white card, cut it out in the shape of a cloud and attached it to the front panel using small scraps of card to create dimension. I also added the other gold star and a sparkly gold heart from another used greeting card to complete the design.

Upcycled Owl Greeting Card, 3D Pop-Up Box Card

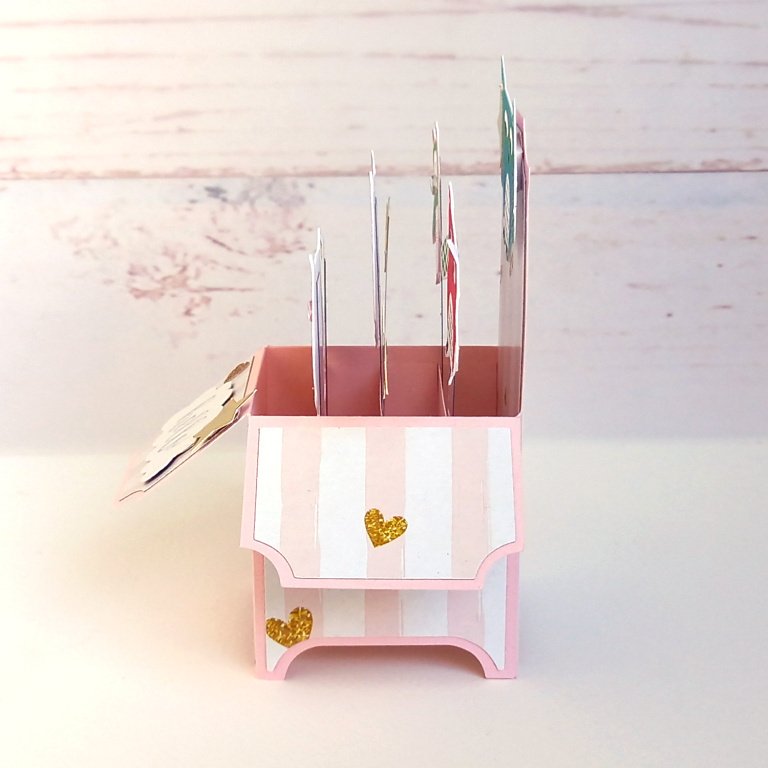
Here is the box card from the side, showing that it will fold flat for easy posting. 

Upcycled Owl Greeting Card, 3D Pop-Up Box Card

What do you think? It certainly has a truly unique, handmade quality about it, making it a beautiful one of a kind card!

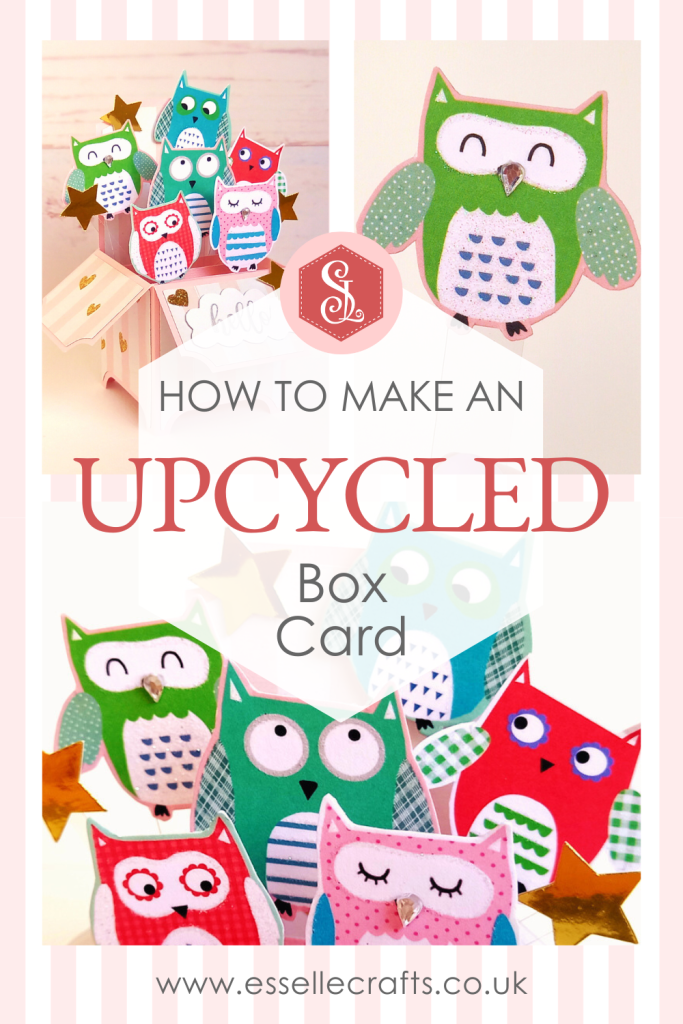
How to Make an Upcycled Owl Box Card

Happy crafting!
Suzanne ๐Ÿฆ‰
3D Papercraft Projects · Christmas Papercraft

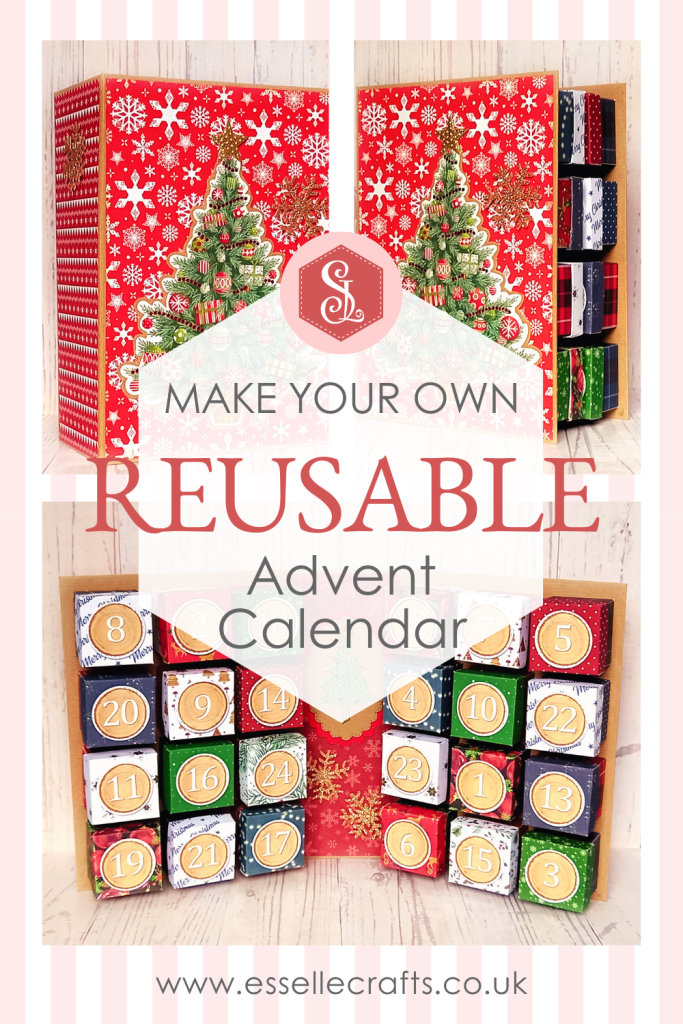
DIY Reusable Advent Calendar

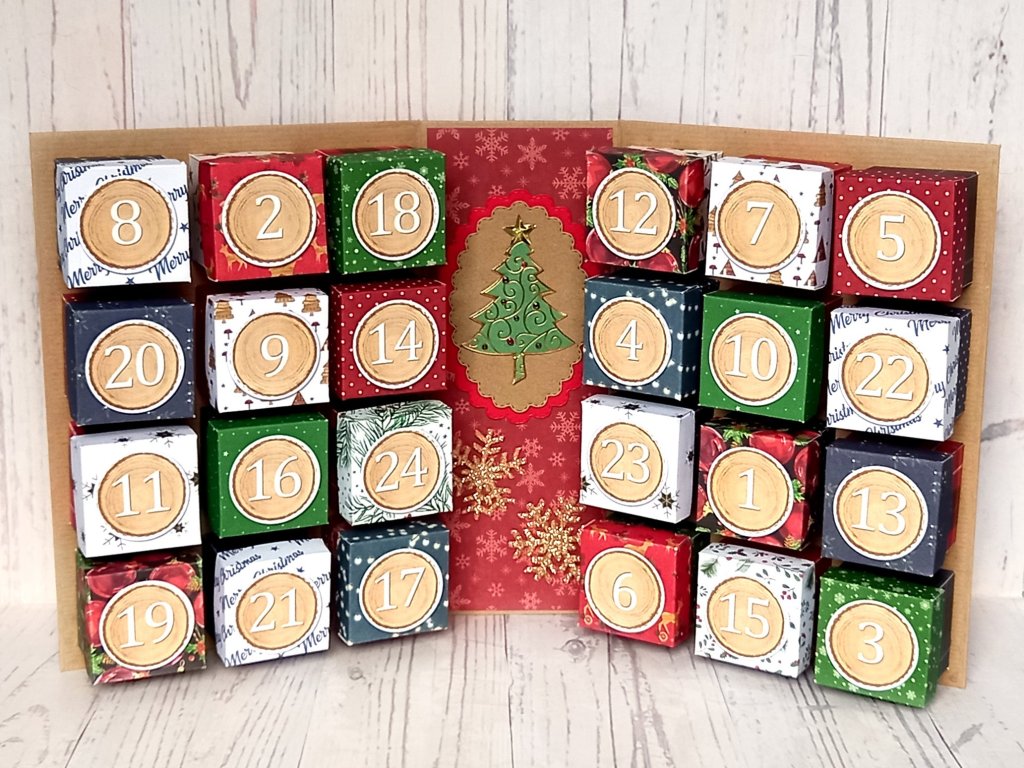
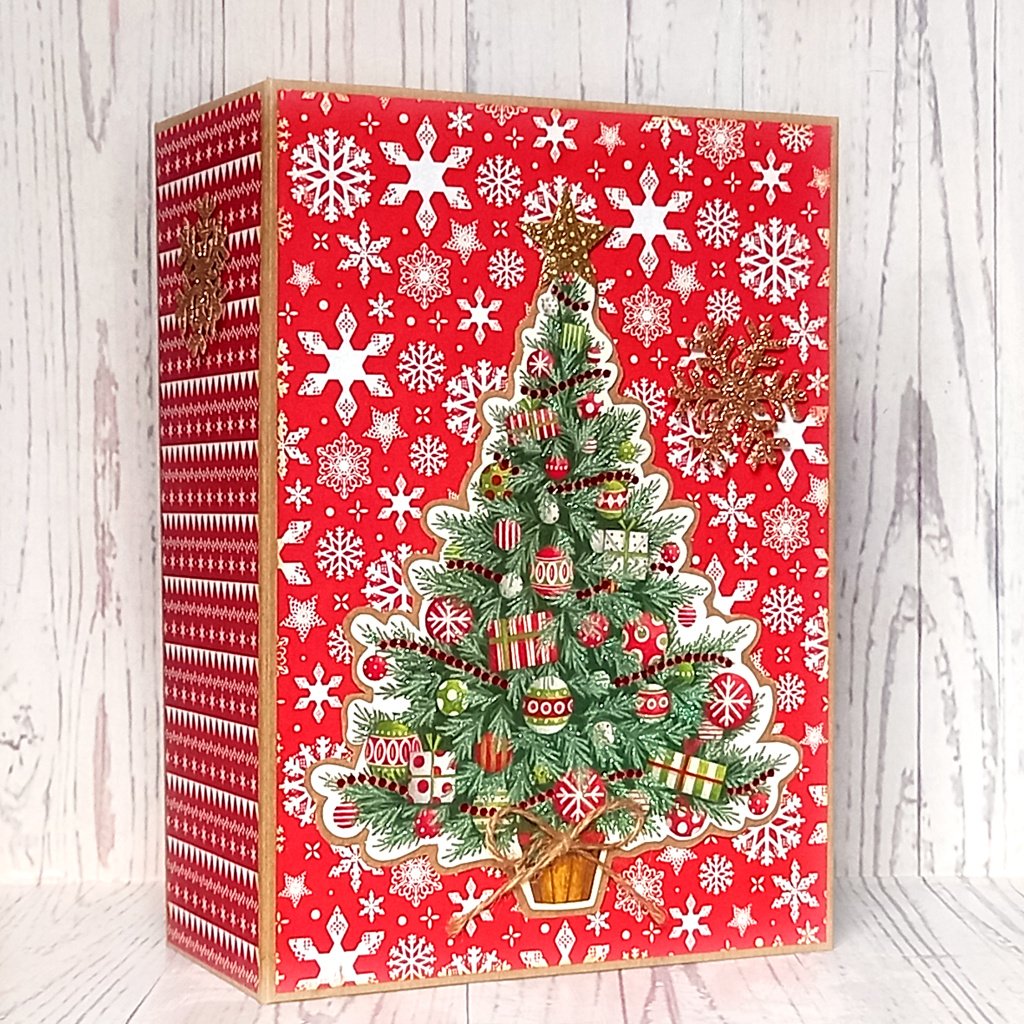
Last year, I decided to make my own eco-friendly advent calendar! Although very time-consuming it was so worth the effort and it looks amazing! It can be reused year after year and can be filled with lots of different treats!

eco-friendly DIY reusable advent calendar

To make this advent calendar, I used:

  • festive patterned cardstock 230gsm / 85lb
  • festive patterned paper 90gsm / 33lb
  • thick card, such as grey board
  • strong tape, such as duct tape
  • brown wrapping paper
  • white cardstock 220gsm / 80lb
  • scissors / craft knife / paper trimmer
  • ruler
  • scoring board
  • craft glue
  • circular stitched die 4cm / 1.57″ diameter
  • Sizzix Big Shot Foldaway
  • used Christmas card embellishments

Here’s my video tutorial showing how I made it:

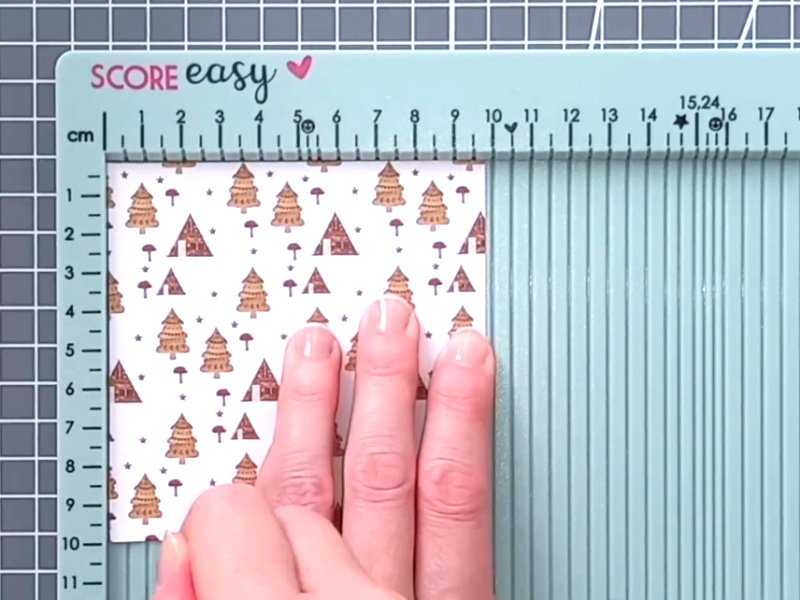
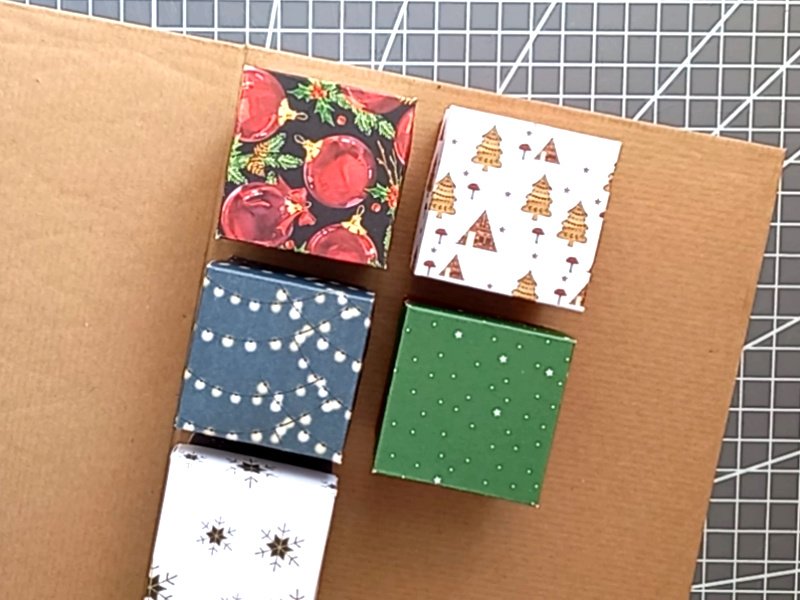
For the box lids, I cut out 24 pieces of patterned cardstock, each measuring 9.8 x 9.8cm / 3.85 x 3.85″ and scored them at 1cm and 2.5cm / 0.4″ and 1″ on all four sides.

eco-friendly DIY reusable advent calendar

For the box bases, I cut out 24 pieces of patterned cardstock, each measuring 14.5 x 14.5cm / 5.7 x 5.7″ and scored them at 1cm and 5cm / 0.4″ and 2″ on all four sides.

eco-friendly DIY reusable advent calendar

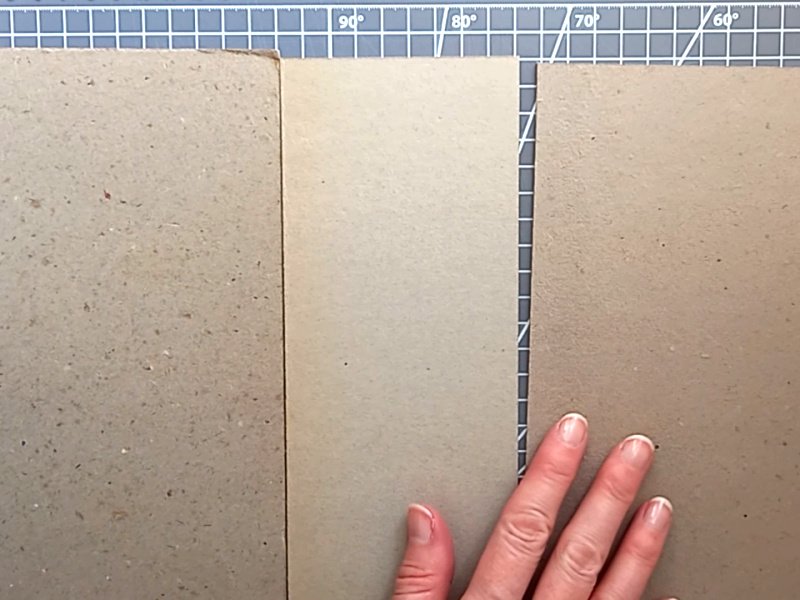
Next, I cut out two pieces of thick card, one for the front and one for the back, each measuring 17.5 x 24cm / 6.9 x 9.45″ and another piece for the spine, measuring 9cm x 24cm / 3.5 x 9.45″.

eco-friendly DIY reusable advent calendar

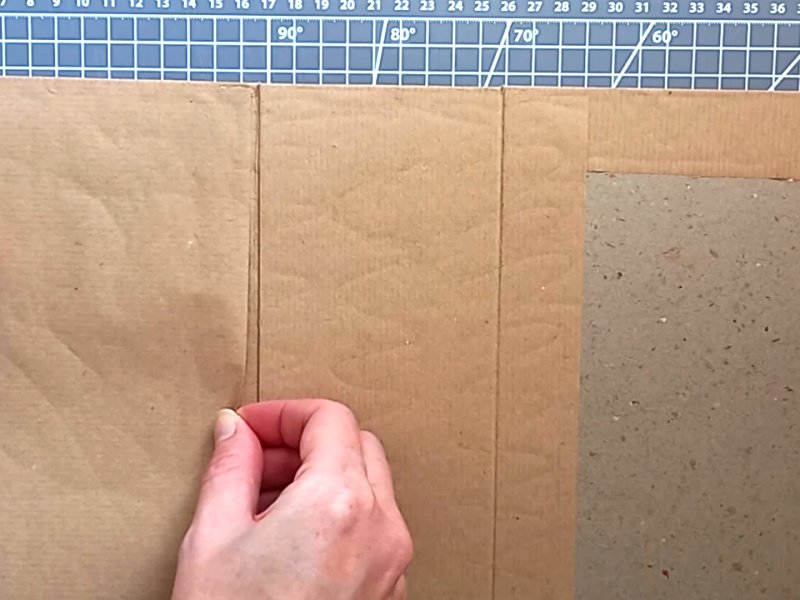
I used brown wrapping paper to cover the outside of the calendar and left approximately 2.5cm / 1″ around the outside. Then I cut another piece to cover the inside of the spine, measuring 23 x 13cm / 9 x 5″ and two pieces (one to cover the inside front and one to cover the inside back) measuring 23 x 16.5cm / 9 x 6.5″

eco-friendly DIY reusable advent calendar

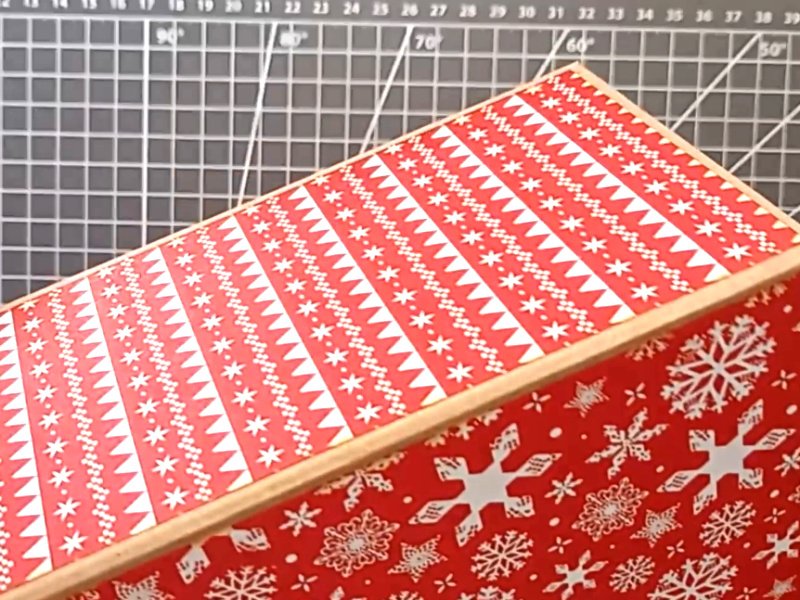
I cut two decorative patterned paper panels for the front and back covers, each measuring 17 x 23.5cm / 6.7 x 9.25″ and another panel for the spine, measuring 8.5cm x 23.5cm / 3.35 x 9.25″.

eco-friendly DIY reusable advent calendar

I also cut a piece of patterned cardstock to cover the inside of the spine, measuring 8.5 x 23.5cm / 3.35 x 9.25″.

eco-friendly DIY reusable advent calendar

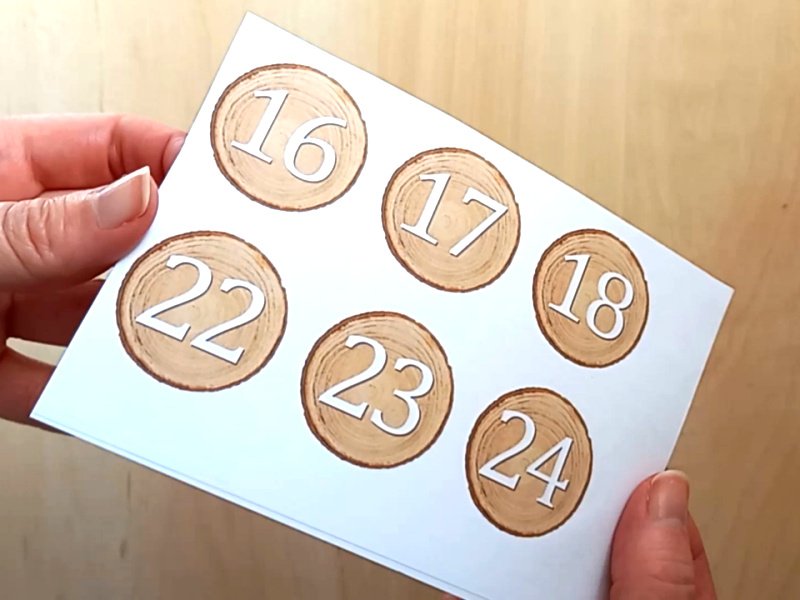
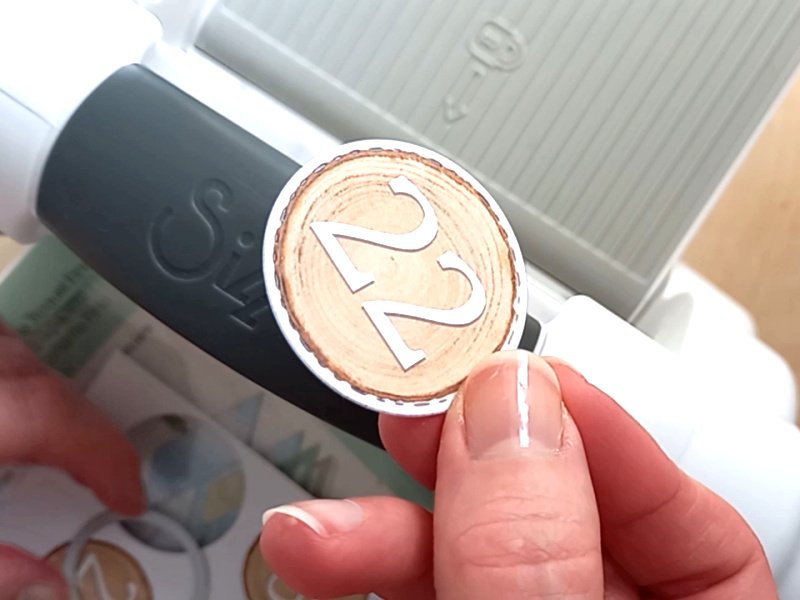
I typed the numbers 1 – 24 onto images of a woodgrain slice, printed them onto white cardstock, then cut them out using a circular stitched die 4cm / 1.57″ diameter.

eco-friendly DIY reusable advent calendar

eco-friendly DIY reusable advent calendar

Before I attached the boxes, I arranged them so that they were evenly spaced.

eco-friendly DIY reusable advent calendar

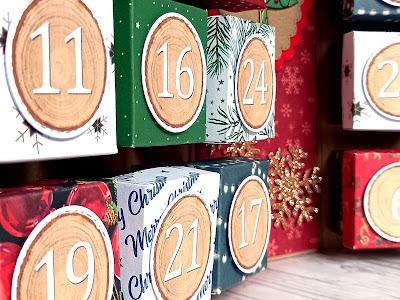
I then added three layers of scrap cardstock behind each of the numbers to give them more dimension. (Foam pads would work just as well, but, as you know, I don’t like to use them.)

eco-friendly DIY reusable advent calendar

Once it was all assembled, I decorated the calendar with embellishments I’d saved from used Christmas cards!

eco-friendly DIY reusable advent calendar

eco-friendly DIY reusable advent calendar

It really was such a worthwhile project to make and will undoubtedly be a talking point for many years to come! I hope I have now inspired you to make one of your own!

Happy crafting
Suzanne ๐ŸŽ„
3D Papercraft Projects · Christmas Papercraft · Upcycling Projects

DIY Upcycled Christmas Card Baubles

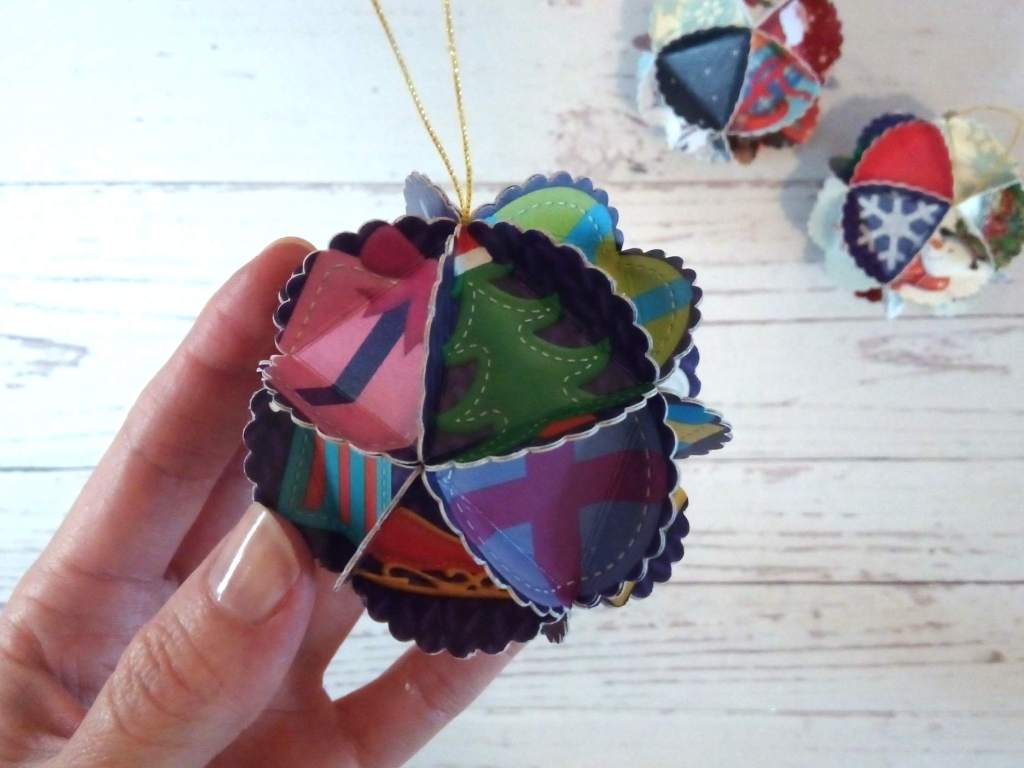
I’m a bit of a hoarder when it comes to paper craft. I’m always keeping old greeting cards, packaging, envelopes and even used Advent calendars and Christmas crackers – anything made of paper or card that I might be able to reuse. I have a stack of old Christmas cards that I’ve been slowly going through, and a few years ago I created these super cute Christmas card baubles!

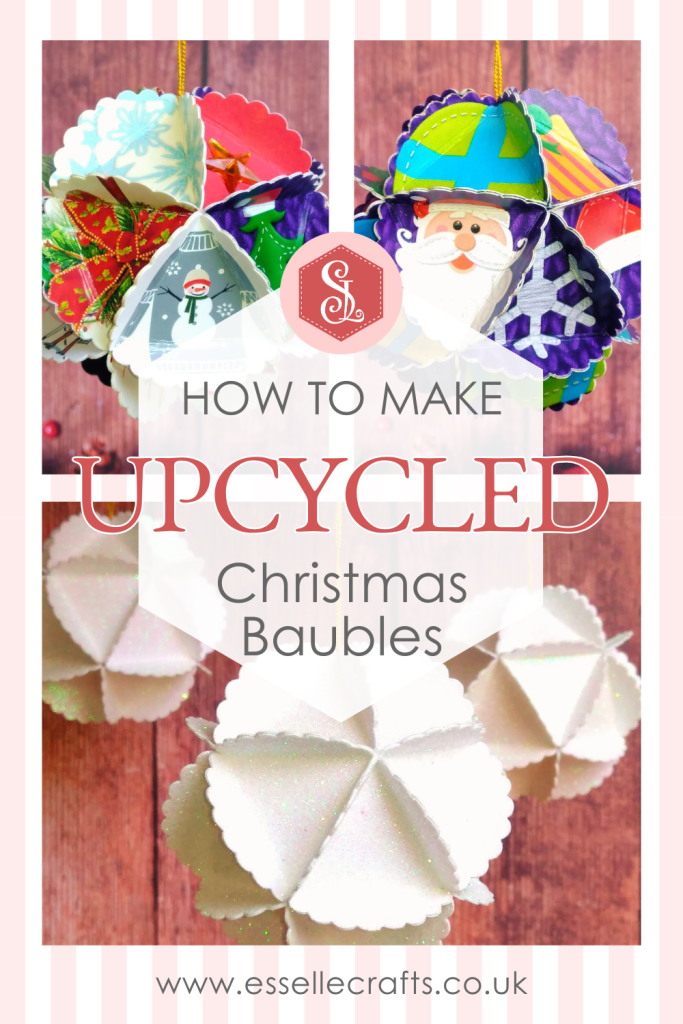
Upcycled Christmas Card Baubles as Hanging Decorations

Aren’t they fabulous!?

They are so easy to make, and the best thing is you can use any materials left over from Christmas to decorate them, including ribbon bows, sparkly gems, stickers, etc.

To make one, you will need:

  • used Christmas cards / old Advent calendar / glittery card crackers
  • circle punch (I used a 1.5″ scalloped edge craft punch)
  • pencil
  • ruler
  • scissors
  • strong craft glue
  • thread, string, ribbon or wool for hanging

Watch my video tutorial to see me making one, or simply follow the written instructions below:

To begin, you will need to cut (punch) out twenty circles from the card (I’m using an old Advent calendar for this one). You could also draw around something circular for this, but they all need to be exactly the same size.

Upcycled Christmas Card Baubles as Hanging Decorations

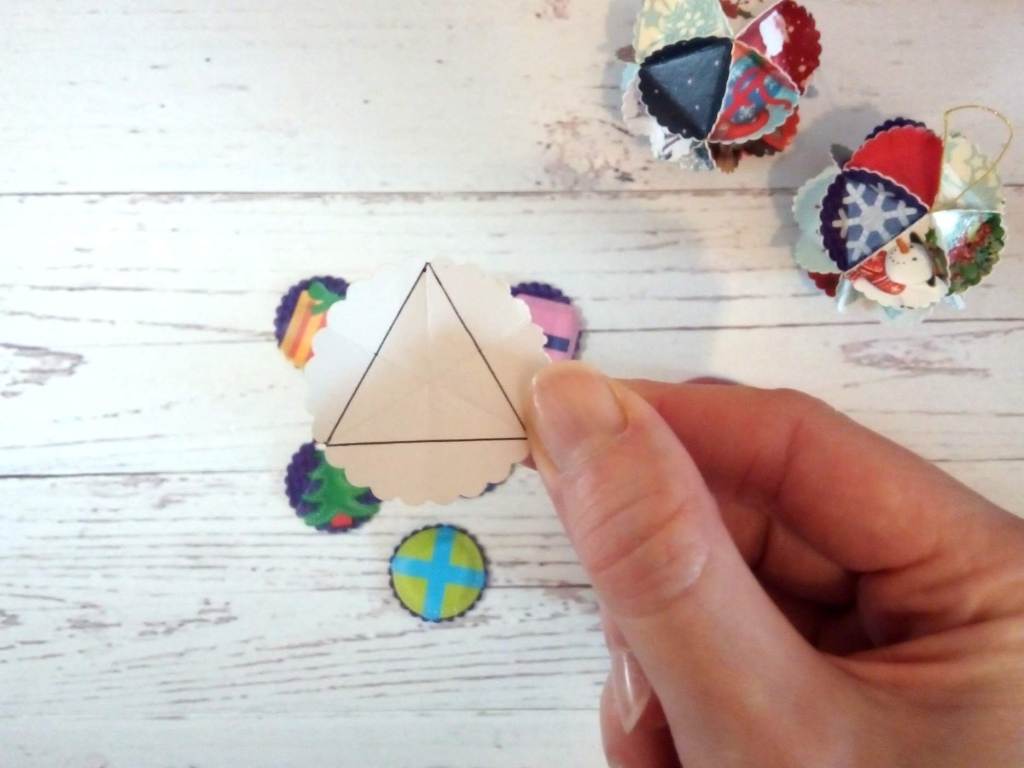
Cut another circle from a scrap piece of paper and fold it in half. Fold it again into exact thirds and open it out. Draw a triangle where every other point meets, and cut this out (it should be an equilateral triangle).

Upcycled Christmas Card Baubles as Hanging Decorations

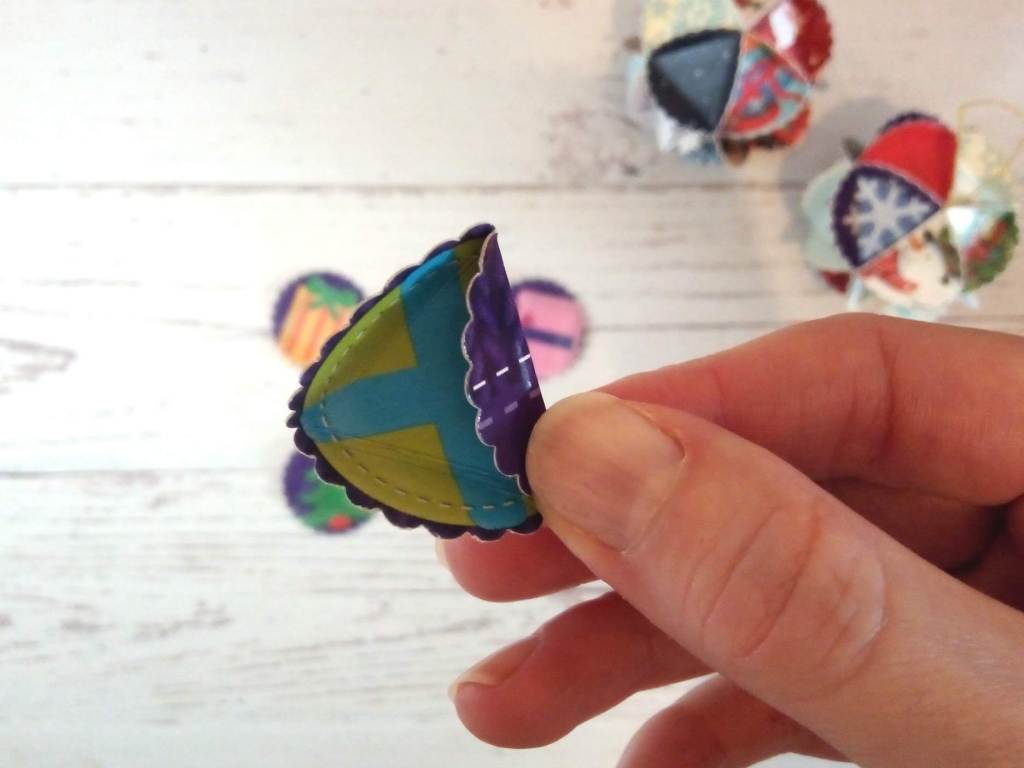
Using this triangle as a template, fold each of the twenty card circles as shown below. You could fold them against the edge of a ruler to make this easier.

Upcycled Christmas Card Baubles as Hanging Decorations

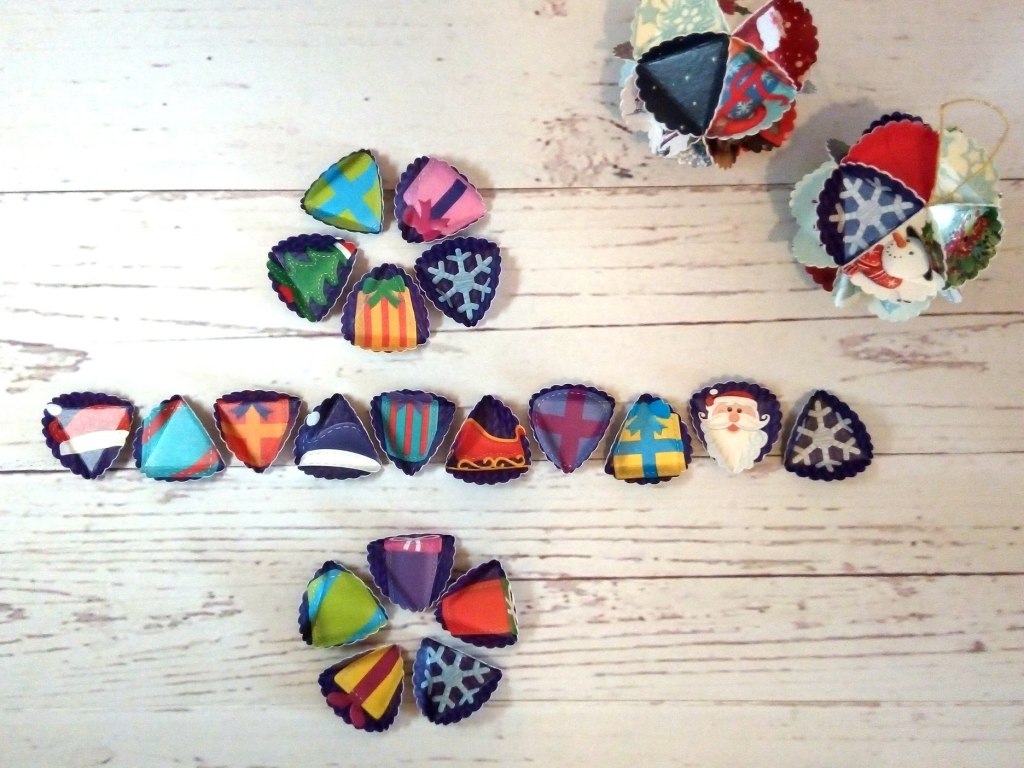
Next, arrange the twenty pieces so that you have five for the top section, ten for the middle section and five for the bottom section. Think about how each of the pieces will look once they are all put together. Try not to have two pieces the same colour next to each other, and think about which way up they will need to face.

Upcycled Christmas Card Baubles as Hanging Decorations

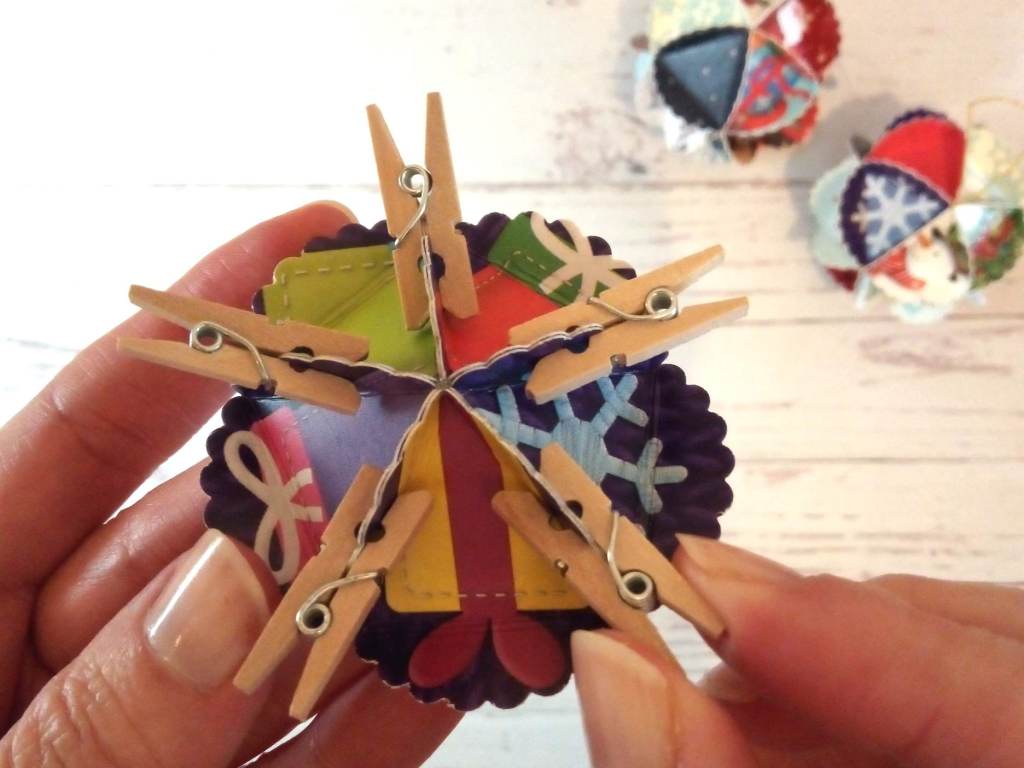
Starting with the bottom section, glue two pieces together, matching the edges up neatly. Then glue three more pieces on so that they form a circle. You can use mini pegs here to help hold the pieces together if you need to.

Upcycled Christmas Card Baubles as Hanging Decorations

Upcycled Christmas Card Baubles as Hanging Decorations

Do the same with the top section, but be sure to leave one edge open.

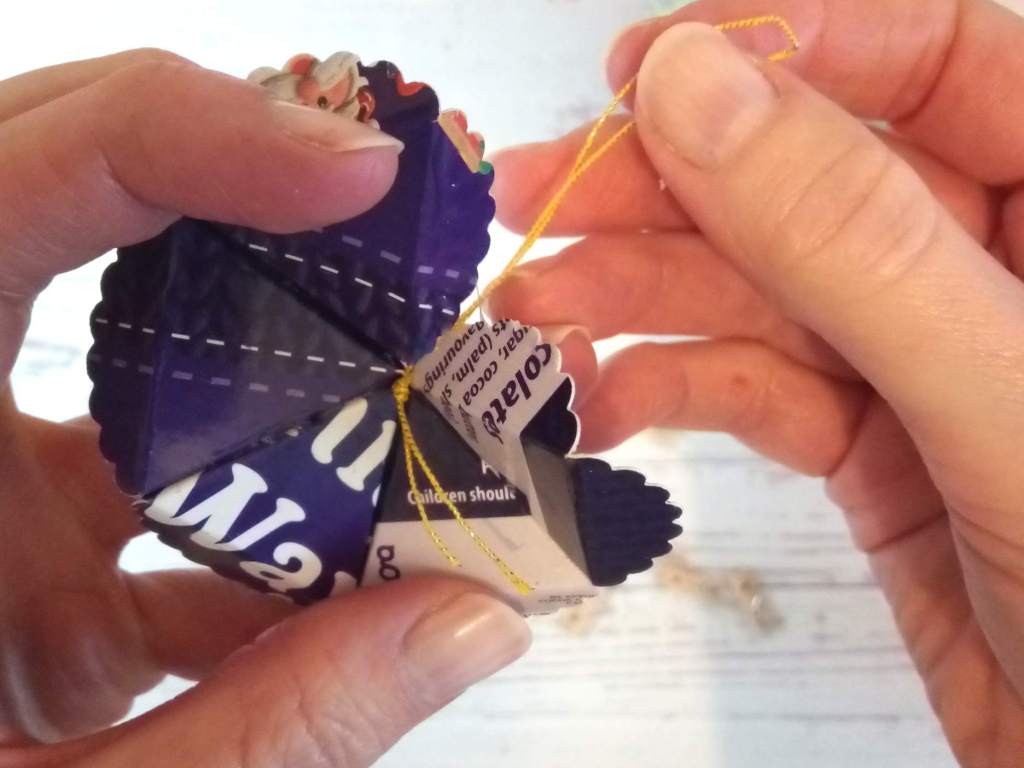
Take a length of thread, string, ribbon or wool (I used the string from a Chrsitmas tree chocolate) and knot the ends together. Slide the knot between the two open edges of the top section and glue the edges together. Pull the thread tight and apply a little glue to the inside to keep it securely in place.

Upcycled Christmas Card Baubles as Hanging Decorations

Upcycled Christmas Card Baubles as Hanging Decorations

Upcycled Christmas Card Baubles as Hanging Decorations

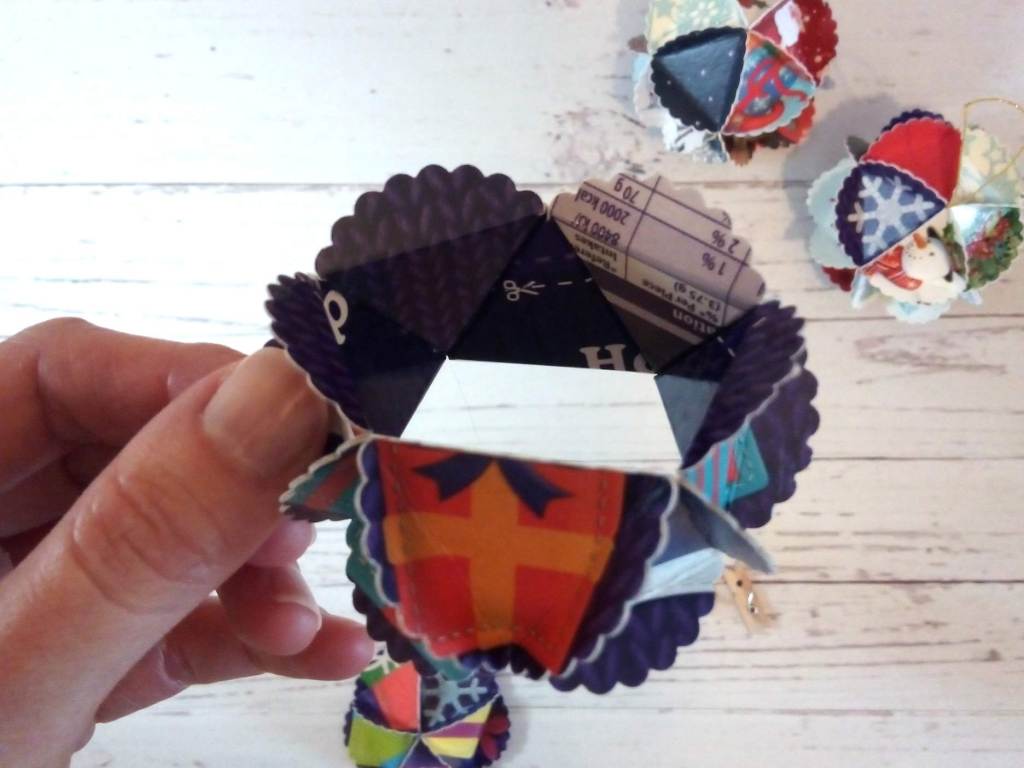
For the middle section, glue the ten pieces together to form a long line, then join the ends together to form a collar.

Upcycled Christmas Card Baubles as Hanging Decorations

Upcycled Christmas Card Baubles as Hanging Decorations

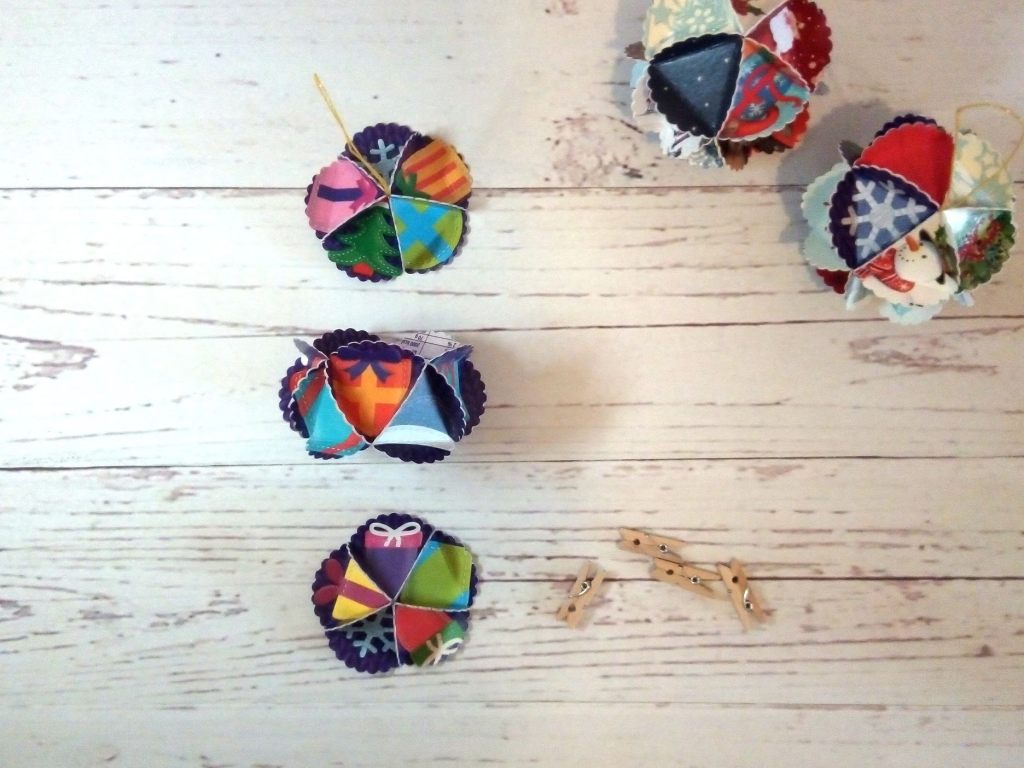
Glue the bottom section on, taking care to match up all of the edges (use pegs if you need to). Repeat with the top section and leave to dry.

And here it is! A super cute Christmas decoration ready for next Christmas!

Upcycled Christmas Card Baubles as Hanging Decorations

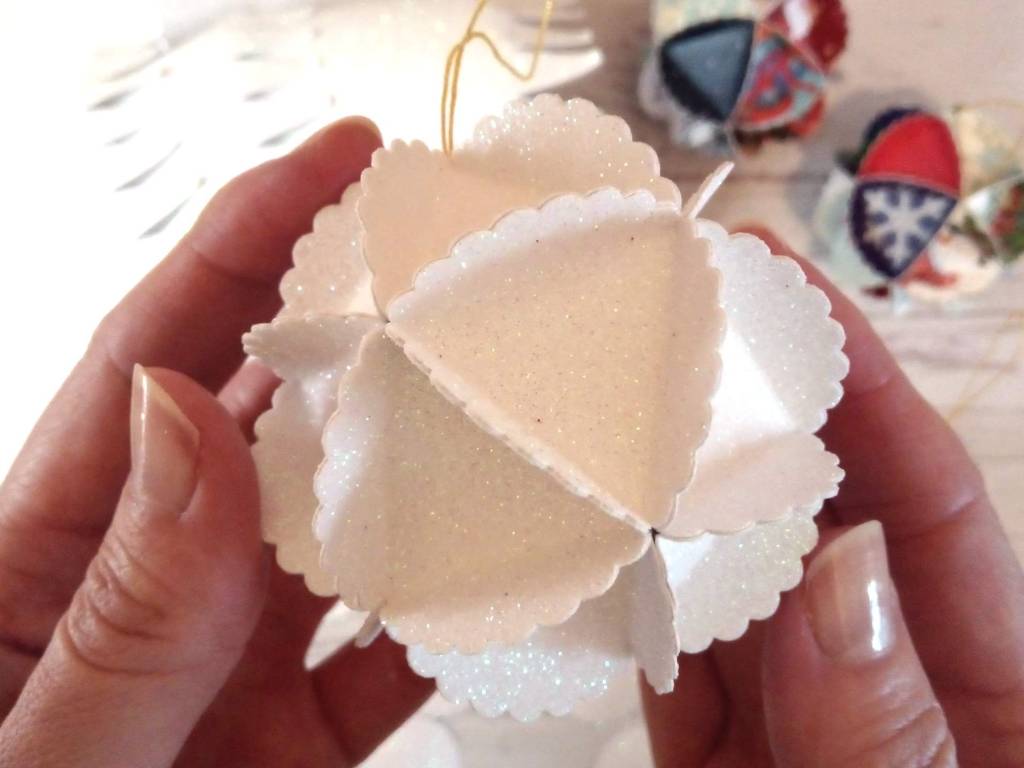
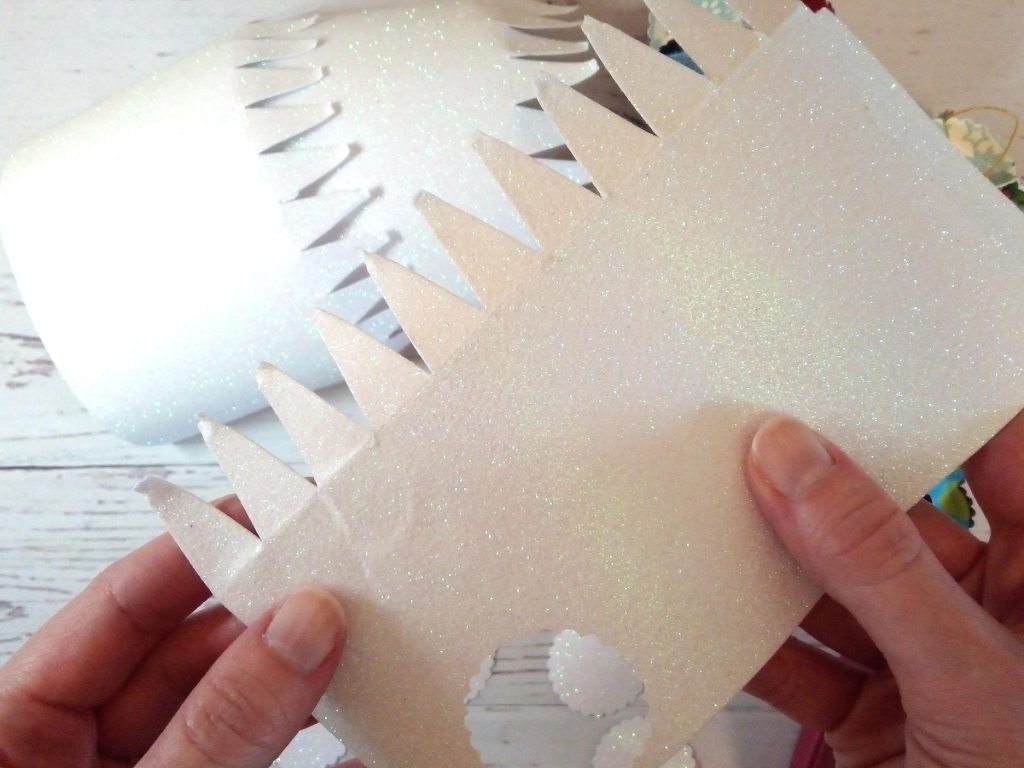
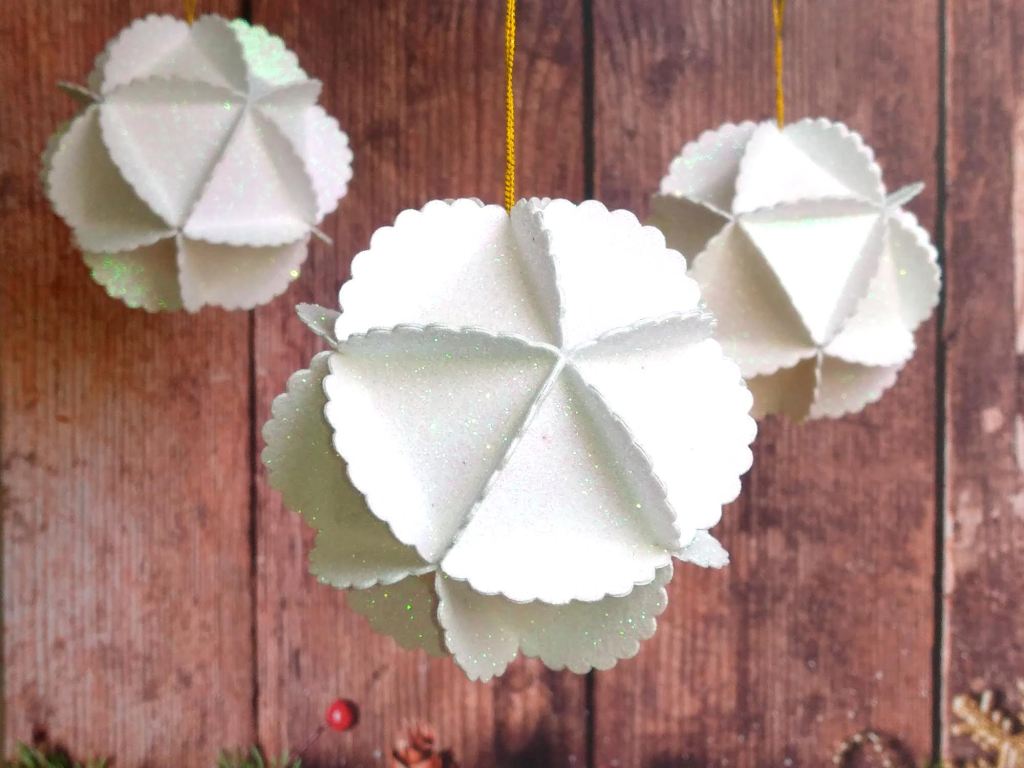
I also created this little beauty using non-recyclable glittery Christmas cracker card ๐Ÿ™‚

Upcycled Christmas Cracker Glitter Baubles as Hanging Decorations

Upcycled Christmas Cracker Glitter Baubles as Hanging Decorations

Upcycled Christmas Cracker Glitter Baubles as Hanging Decorations

Upcycled Christmas Cracker Glitter Baubles as Hanging Decorations

What will you create one out of?

DIY Upcycled Christmas Greeting Card Baubles

Happy crafting and happy upcycling!
Suzanne