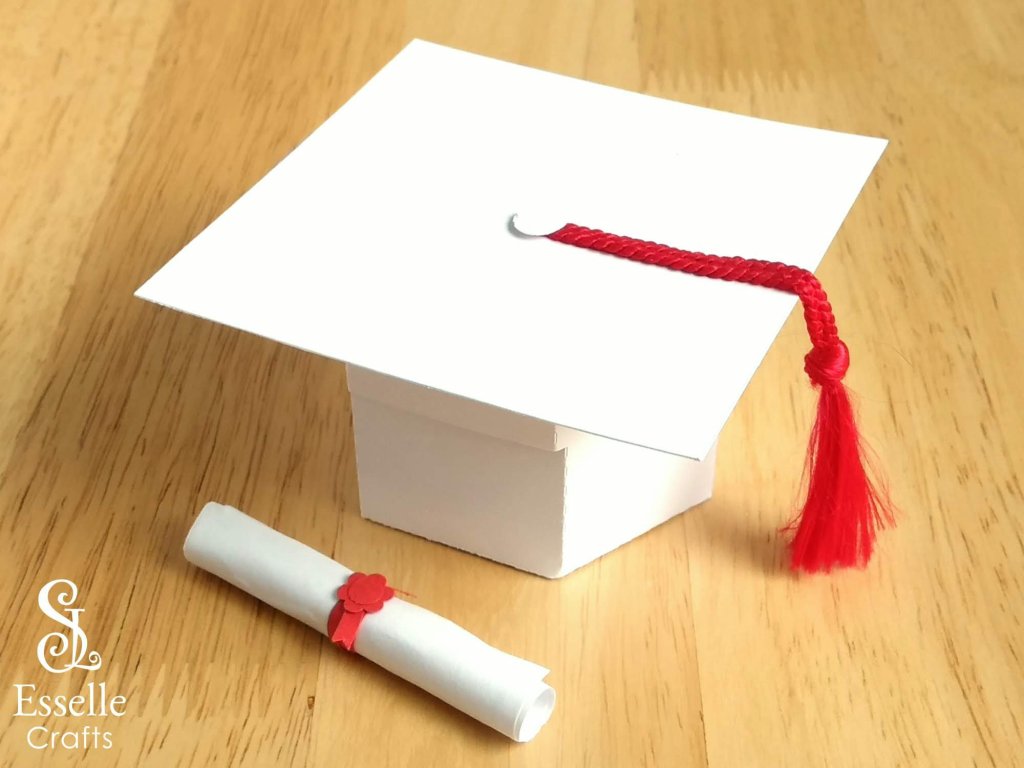
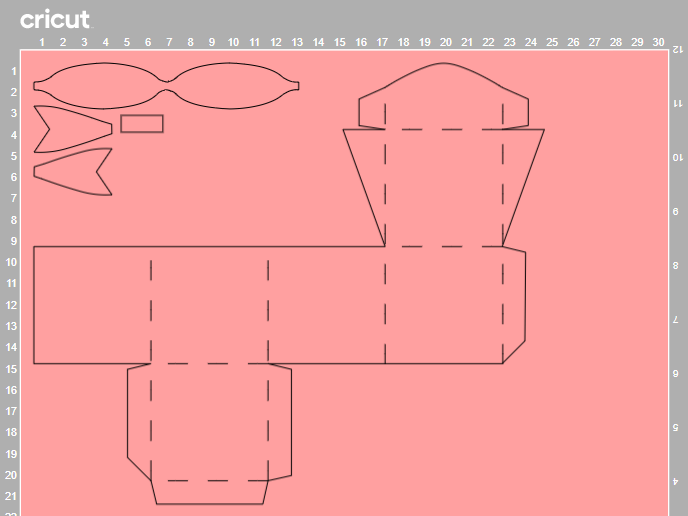
With the end of the academic year fast approaching, this adorable little Graduation Cap Gift Box can be made quickly and easily to celebrate a forthcoming graduation.
You can choose to make the traditional black cap and tassel, or any variation of colours.
To make one, you will need:
* Graduation Cap Gift Box template (PDF and SVG available) * Computer and printer to print the PDF template and instructions * Digital cutting machine * Double sided cardstock (220-250gsm / 80-92lb recommended) * Double-sided thinner card or paper (90-160gsm / 33-60lb recommended) * Craft glue / double-sided tape
If you are not using a cutting machine, you will also need:
* Craft knife / scissors * Scoring tool * Ruler
Watch my video tutorial showing how to assemble the box and be sure to follow the tips below.
TIP 1 : Glue each of the five base tabs to the inside of the base, then glue the hexagon piece to the inside to cover the tabs and strengthen the base.
TIP 2 : Glue the five lid tabs to the outside of the top.
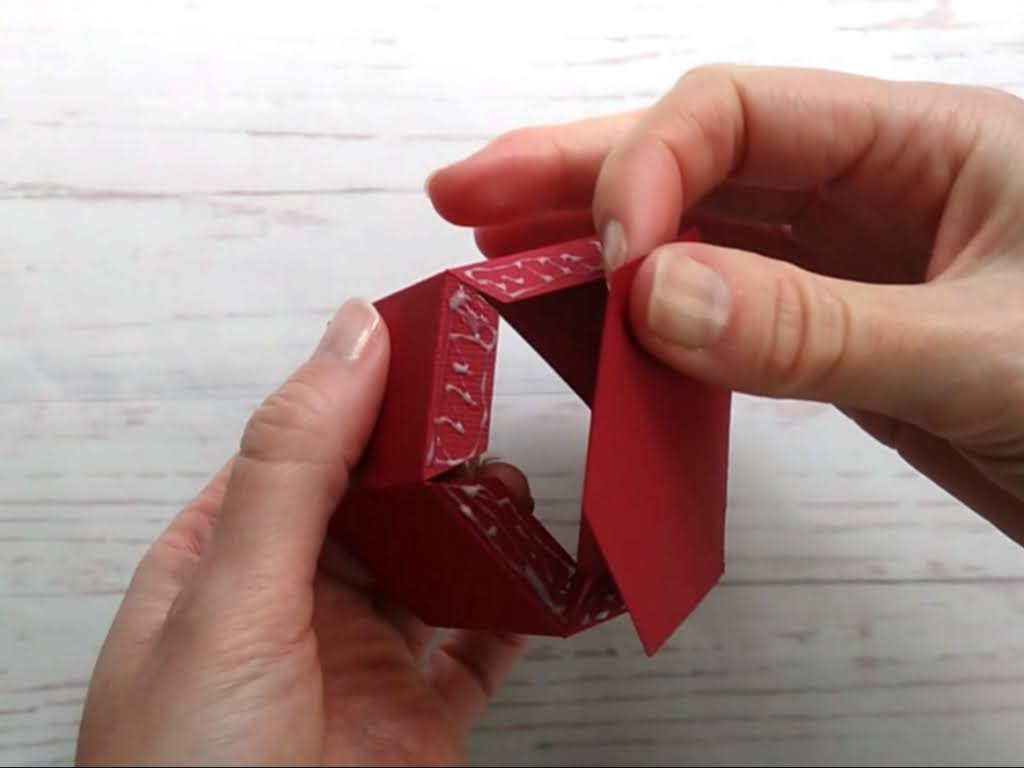
TIP 3 : When rolling the tassel, I like to use a pair of narrow tweezers to start it off, but you could use a cocktail stick or a quilling tool instead.
TIP 4 : Before you reach the other end of the tassel, apply a little glue and attach one end of the long strip to it. Then continue to roll the tassel to the end and secure with glue.
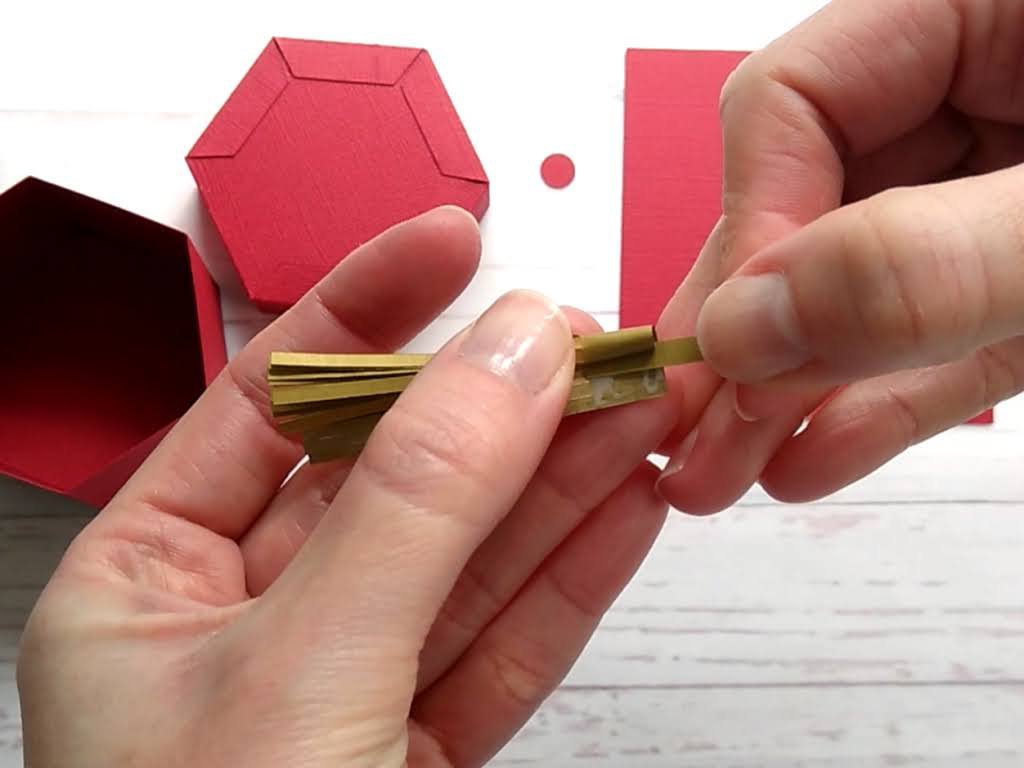
TIP 5 : As an alternative to paper, you could try using a more traditional cord tassel. Just cut the ends to the desired length, then glue them to the top of the square piece. This will then be covered by the little circle piece.
TIP 6 : Line the square up so that the tassel hangs over the right side and one flat hexagonal side faces the front.
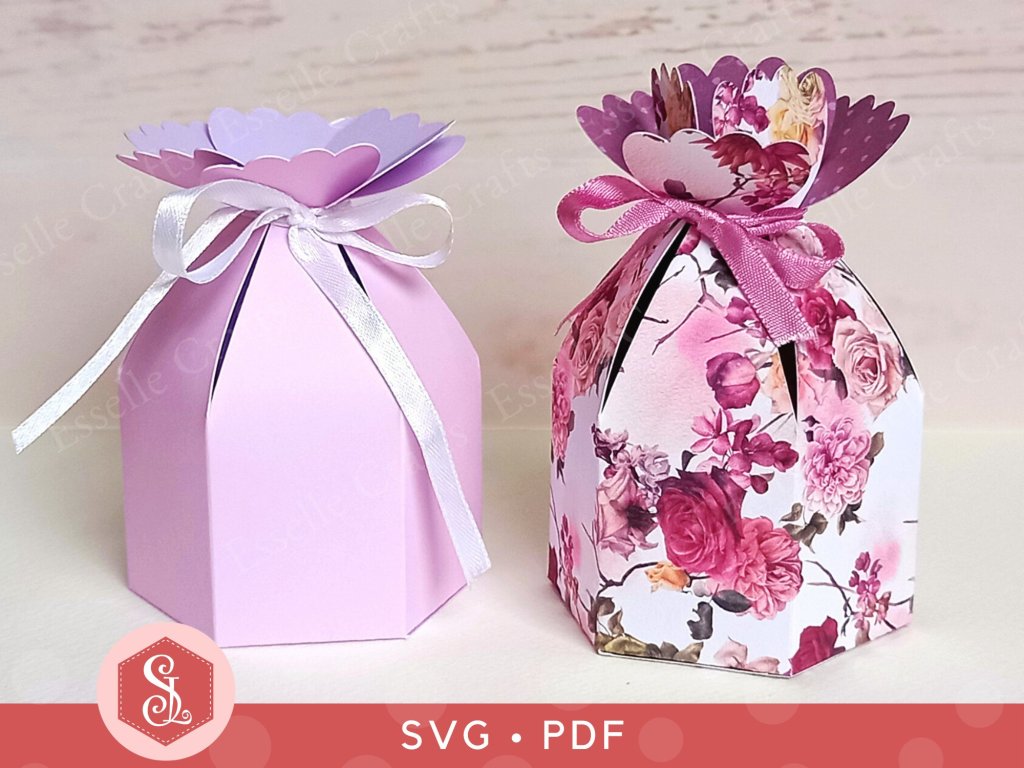
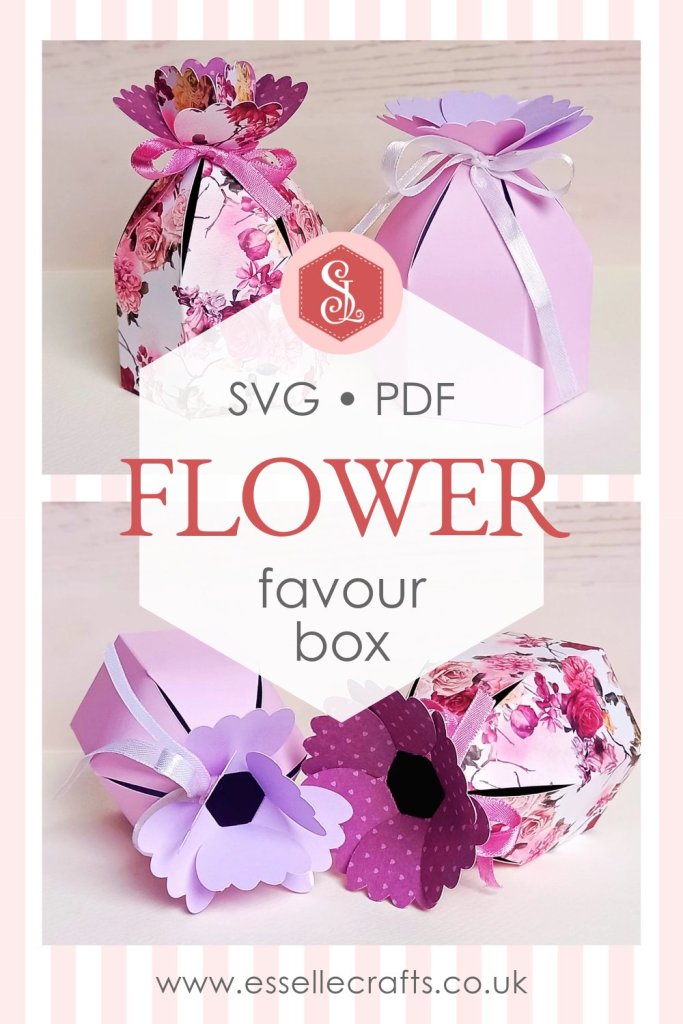
Now, what to fill it with? Chocolates? Small gifts? Or how about a congratulatory message rolled up and disguised as a diploma!
Perfect for birthday parties, Mother’s Day gifts, wedding favours and more, the template for this box is available through my Etsy shop as an SVG cut file, as well as a PDF if you prefer to cut out by hand.
To make one, you will need:
* Flower Favour Box template (PDF and SVG available) * Computer and printer to print the PDF template and instructions * Digital cutting machine * Double sided, patterned cardstock (220-250gsm / 80-92lb recommended) * Craft glue / double-sided tape * Ribbon
If you are not using a cutting machine, you will also need:
* Craft knife / scissors * Scoring tool * Ruler
Watch my video tutorial showing how to assemble the box and be sure to follow the tips below:
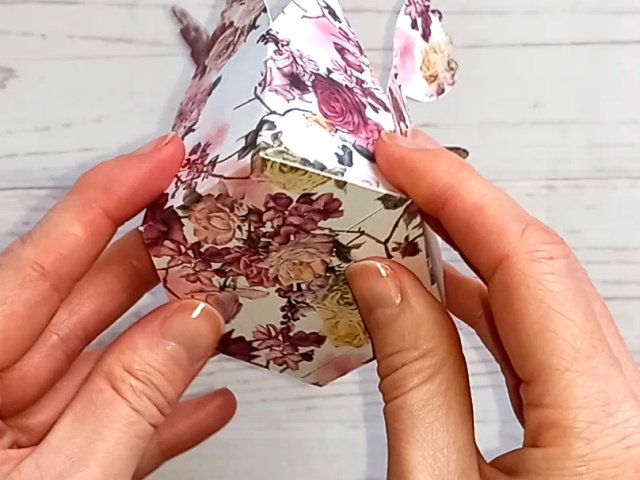
TIP 1 : Make sure that the base is lined up carefully against the score lines. Adding the extra hexagon piece to the inside of the box will hide the tabs and strengthen the base.
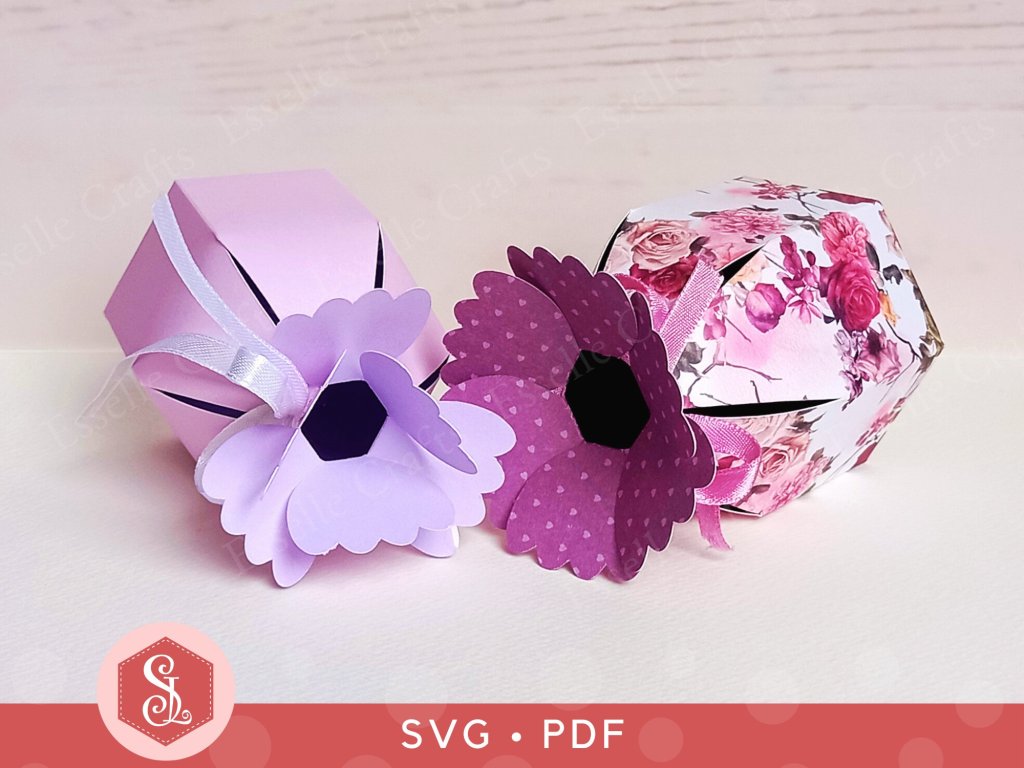
TIP 2 : When tying the box up for the first time, pull the ribbon gently to allow all of the petals to join up equally in the centre.
TIP 3 : The petals can be arranged in two different ways. They can either be overlapped to look like an open flower (as shown on the right) or spread out (as shown on the left):
These are such pretty little boxes for gifting small treats, so I hope that you are now inspired to create your own flower favour boxes!
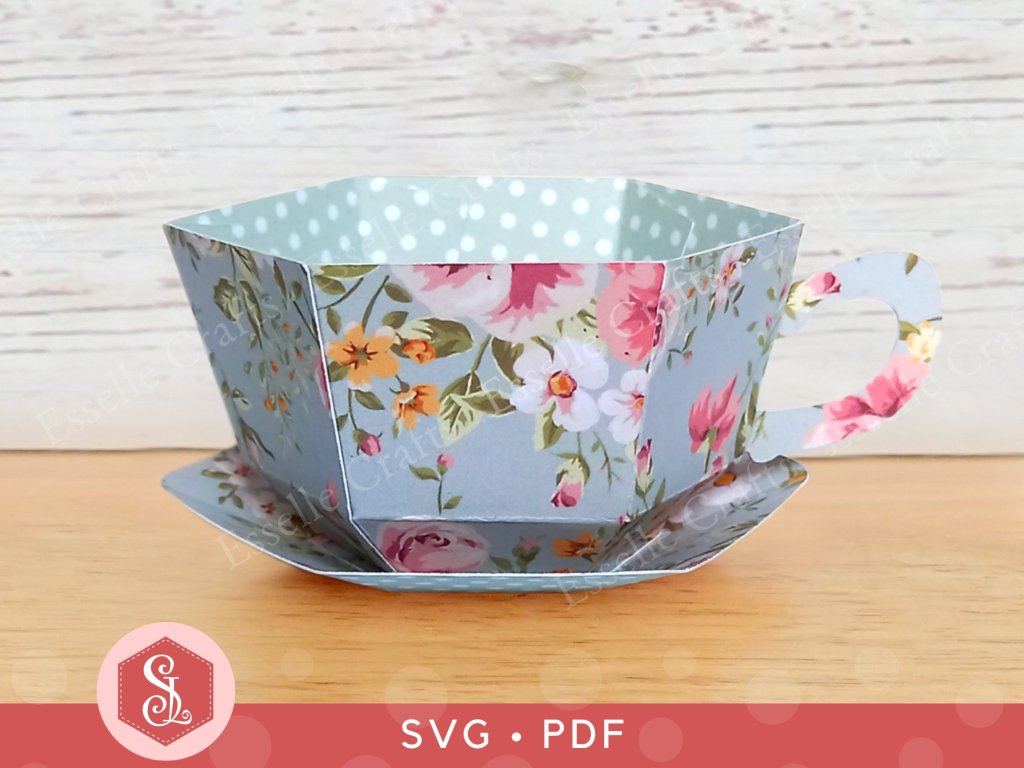
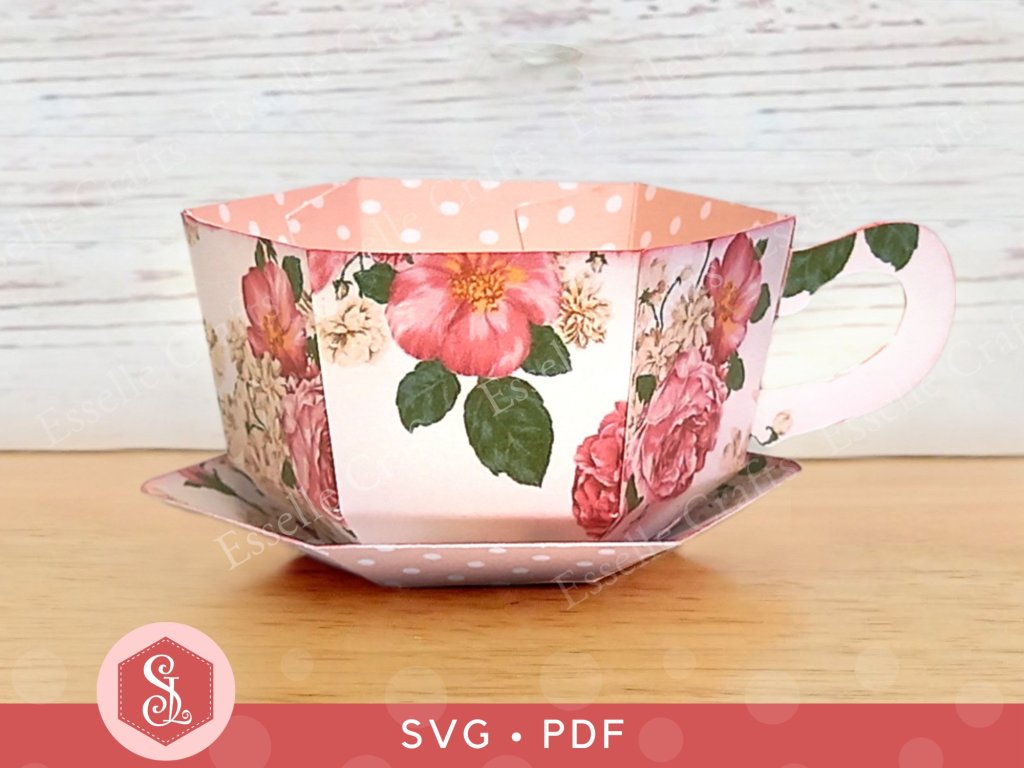
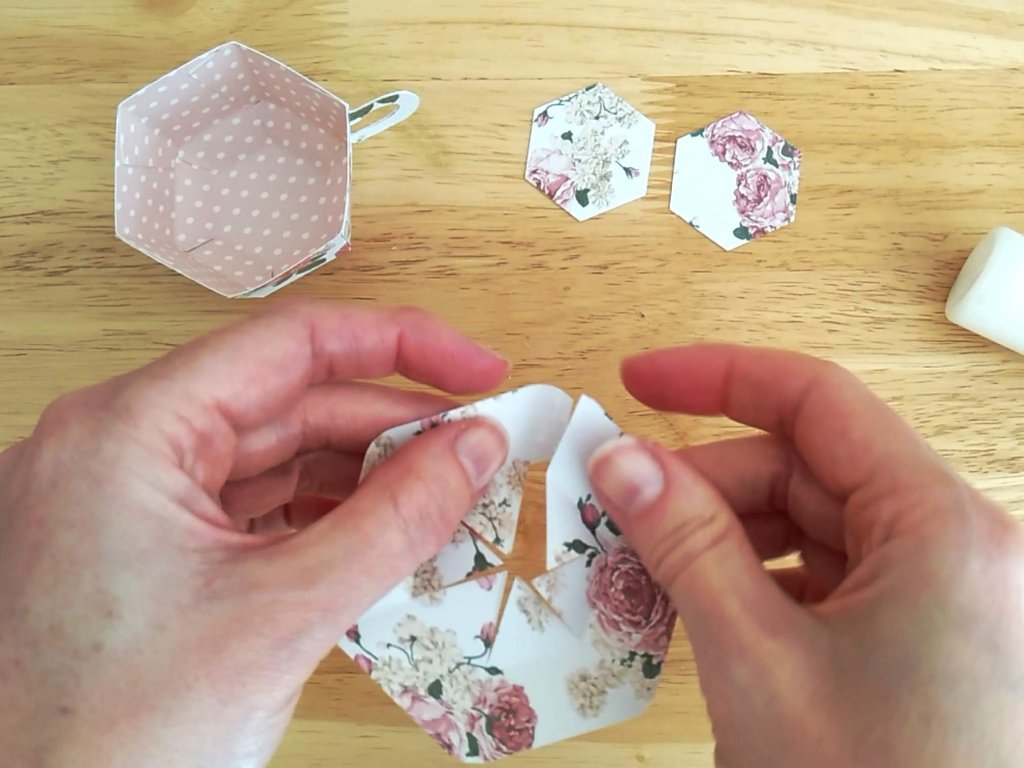
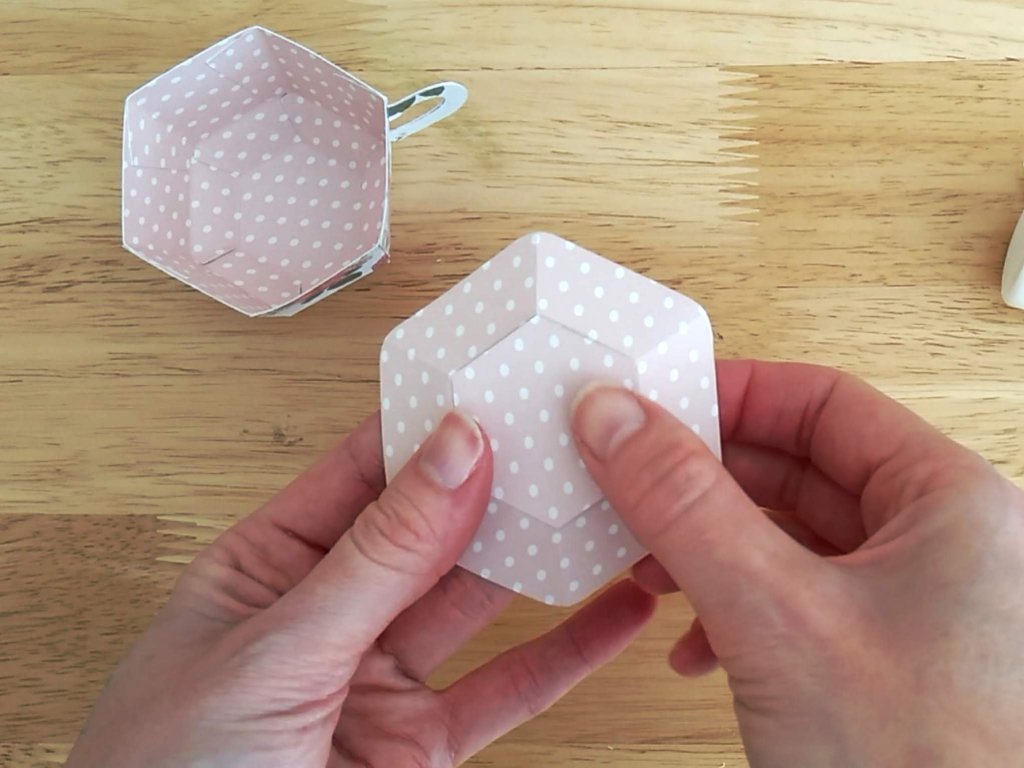
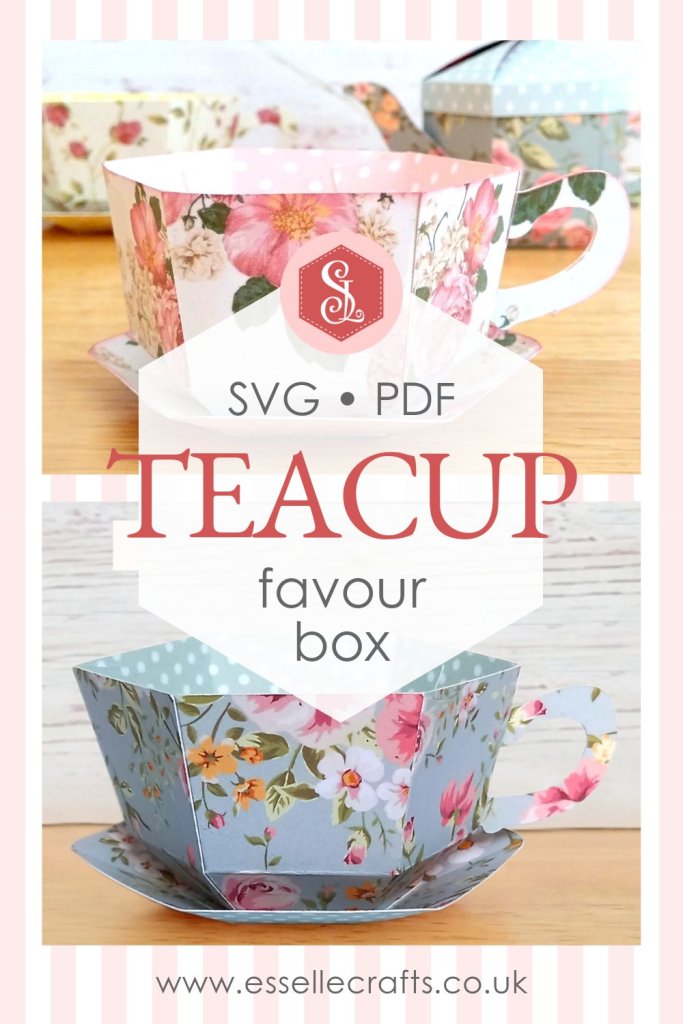
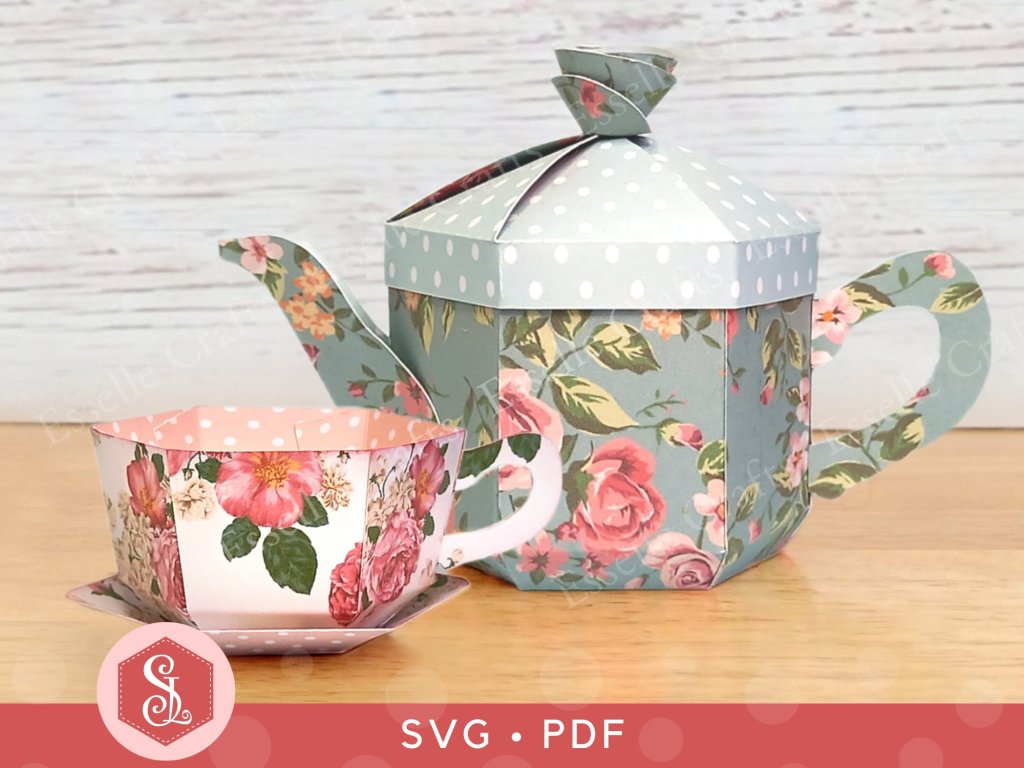
The little teacup can be filled with delicious treats and makes an ideal gift for any tea-lover! Perfect for birthday parties, wedding favours, Mother’s day gifts, tea parties and so much more!
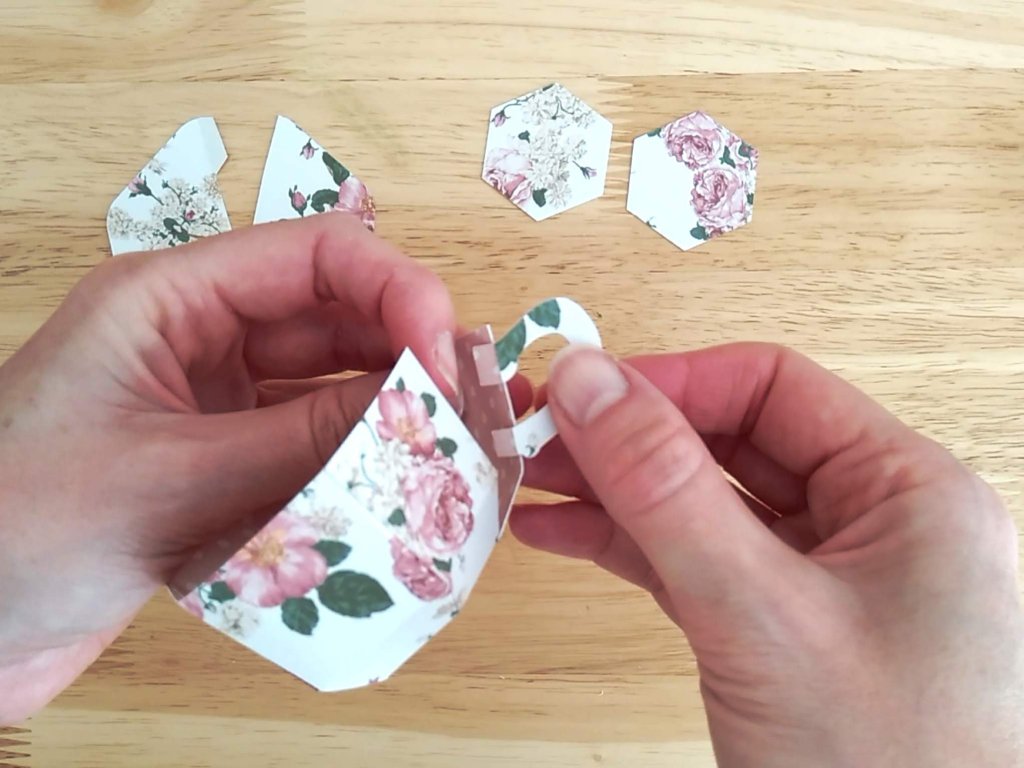
To make a teacup and saucer, you will need:
* Teacup Favour Box template (PDF and SVG available) * Computer and printer to print the PDF template and instructions * Digital cutting machine * Double-sided, patterned cardstock (220-250gsm / 80-92lb recommended) * Craft glue / double-sided tape
If you are not using a cutting machine you will also need:
* Craft knife / scissors * Scoring tool * Ruler
Watch my video tutorial showing how to assemble the teacup and saucer, and be sure to follow the tips below.
TIP 1: When attaching the handle, position it a couple of millimetres up from the second score line.
TIP 2: If you are using patterned cardstock, try turning the hexagon pieces until the pattern matches up or looks right with the rest of the saucer.
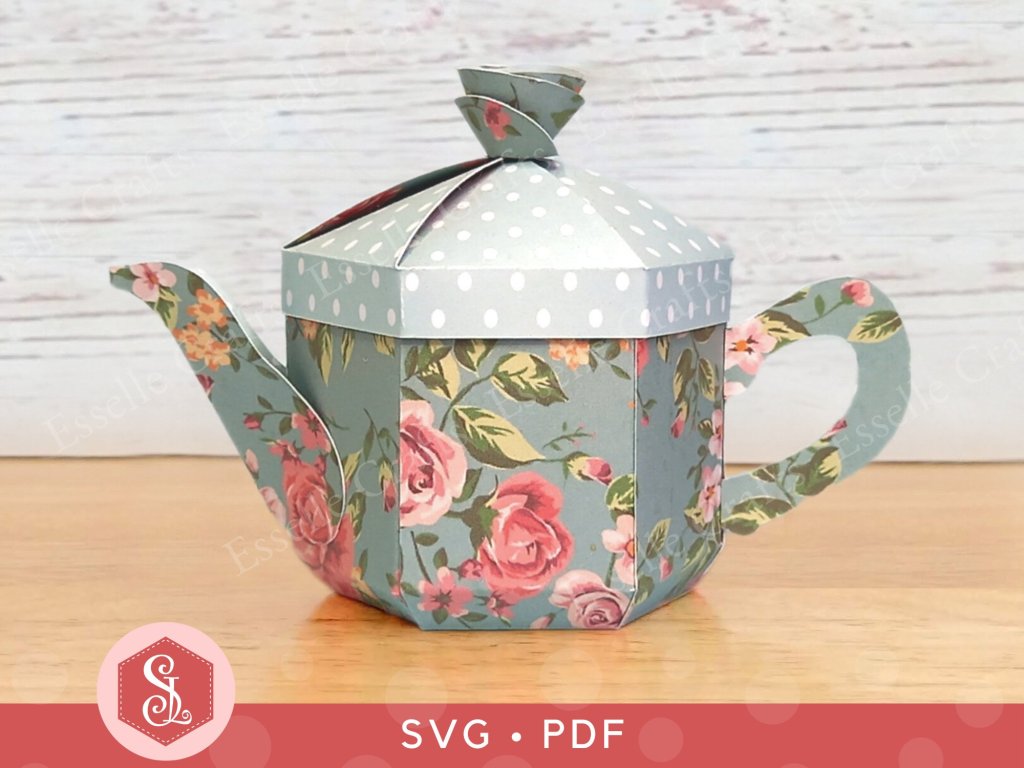
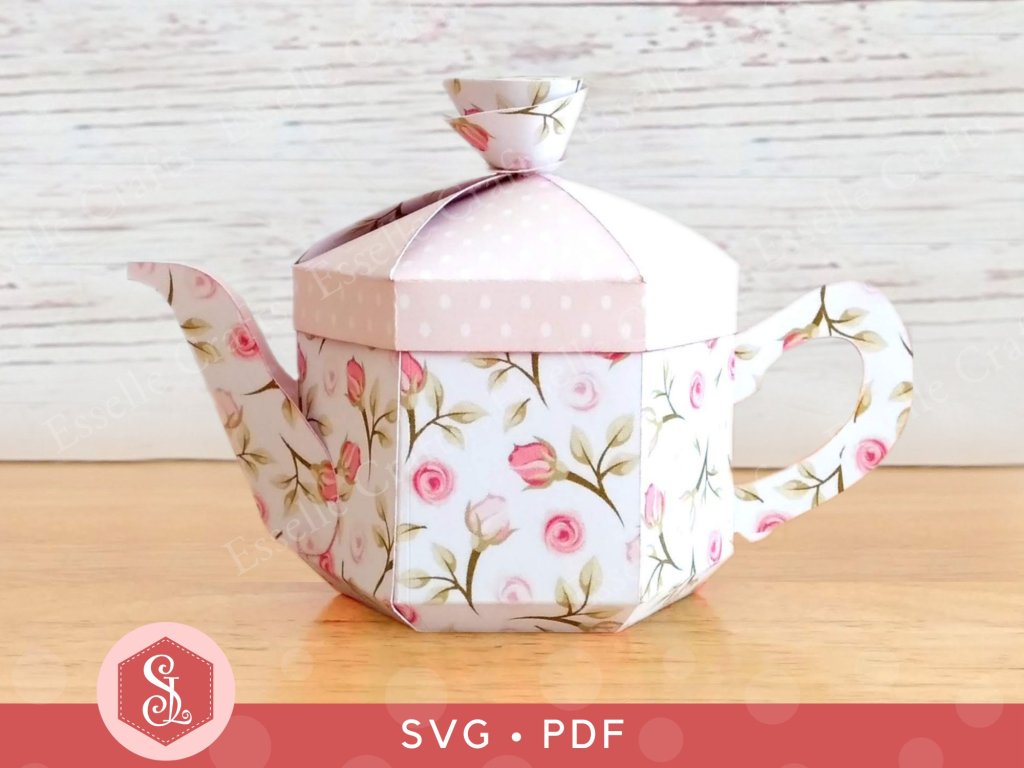
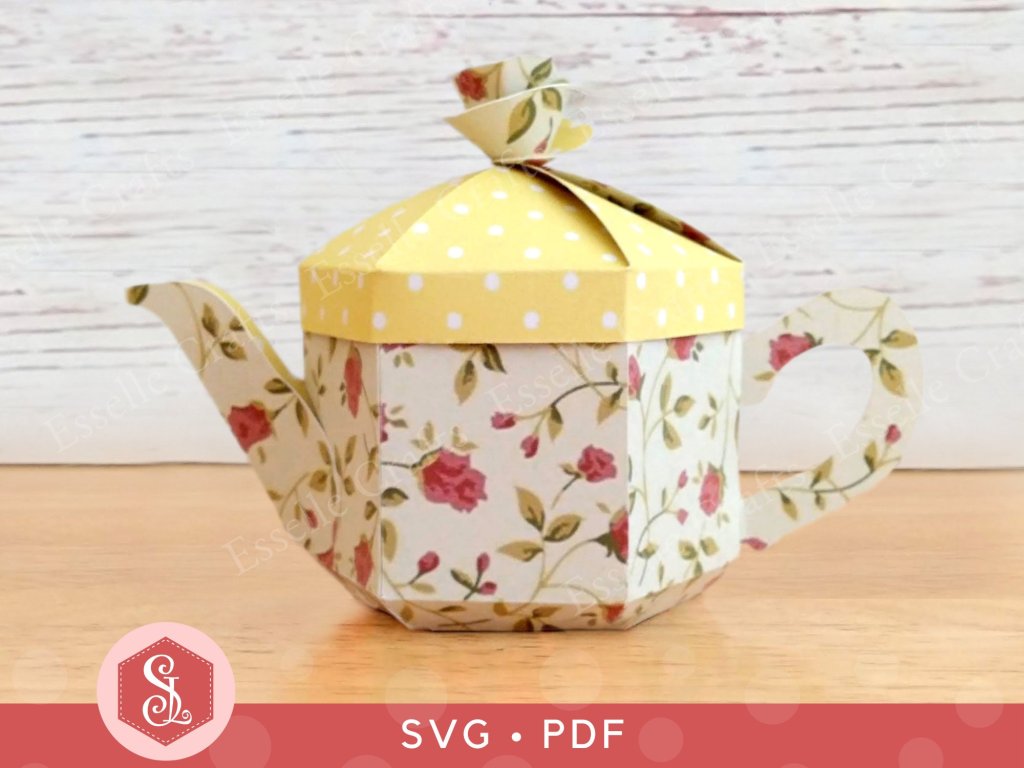
I recently updated my Teapot Favour Box template so that a larger sized box can be made on a 12″x 12″ cutting mat. To complement this, I have also updated my video assembly tutorial over on my YouTube channel.
With a removable lid, this adorable little teapot box can be filled to the brim with sweets or small treats and makes an ideal gift for any tea-lover! Perfect for birthday parties, wedding favours, Mother’s day gifts, tea parties and so much more!
To make a teapot box, you will need:
* Teapot Favour Box template (PDF and SVG available) * Computer and printer to print the PDF template and instructions * Digital cutting machine * Double-sided cardstock (220-250gsm / 80-92lb recommended) * Craft glue / double-sided tape
If you are not using a cutting machine you will also need:
* Craft knife / scissors * Scoring tool * Ruler
Watch my new, updated video tutorial showing how to assemble the teapot box and be sure to follow the tips below.
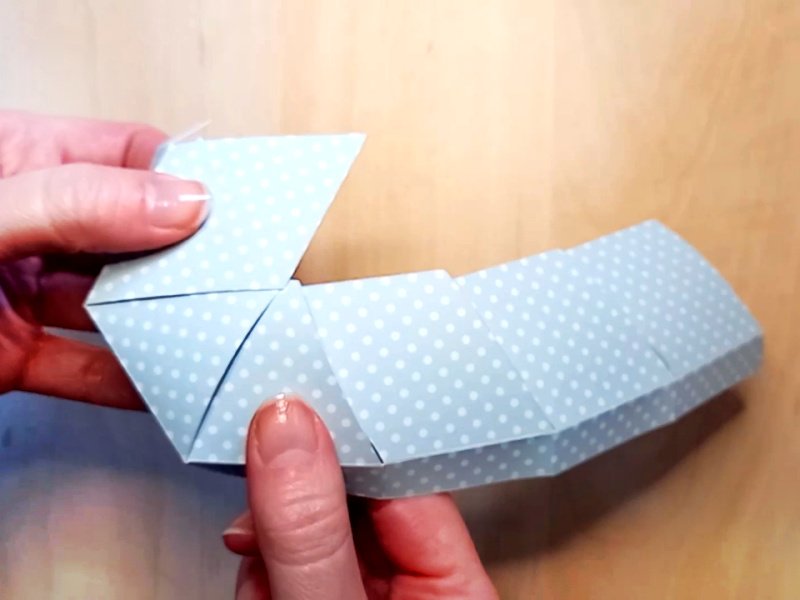
TIP 1 : Glue the two base pieces together carefully so that the score lines match up.
TIP 2 : Starting from the left side, tuck each of the six lid flaps into one another, then glue the small tab to the inside to secure. Make sure that all of the corners meet evenly in the centre, then apply a tiny dot of glue to the centre to hold it all in position.
TIP 3 : After rolling the rose to the end, allow it to unroll slightly until you get the desired size. Then glue the end to the base of the rose and hold it in place until it dries. I find that using a pencil with a rubber on the end helps with this.
So, what will you fill your little teapot box with? Chocolates? Candies? Biscuits? Teabags? The choice is yours!
And don’t forget, if you team the teapot box with my teacup and saucer favour boxes, then you can create your own fantastic little paper tea sets!
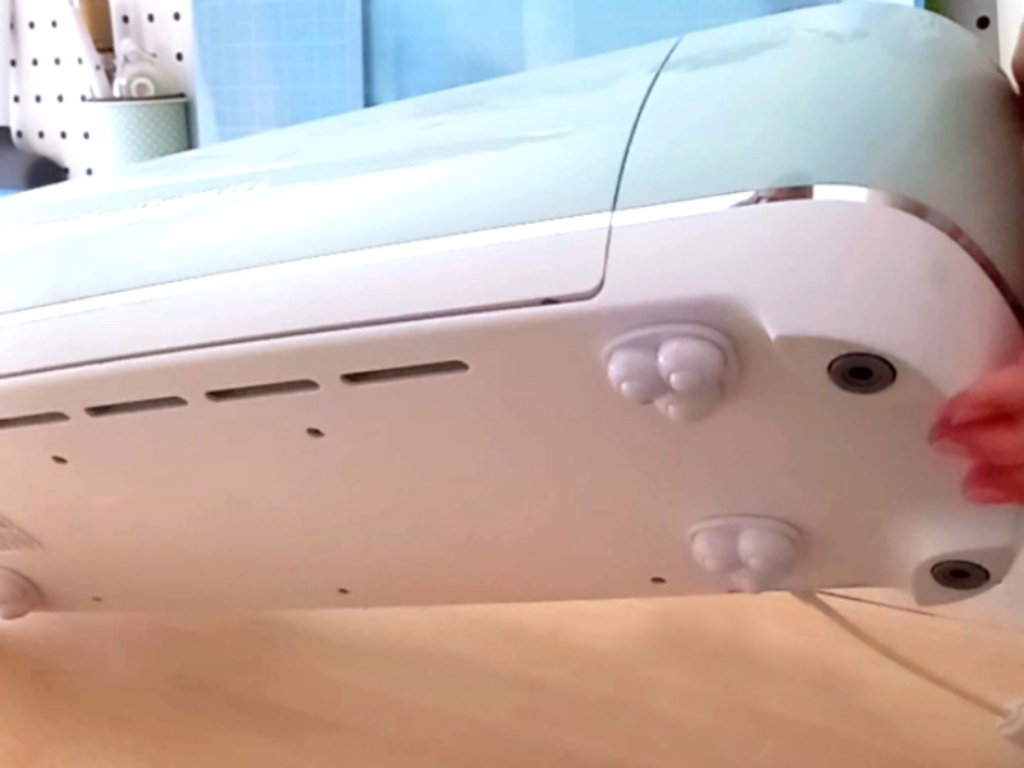
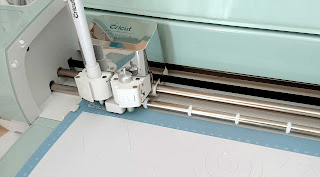
Do you have to move your heavy digital cutting machine every time you want to use it? I do, due to a current lack of space on my craft desk!
Up until now I’ve either had to pull my Cricut Explore forwards (not easy when it has rubber feet) or carefully lift it into position at the front of my desk so that there’s enough space behind it for the cutting mat to pass through without hitting my pegboard.
They come with little self adhesive sticky pads that easily peel off, so all I had to do was simply attach the wheels to the base of my Cricut machine, one in each corner.
Now my Cricut glides effortlessly, forwards and backwards, and I know that it’s not going to get damaged whenever I move it. Not only that, but it can also rotate 360° if I want it to!
Have you tried these little casters or something similar for your cutting machine? They really are a game-changer for me!
In this post, I will be answering some of the most frequently asked questions about using my digital files. I hope you find this information useful, but if you still have any questions, feel free to contact me through my Etsy shop and I will do my best to answer them.
Please note – all of my SVG files are tested in Cricut Design Space and are cut out using my Cricut Explore Air 2. I also cut out smaller versions (using the small dashed cuts SVG file) on my Cricut Joy. Results may vary with other cutting machines.
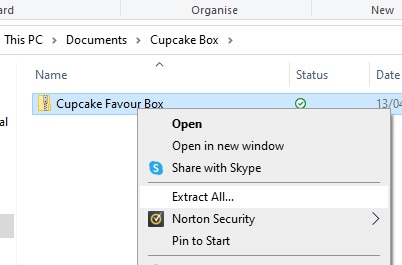
I have downloaded a zip folder, so how do I access the files?
All of the files are compressed within a zip folder to make downloading easier. If you right click on the zip folder, then go to ‘Extract All’ this will save the files into a new, accessible folder.
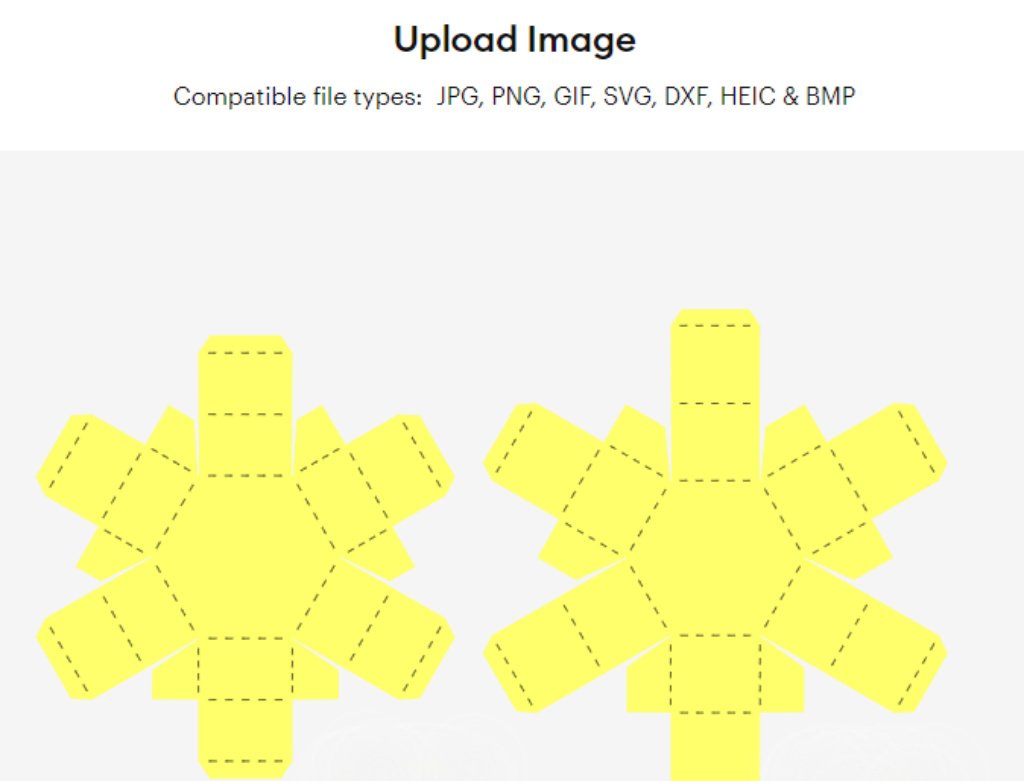
How do I upload the SVG files into Cricut Design Space?
Once you have Cricut Design Space open, click ‘New’ to create a new blank canvas. Then click ‘Upload’, then ‘Upload Image’ and ‘Browse’. You will then need to find the file that you want to work with.
There are two different SVG files. Which one do I use?
Most of my templates come as two different versions. One has solid score lines (_solid.svg), for cutting machines that can score, and one has the more traditional dashed lines, which your machine will cut out as small perforations. Select the version that you want to use, then click ‘Upload’, then ‘Add to Canvas’.
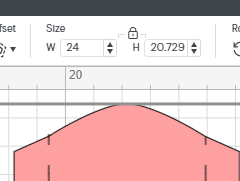
How do I resize my SVG files?
Firstly, make sure that everything on the canvas is selected, then either type in the measurement that you require in the size box (W ) or drag the resize arrow in the bottom right corner. Just make sure that the padlock icon is locked before you do this to ensure that all of the pieces stay in proportion.
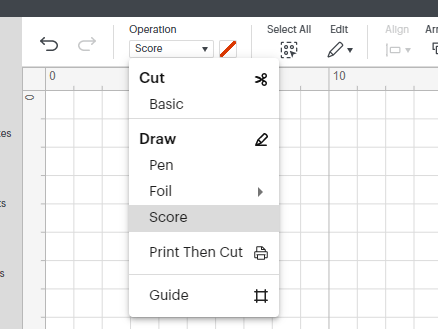
How do I work with solid score lines?
If you are using one of my _solid.svg files you will need to select each of the score lines, then go to ‘Operation’ and change them from ‘Basic Cut’ to ‘Score’.
If you don’t have a digital cutting machine that can score, use the other .svg file, which will cut the score lines as small perforations.
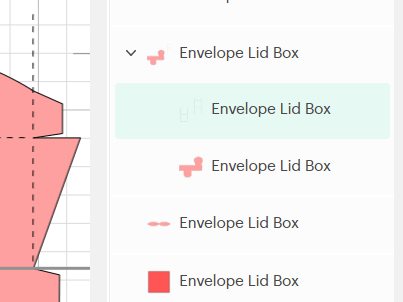
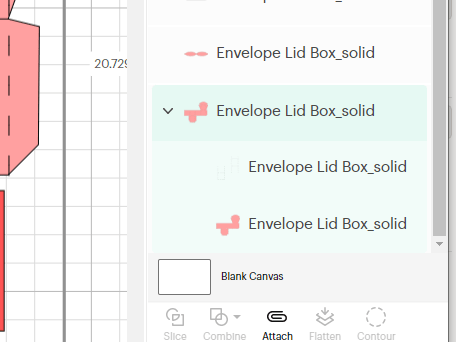
Why are my score lines showing up on a separate mat?
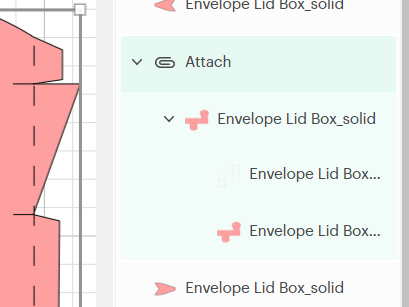
Firstly, you will need to select the score lines, together with the piece that they need to be attached to, then click ‘Attach’.
This will ensure that the score lines are attached to the piece on the mat.
I have also created this short video tutorial, showing the entire process, which might help:
I don’t have a digital cutting machine. Can I still make your products?
Yes, in most cases you can! The majority of my templates include at least one PDF template that can be printed and cut out by hand. Please check the individual listings in my Etsy shop for more information.
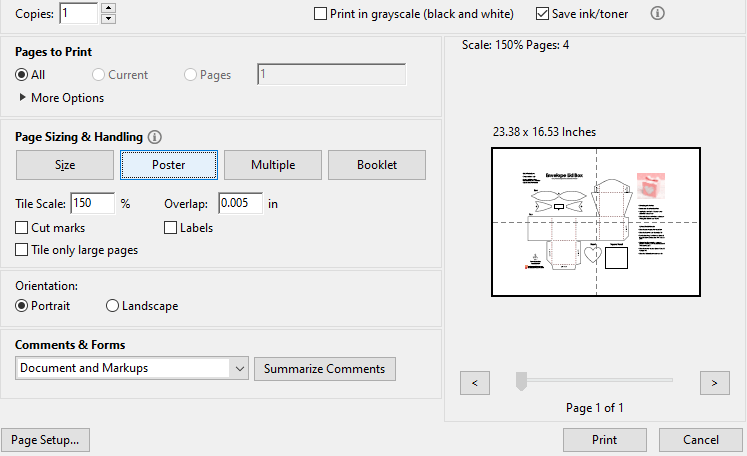
How do I resize the PDF template?
If you wish to reduce the size of the PDF template, click on ‘Custom Scale’ within the printer properties box and enter the value that you need (eg; 75%).
If you wish to increase the size of the PDF template, click on ‘Poster’ and enter the value that you need (eg; 150%). This will spread the template over several pages, and will include an overlap. If you need the template a lot bigger, then you can take the file to a print shop.
What weight of cardstock do you recommend for your projects?
For construction, I recommend using about 240gsm cardstock (88lb), but generally anything around 220 – 250gsm (80 – 92lb) will work just fine. If you choose to make your project smaller, then a lighter (thinner) cardstock may be required. Similarly, if you choose to make your project bigger, then a heavier (thicker) cardstock may be required. For some of the decorative panels, a lighter card or paper 90 – 120gsm (30 – 44lb) will work best, but I will always state in the instructions if this differs.
Following a recent update, Cricut Design Space is experiencing issues when uploading SVGs. It is showing a red warning bar at the top of the screen, worded something like this:
After doing some research about this ‘sodipodi:namedview’ error, there appears to be a few things that can resolve it.
Firstly, the error is only occuring on the desktop version of Cricut Design Space, not on the mobile app. So, for a quick temporary fix, you can transfer the SVG that you want to use to your mobile device via email, then open the Cricut Design Space app on your mobile device and upload the SVG as usual. If you then open Cricut Design Space on your desktop again, you will see the SVG in your ‘Recent Uploads’.
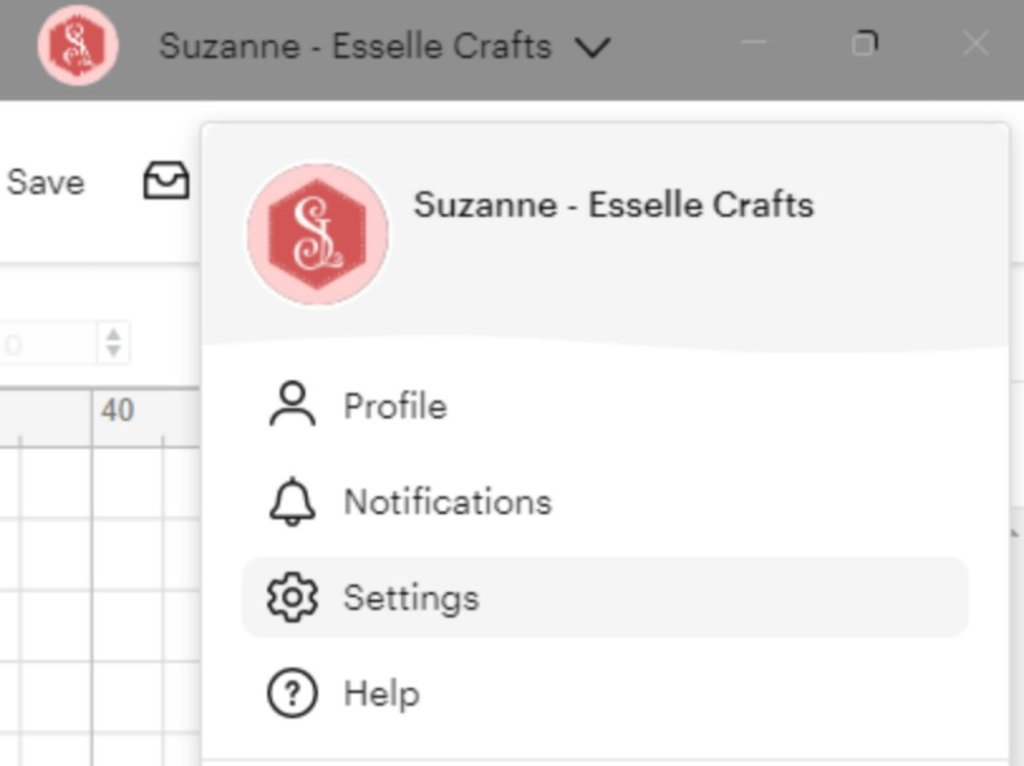
Secondly, (for a more permanent fix 🤞) your desktop version probably needs updating. This can take a bit of time, but to do this you need to click on your Cricut Design Space profile and select ‘Settings’.
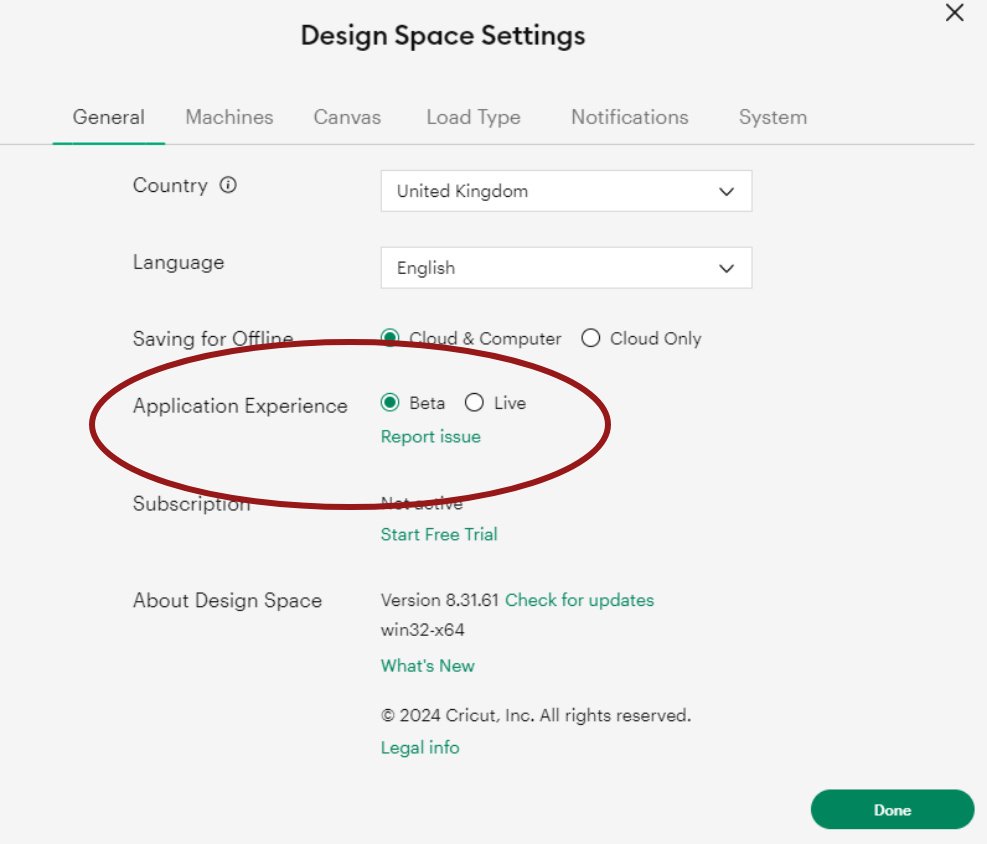
Then you need to check that ‘Beta’ is highlighted next to ‘Application Experience’.
Next you need to check that you have the most up-to-date version of Cricut Design Space – this needs to be version 8.31.61 (the previous version with the bug was 8.31.60 and I discovered a few more before that). Click ‘check for updates’ if yours shows anything other than Version 8.31.61
Cricut Design Space will then update and restart (you may also need to restart your computer to resolve any remaining issues), then hopefully you will be able to upload your SVGs in the usual way!
Hooray! 🎉
I really hope this helps to solve any problems you’re having with uploading your SVGs to Cricut Design Space. Do let me know how you get on with it 🙂