3D Papercraft Projects · Favour Boxes

Cupcake Favour Boxes

I’ve given my cupcake favour box photos a little makeover! I originally designed the box to complement my teapot favour box and my teacup and saucer but felt that the photos didn’t match. So, here they are!

Three pastel cupcake favour boxes designed and made by Esselle Crafts

The boxes are super cute and the template is easy to assemble and, once they are filled with delicious treats or small gifts, they make the perfect addition to any tea party or celebration! 🧁

Three pastel cupcake favour boxes designed and made by Esselle Crafts

To make a cupcake box, you will need:

Cupcake Favour Box template (SVG and PDF available)
* Computer and printer to print the PDF templates and instructions
* Double-sided / patterned cardstock (220-250gsm / 80-92lb recommended)
* Thinner card for the icing panels (160gsm / 60lb recommended)
* Craft glue / double-sided tape

If you are not using a digital cutting machine, you will also need:

* Craft knife / scissors
* Scoring tool
* Ruler

Watch my video tutorial showing how to assemble the box and be sure to follow the tips below:

TIP 1 : I recommend using thinner card for the icing panels (approx 160gsm / 60lb) as the lid may not close properly if it’s too thick. Patterned or embossed papers work really well for these panels to create texture and interest.

Adding textured icing panels to a cupcake favour box

TIP 2 : Try inking the edges of the icing panels before gluing them into place to give them added definition. You could also use glossy card (as I’ve done here) or apply a thin layer of acrylic gloss varnish to really make the icing sparkle! ✨

White, glossy card icing on a cupcake favour box

TIP 3 : Allow the rose to unroll slightly before gluing it. You could also apply a little acrylic gloss varnish to the edges of the finished rose to look like a glaze.

Making a paper rose for a cupcake favour box

Choosing your own colour scheme means you can match your little cupcake favour boxes to any occasion or celebration. I really love these vintage pastel coloured boxes. They would look great as wedding favours, or you could make a really big one as a centerpiece for a birthday or for Mother’s Day.

Three pastel cupcake favour boxes designed and made by Esselle Crafts

This little red velvet cupcake box (that I made previously) is still my favourite! 🧁 I had so much fun choosing the colours and patterns for it, but it would not have been possible without my fabulous Cricut cutting machine! ❤️ Those teeny tiny hearts that I added on for extra detail are about 3mm wide! Imagine cutting those out by hand!

A small, red velvet inspired cupcake favour box designed and made by Esselle Crafts

Whether you’re using the SVG cut files or the PDF file, resizing the templates is super easy. Imagine giving a tiny one to someone with a surprise gift inside!💍

Cupcake Favour Box Blog Post by Esselle Crafts

I would really love to see the little cupcake boxes you create using this template and what you put inside them. Maybe you could make one a little bit bigger and put a real cupcake inside it – then you truly could have your cake and eat it! 🧁

Happy crafting!
Suzanne

3D Papercraft Projects · Gift Bags · Upcycling Projects

Even More Upcycled Favour Bags!

Once again, I have been busy making more upcycled favour bags using my Butterfly Favour Bag template.

Four upcycled favour bags by Esselle Crafts

For this first one, I cut the front, back and side panels out of an old tissue box, then used a silver metallic marker pen around the edges before gluing them in place. To compliment the silver, I used silver glitter card for the handle panels.

White upcycled favour bag with leaf design

The panels on this colouful butterfly bag started life as a different kind of gift bag! It was given to me last year, but the base was slightly damaged, so I cut it up and used as much of it as I could.

Pink upcycled favour bag with gold butterfly design

The front and back panels came from the front and back of the original gift bag, and the smaller side panels came from the sides of the bag, which were a lovely dark, gold colour. To compliment this, I used a gold metallic marker pen around the edges of the panels and a bright gold glitter card for the handle panels.

Three pink upcycled favour bags with gold butterfly design

The original gift bag was quite large, so I ended up making three bags – one large and two small!

Three pink upcycled favour bags with gold butterfly design

This next bag is definitely my favourite! 💛 The giraffe design came from another old tissue box, and again I used a gold metallic marker pen around the edges of the panels. I cut the side panels and handle panels out of gold mirror card and had just enough of the giraffe design card to make a matching gift tag!

Yellow upcycled favour bag with giraffe design

Yellow upcycled favour bag with giraffe design

This next bag also started life as a different kind of gift bag and, just like the other one, I cut the front and back panels from the front and back of the original gift bag and the smaller side panels from the sides of the bag.

White upcycled favour bag with pastel heart design

The gift bag was quite large again, so I had enough to make three small bags!

Three white upcycled favour bags with pastel heart design

Finally, I had collected two tropical jungle design tissue boxes, which I turned into these two fabulous favour bags! I used green glitter card for the handle panels, and the main bag pieces were cut from the cover of an old art folder. 

Two black upcycled favour bags with green tropical jungle design

As I wrote in my previous post, not all of the bags are made entirely from upcycled materials, but it gave me a good chance to go through my cardstock scraps and use bits that have been hanging around for a long time ♻️

How to make upcycled favour bags blog post by Esselle Crafts

Happy crafting and happy upcycling! ♻️
Suzanne

3D Papercraft Projects · Cricut Design Space · Gift Bags

Mini Gold Favour Bags

Using my butterfly favour bag template, I experimented with different sizes and created these cute mini black and gold bags!

Set of Four Mini Gold Paper Craft Favour Bags

I used gold mirror card for the panels and, instead of using the butterfly, I embossed each of the panels with small polka dots. I kept the bows as an extra embellishment, despite the fact that they were so ridiculously tiny to make!

Set of Four Mini Black Paper Craft Bows

I reduced the size of the SVG template in Cricut Design Space to 17.5cm / 6.9″ (W ) making the measurements of the finished bags approximately 5.7cm (W ) x 2.3cm (D) x 7.4cm (H) / 2.25″ (W ) x / 0.9″ (D) x / 2.9″ (H).

This made them the perfect size to hold a mini Lindt chocolate teddy bear!

Set of Four Mini Gold Paper Craft Favour Bags with Chocolate Lindt Teddy

Here you can see the difference in size compared to the standard size bag that I made. 

Mini Gold Paper Craft Favour Bag and Butterfly Favour Bag

I think you’ll agree that these mini versions are super cute, but also super stylish. What little treats would you put inside a bag this small?

Mini Gold Favour Bags Blog by Esselle Crafts

Happy crafting
Suzanne

3D Papercraft Projects · Gift Bags · Upcycling Projects

More Upcycled Favour Bags!

Following on from my previous post, I have been busy making more upcycled gift bags using my Butterfly Favour Bag template.

Colourful Upcycled Favour Bags by Esselle Crafts

The main structure of this stunning purple bag is made from an old school book cover! I then cut the front, back and side panels out of textured paper. The handle panels were cut from silver mirror card and the enlarged bow was made from another piece of the school book cover.

I think this is definitely one of my favourites! 💜

Purple Upcycled Favour Bag by Esselle Crafts

This red bag, along with its bow, also started life as a school book cover! I then cut all of the panels out of red mirror card and embossed them with a beautiful leaf design.

Red Upcycled Favour Bag by Esselle Crafts

I cut the decorative panels on this black leopard print bag out of an old paper bag – you know, the ones you get from little gift shops. I first had to back the paper bag onto thin white card to give it some stability before cutting the panels out. I then ran a gold metallic marker pen around the edges, which perfectly compliments the gold mirror card handle panels.

Leopard Print Upcycled Favour Bag by Esselle Crafts

Here’s all three of them together, looking absolutely gorgeous!

Three Colourful Upcycled Favour Bags by Esselle Crafts

I created these two white bags from old textured cardstock that I’d taken from another project. Don’t they look amazing?! I love the look of white on white. There were a few imperfections on some of the panel pieces, so I embossed each of them using a knitted pattern design, which made them perfect! I then used the leftover scraps to make the little bow and the layered flower.

Two White Upcycled Favour Bags by Esselle Crafts

For this last bag, I cut the main black pieces out of an old art folder and the panels out of a tissue box. I cut the panels out by hand as I wanted to line the little dogs up so that the pattern was equal on both sides. I then ran a silver metallic marker pen around the edges and cut the handle panels out of silver glitter card to match. 

Upcycled Sausage Dog Favour Bag by Esselle Crafts

Whilst not all of the bags are made entirely from upcycled materials, it was a good chance to use up some of my cardstock scraps and experiment with different textures. 

How to make upcycled favour bags blog post by Esselle Crafts

So, which bag is your favourite now?

Colourful Upcycled Favour Bags by Esselle Crafts

Happy crafting and happy upcycling! ♻️

Suzanne

3D Papercraft Projects · Gift Bags · Upcycling Projects

Upcycled Favour Bags

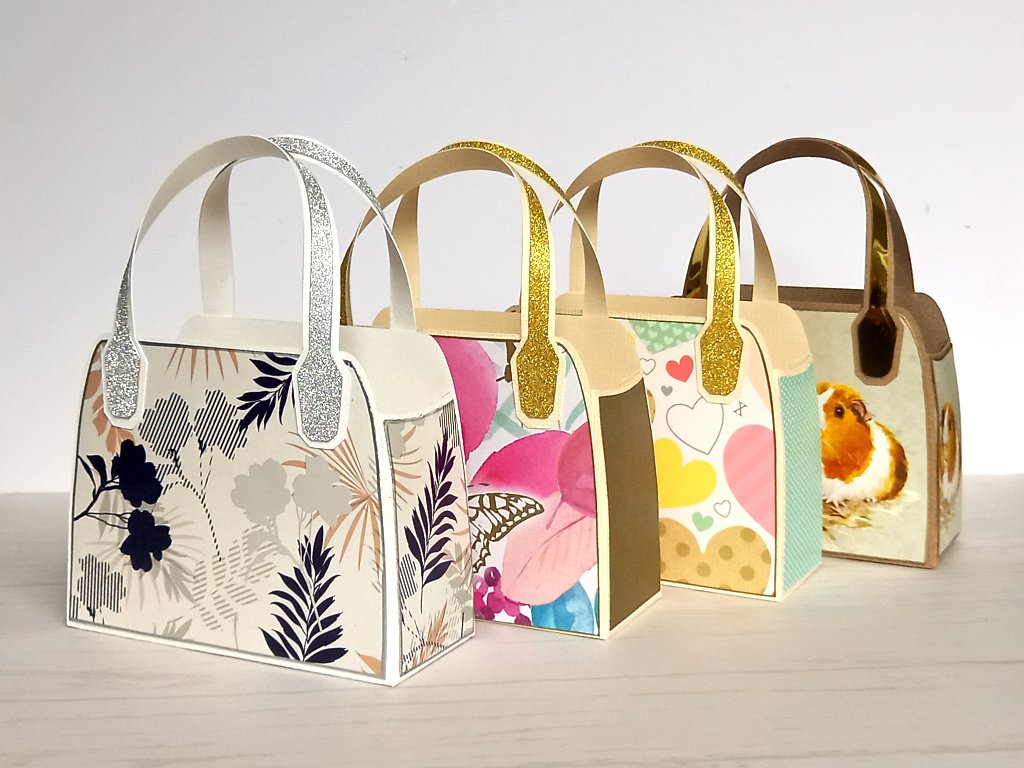
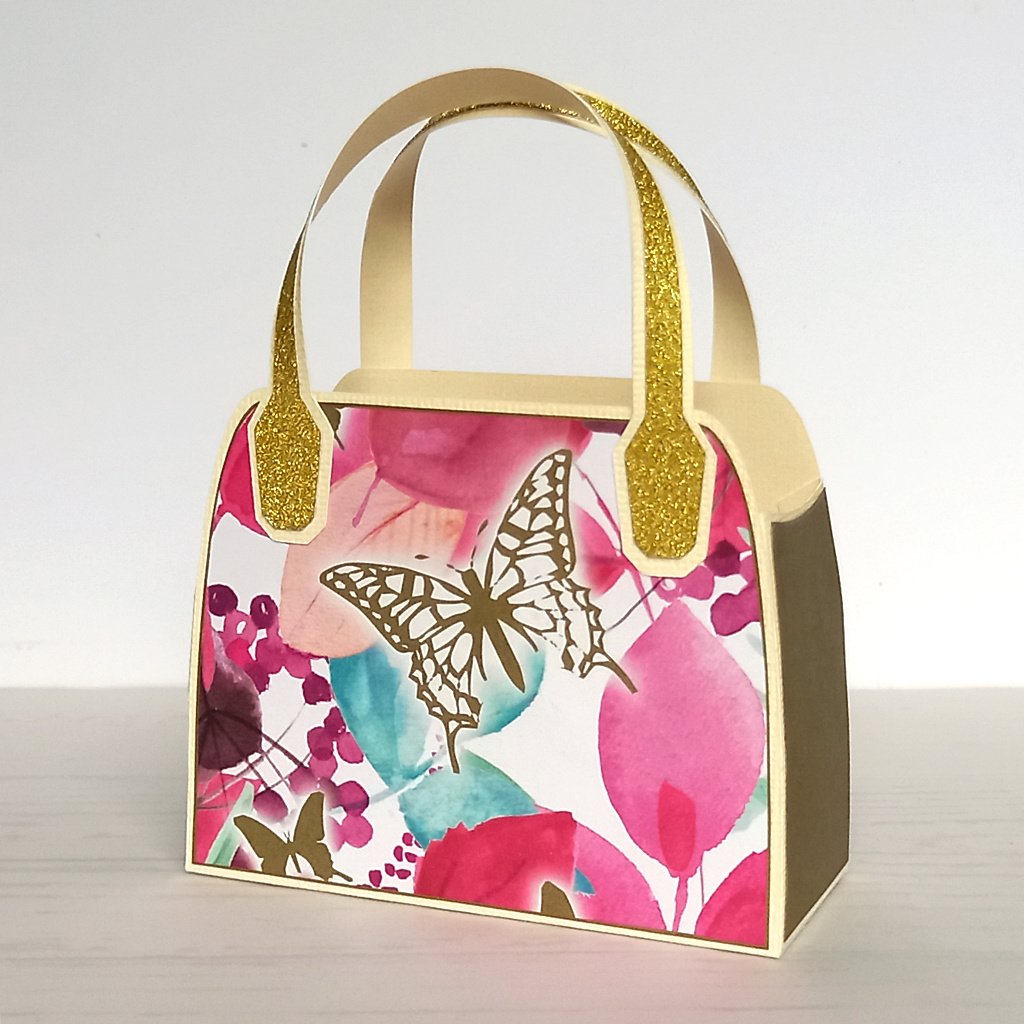
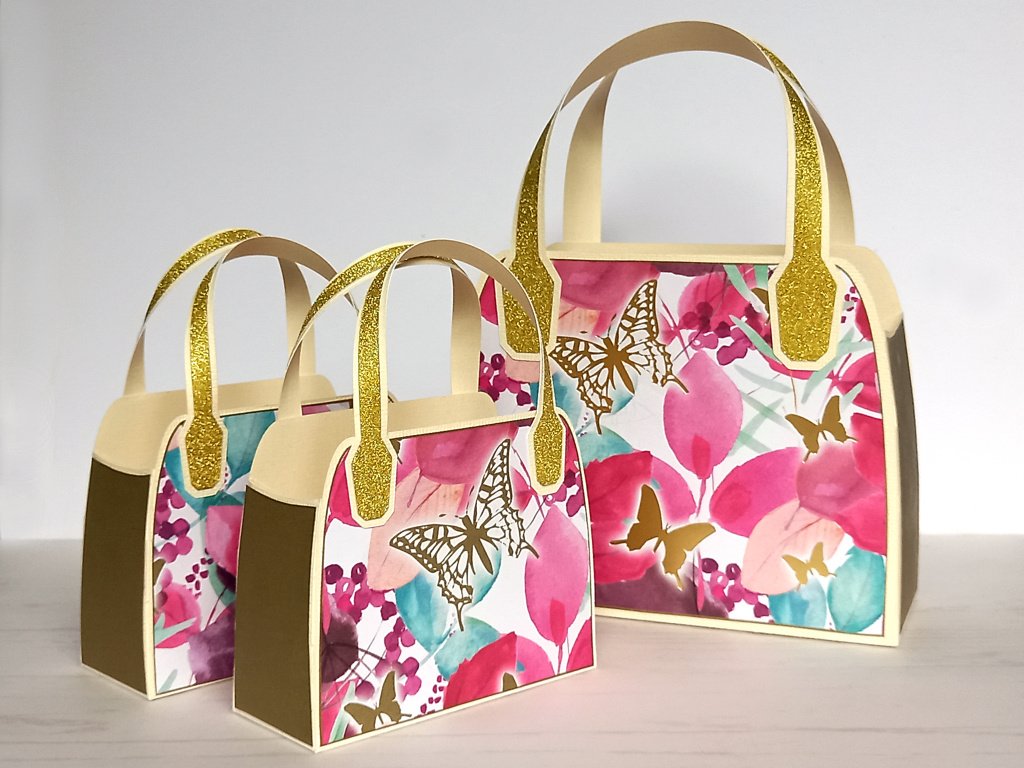
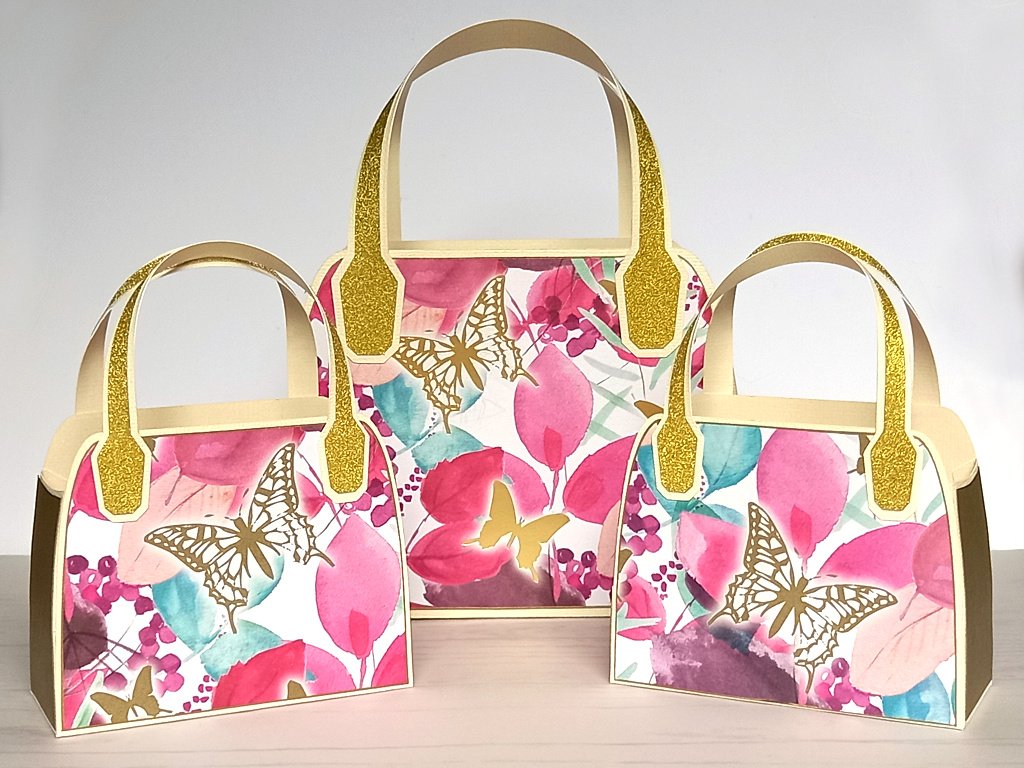
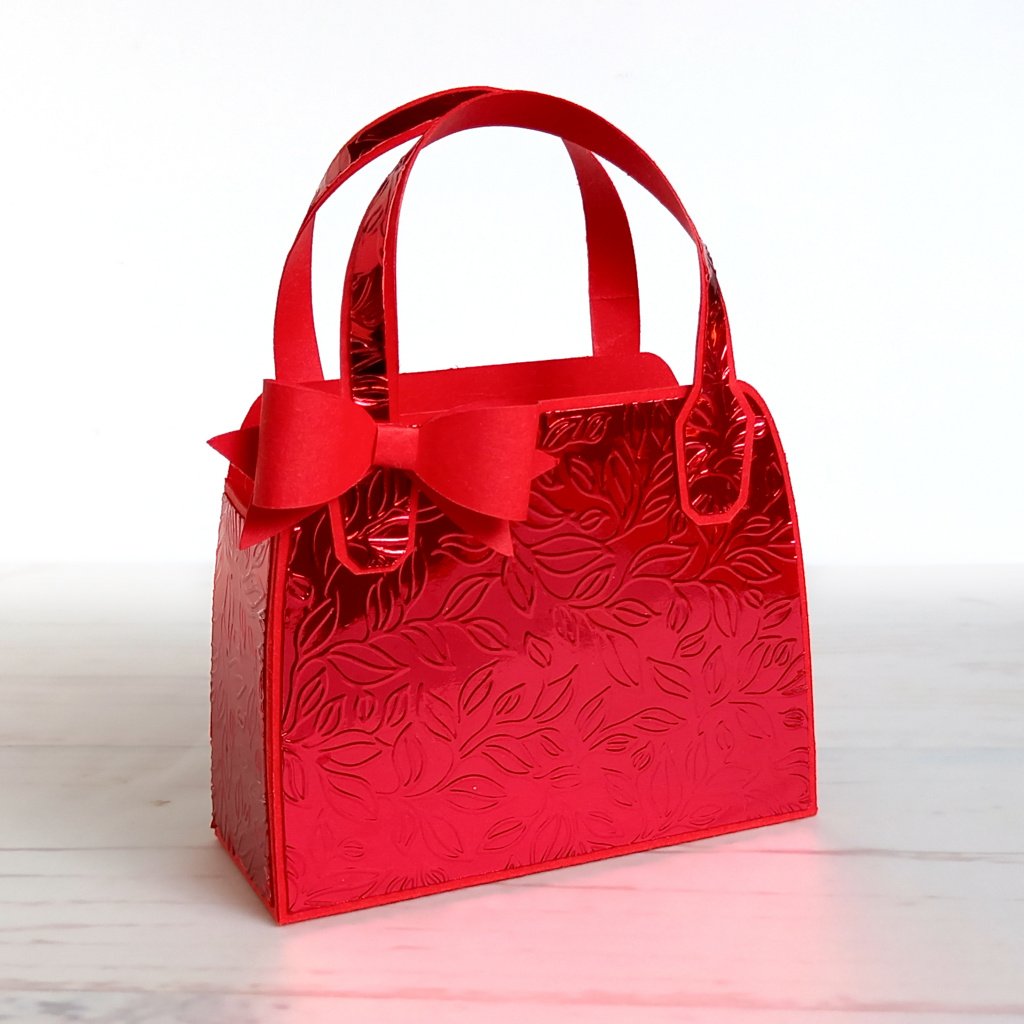
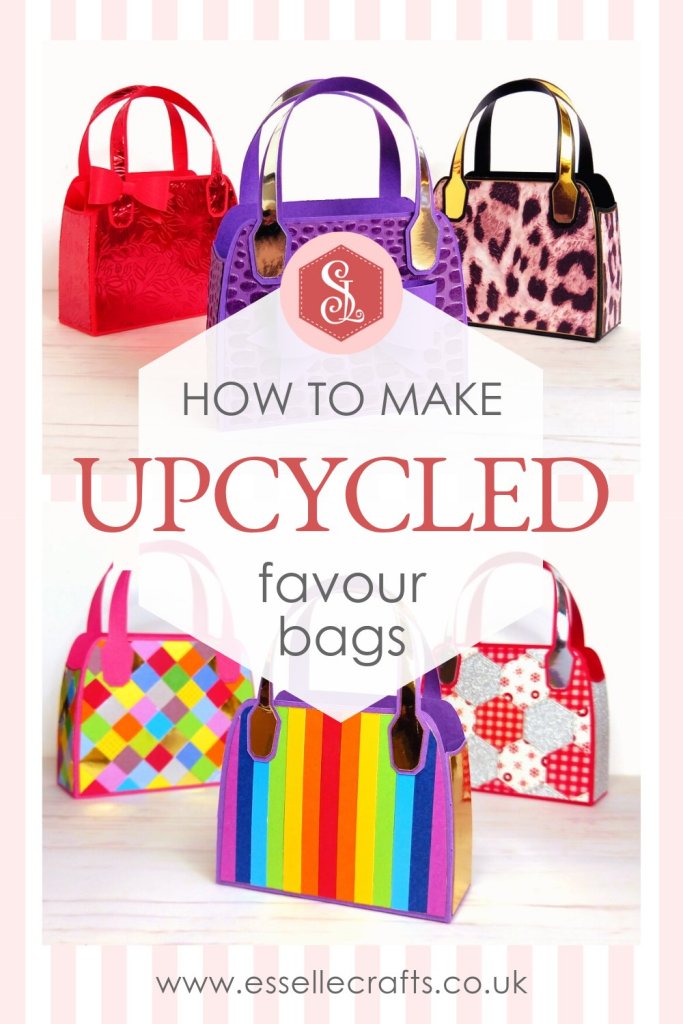
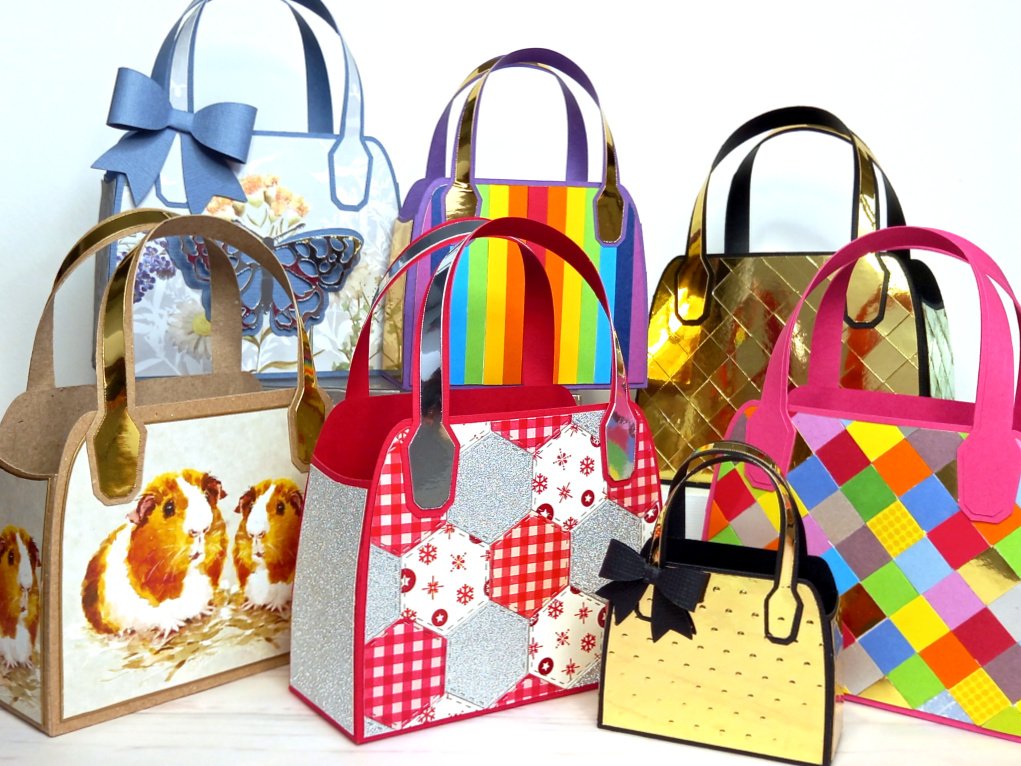
I’ve recently been experimenting with my butterfly favour bag template, seeing what other versions I could come up with, and just look at what I’ve created!

Seven Upcycled Favour Bags by Esselle Crafts

Aren’t they fabulous!?

Most of the bags are decorated with small paper scraps, and I upcycled old greeting cards, Christmas crackers and card packaging for the others ♻️

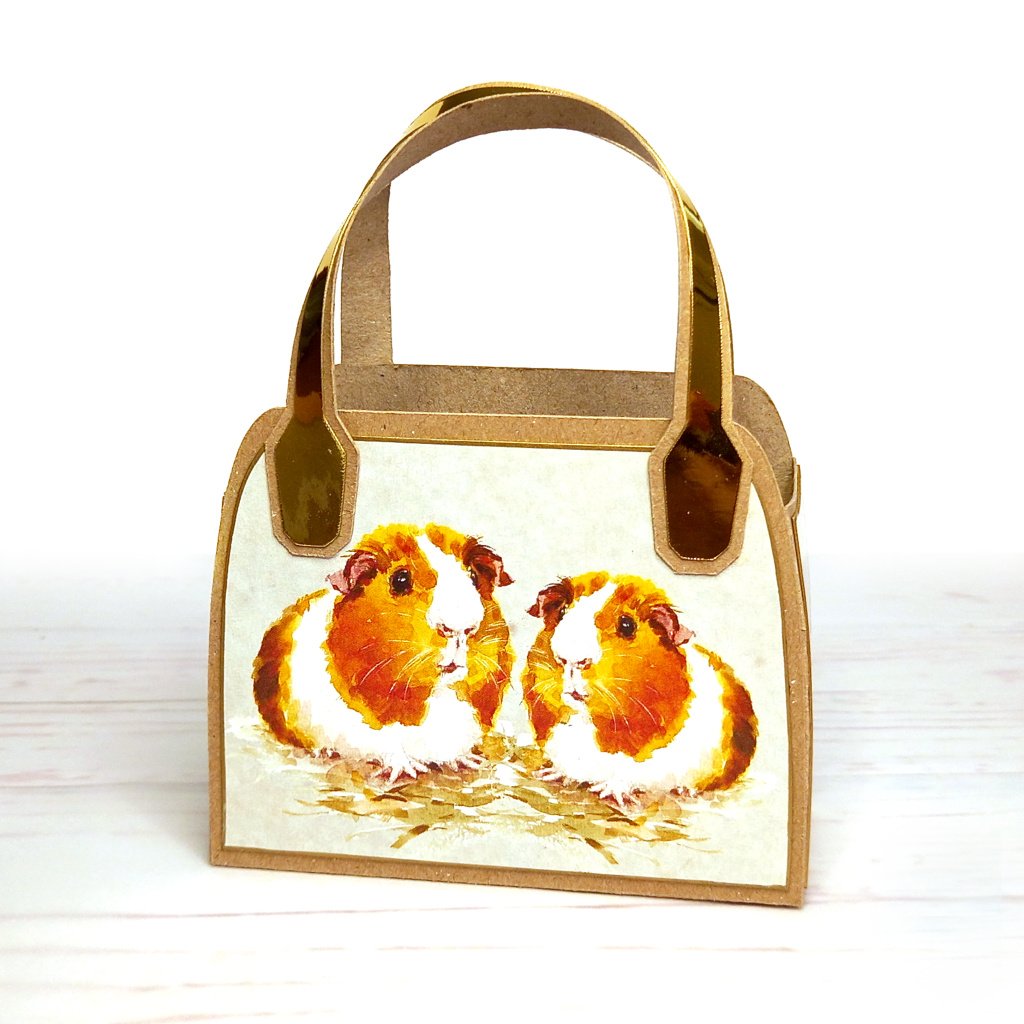
My favourite has to be the Guinea pig bag, made using a square tissue box.

I started by making the bag out of Kraft card, then I cut the front and back panels from the front and back of the tissue box and the two side panels from the picture on the base of the box. I drew around the edges of the panels with a gold metallic marker pen before gluing them on, then cut the handle panels from scraps of gold mirror card.

Guinea Pig Upcycled Favour Bag by Esselle Crafts

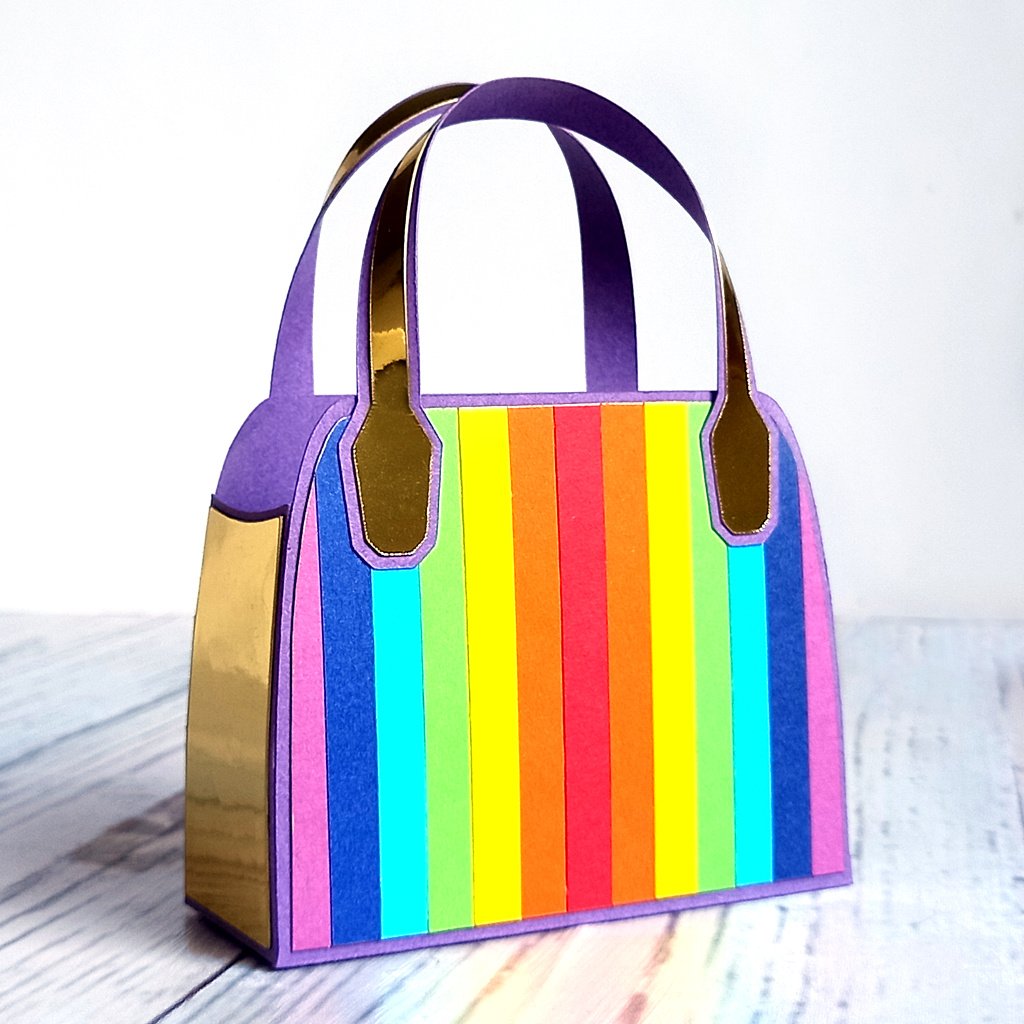
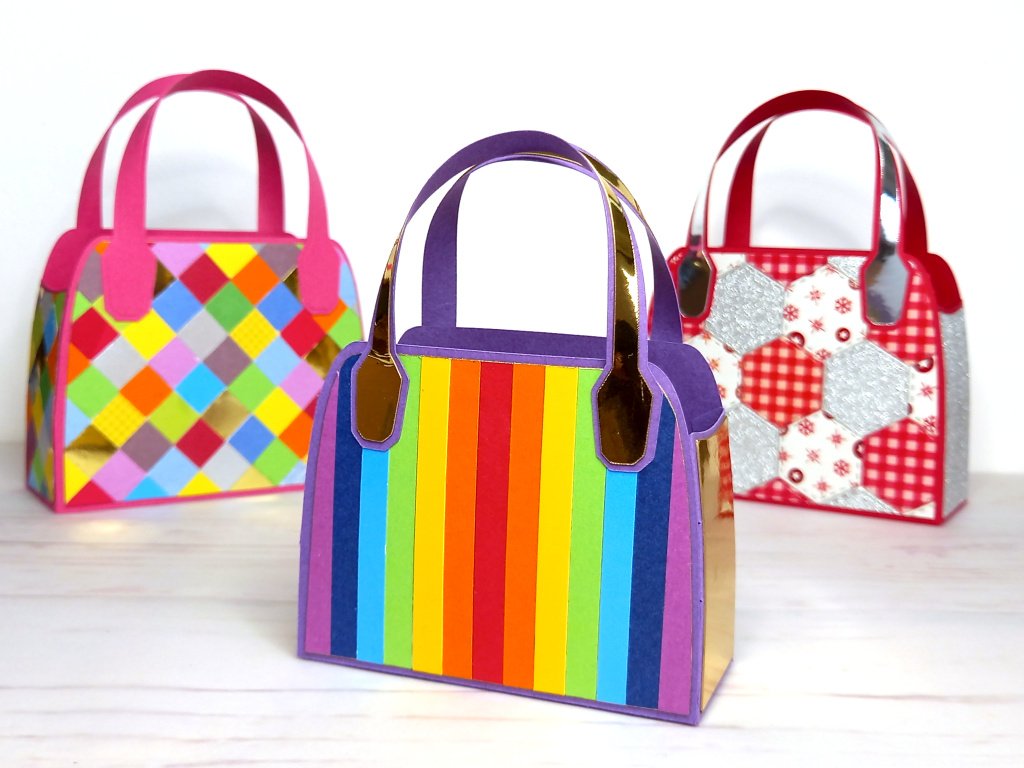
For this rainbow bag, I reduced the size of the template slightly and cut the main bag pieces out of an old school book cover. I then cut the front and back panels out of white copy paper. I found lots of different coloured cardstock scraps and cut them into thin strips. Then I glued the red strip down the centre of the front and back panels and filled the rest with the other colours. After trimming any ends off, I drew around the edges with a gold metallic marker pen, then cut the two side panels and the handle panels out of gold mirror card.

Upcycled Rainbow Favour Bag by Esselle Crafts

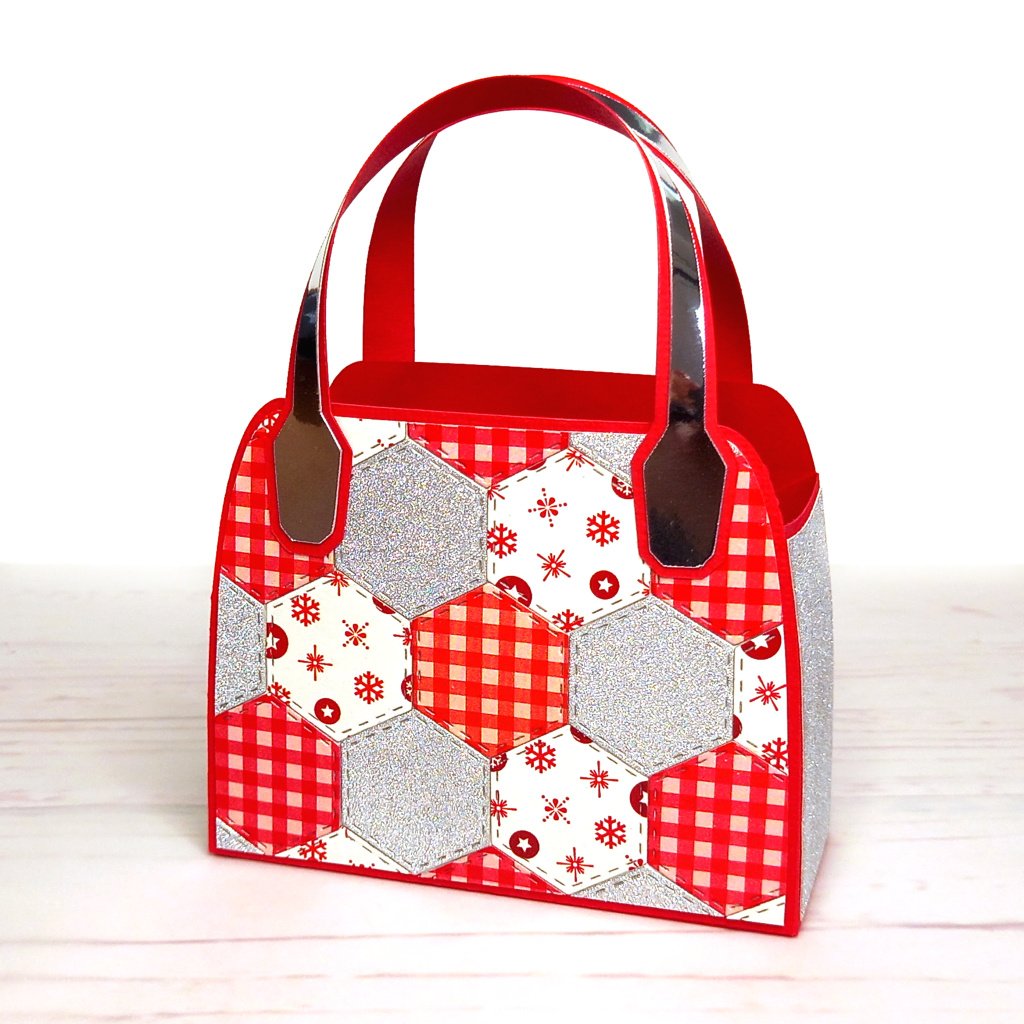
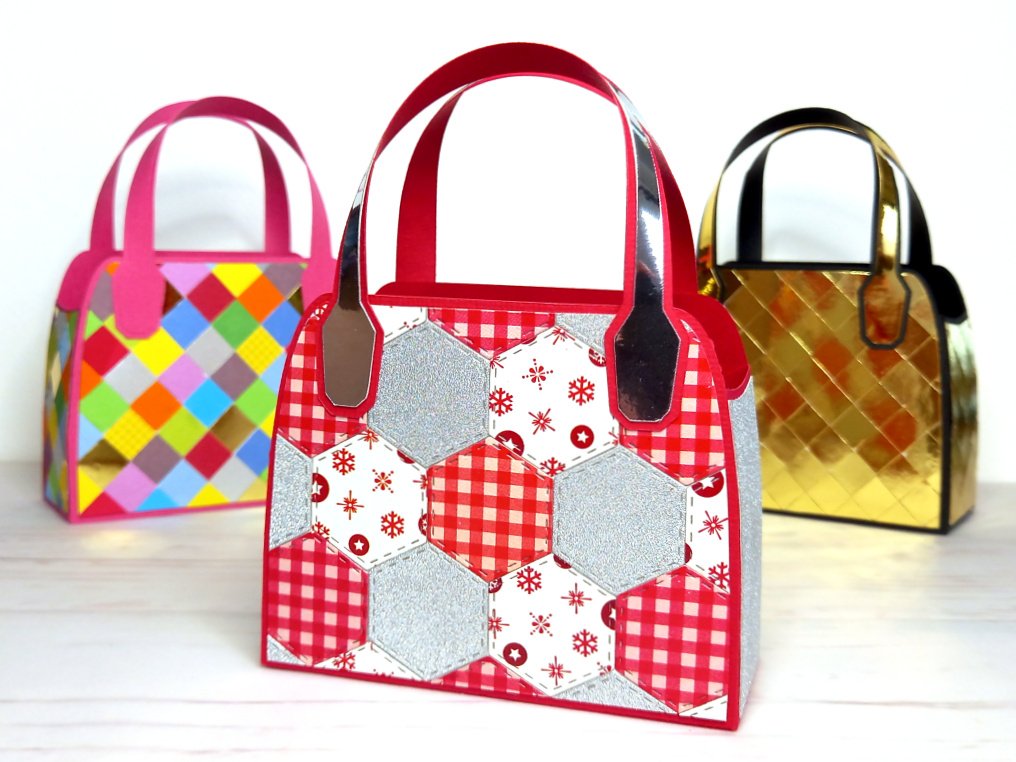
For this next one, I made the main bag out of red cardstock, then cut a front and back panel out of white copy paper. I die cut small hexagons from old Christmas crackers (that I had saved from a couple of years ago) and glued them onto the panels to make a patchwork effect. I then cut the two side panels out of a larger piece of glittery, silver cracker and cut the handle panels out of silver mirror card.

Upcycled Red Patchwork Favour Bag by Esselle Crafts

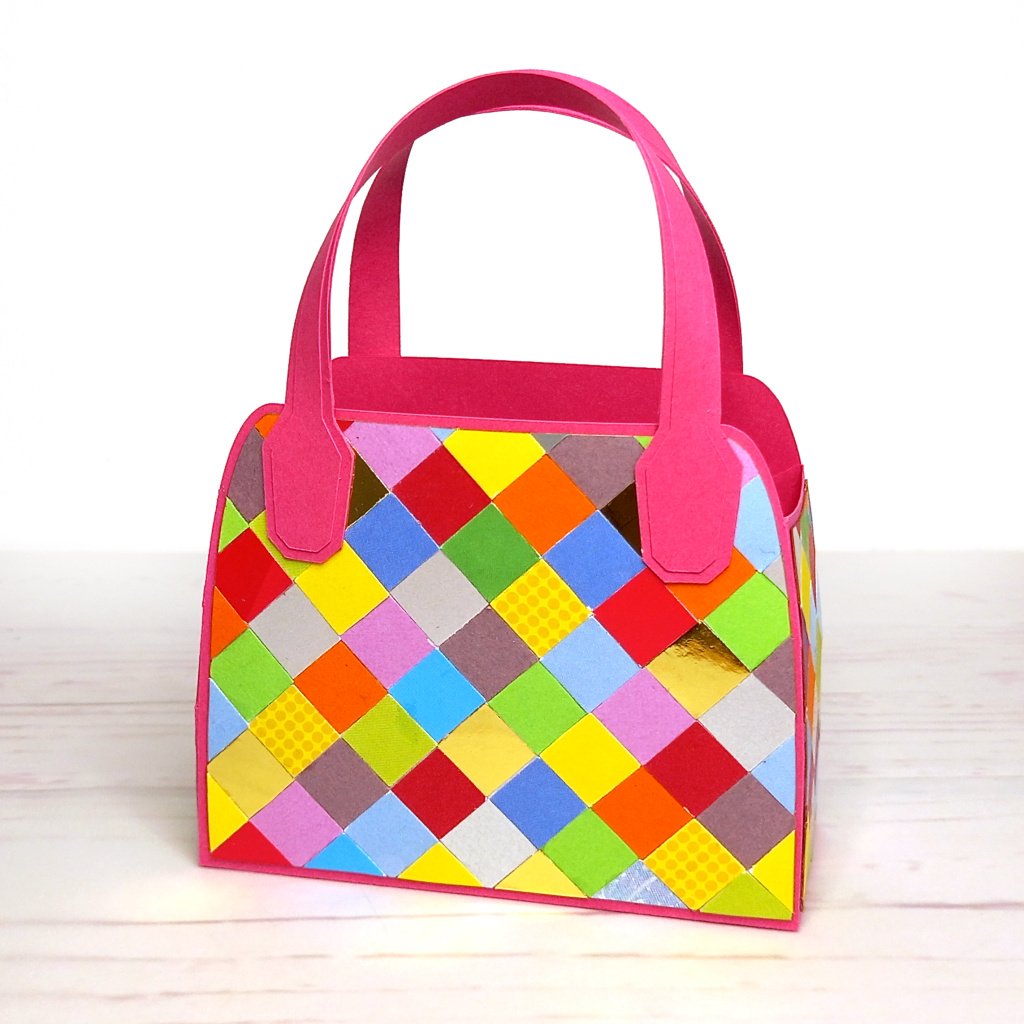
The pink card that I used for this next bag was an old A4 folder divider that I no longer needed. Again, I cut the front and back panels and two side panels from copy paper, then found lots of small scraps of cardstock, greeting cards and food packaging and punched out as many squares as I could using my 1.1cm square punch.

Call me obsessive, but I really wanted all of the edges to match up so that it looked like a candy wrapper bag, and here’s how the panels looked once I’d finished.

Pieces for an Upcycled Favour Bag by Esselle Crafts

Before gluing them on, I ran the panels through my Big Shot to flatten them and it gave them a nice smooth finish.

Colourful Patchwork Upcycled Favour Bag by Esselle Crafts
Colourful Upcycled Favour Bags by Esselle Crafts

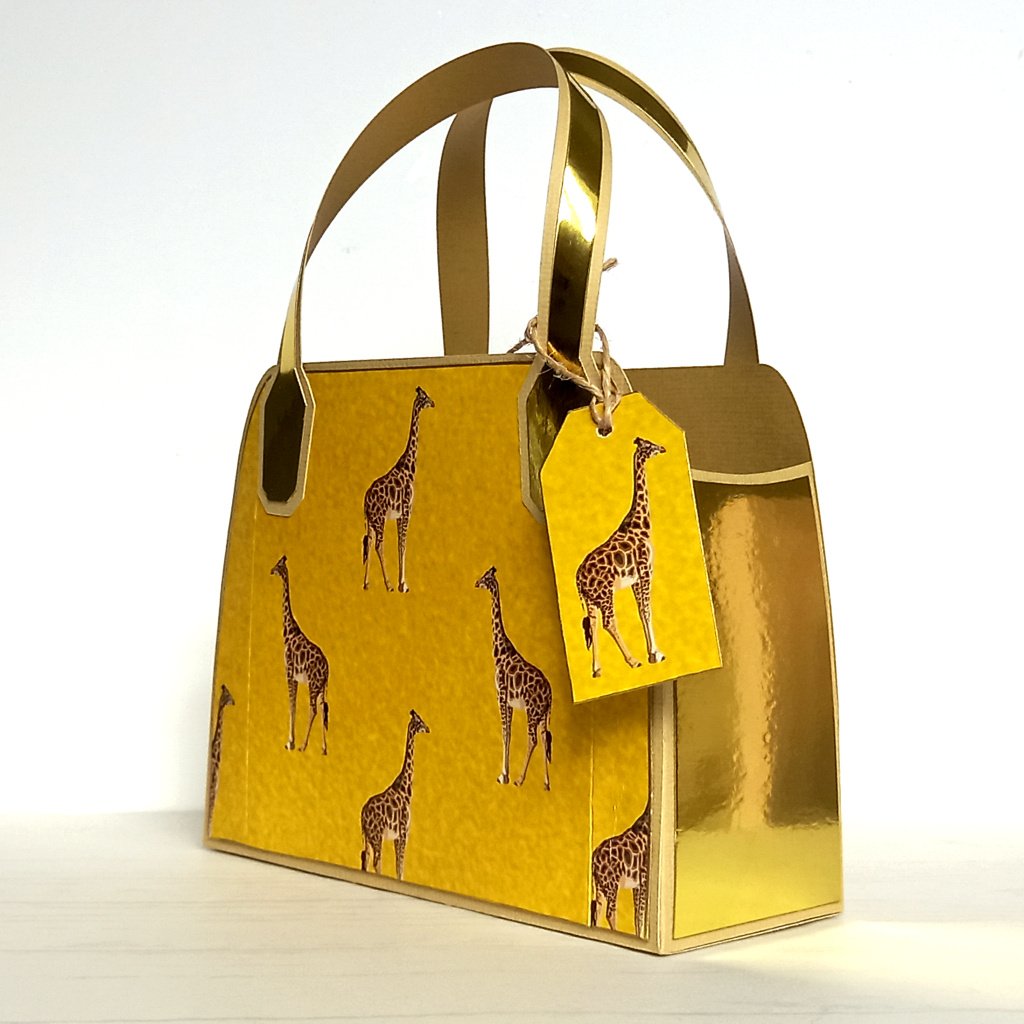
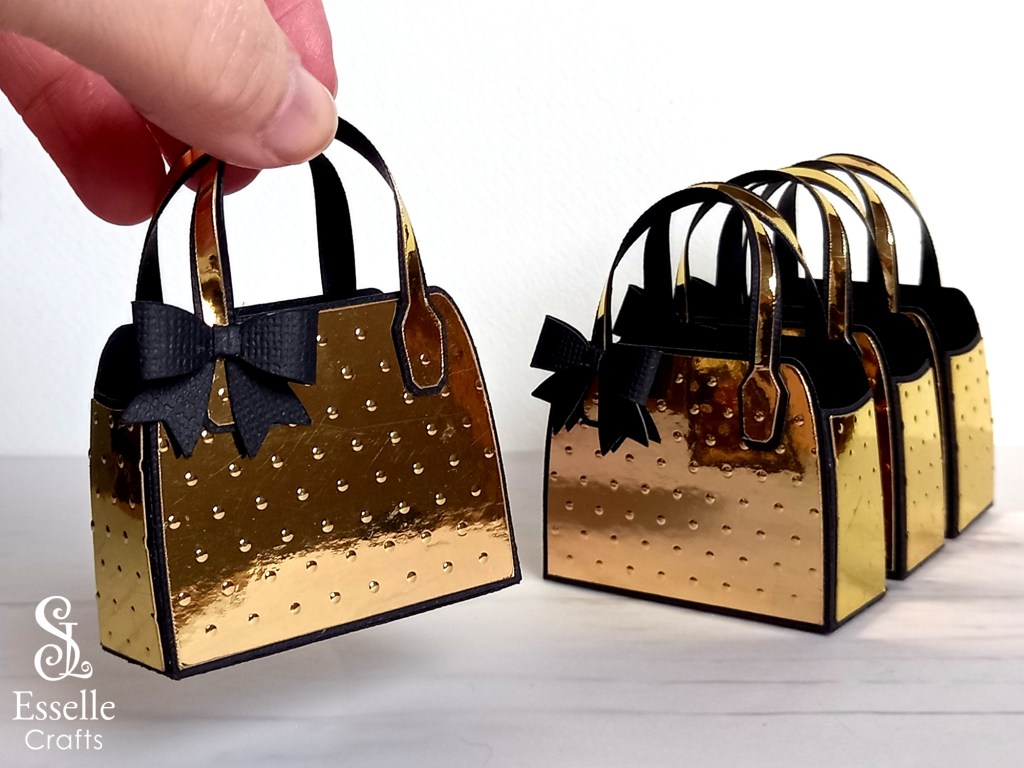
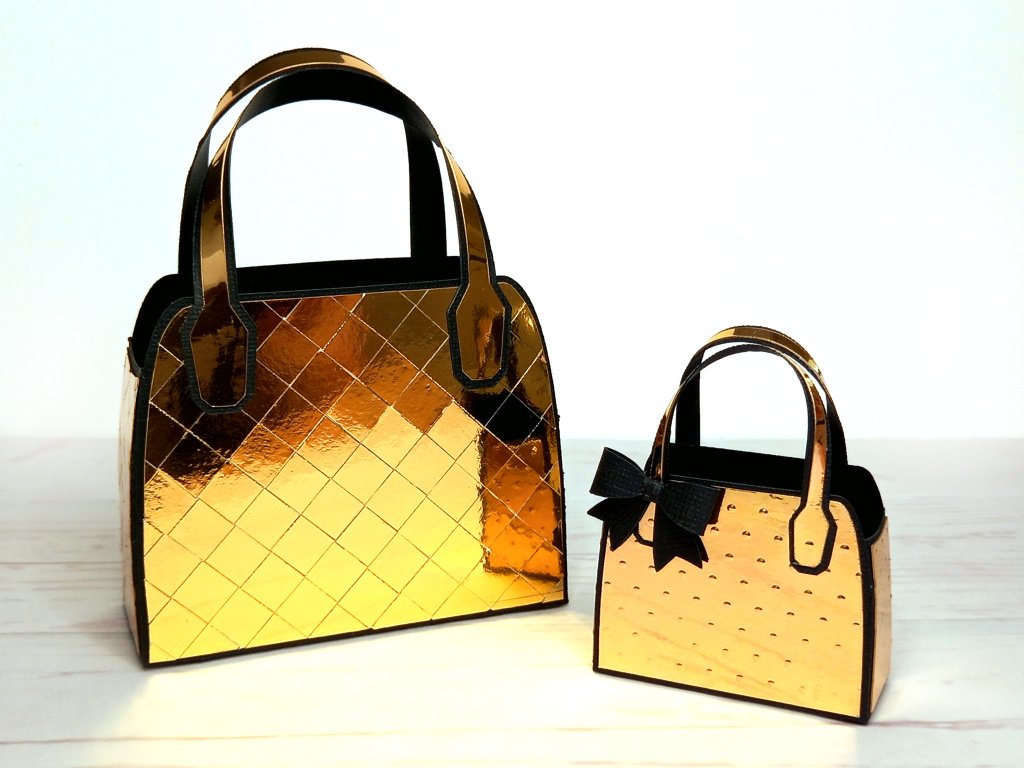
I made this next one in a similar way, using scraps of gold mirror card. Running these panels through my Big Shot created almost a matt finish, and I drew around the edges with a gold metallic marker pen afterwards to hide the white core.

Black and Gold Upcycled Favour Bag by Esselle Crafts

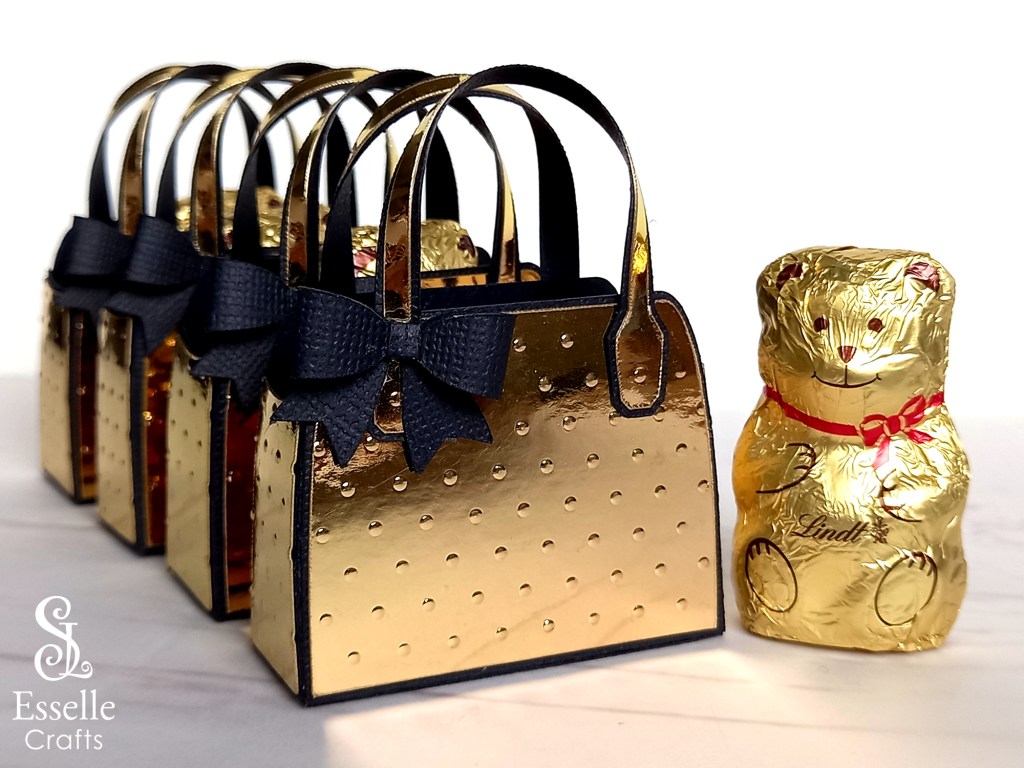
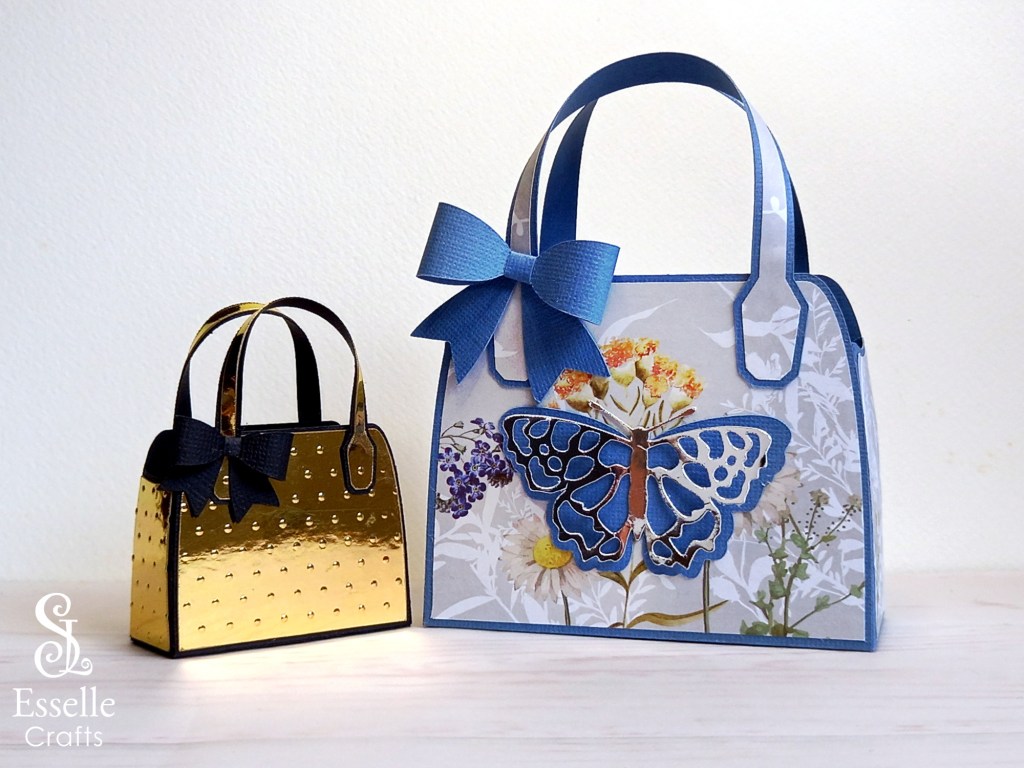
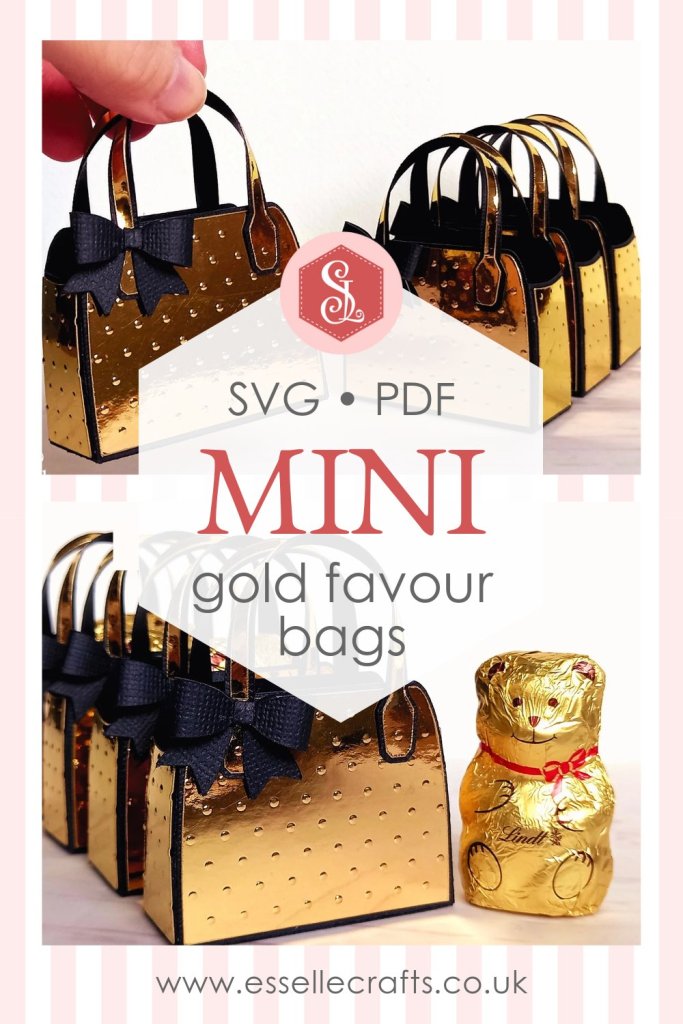
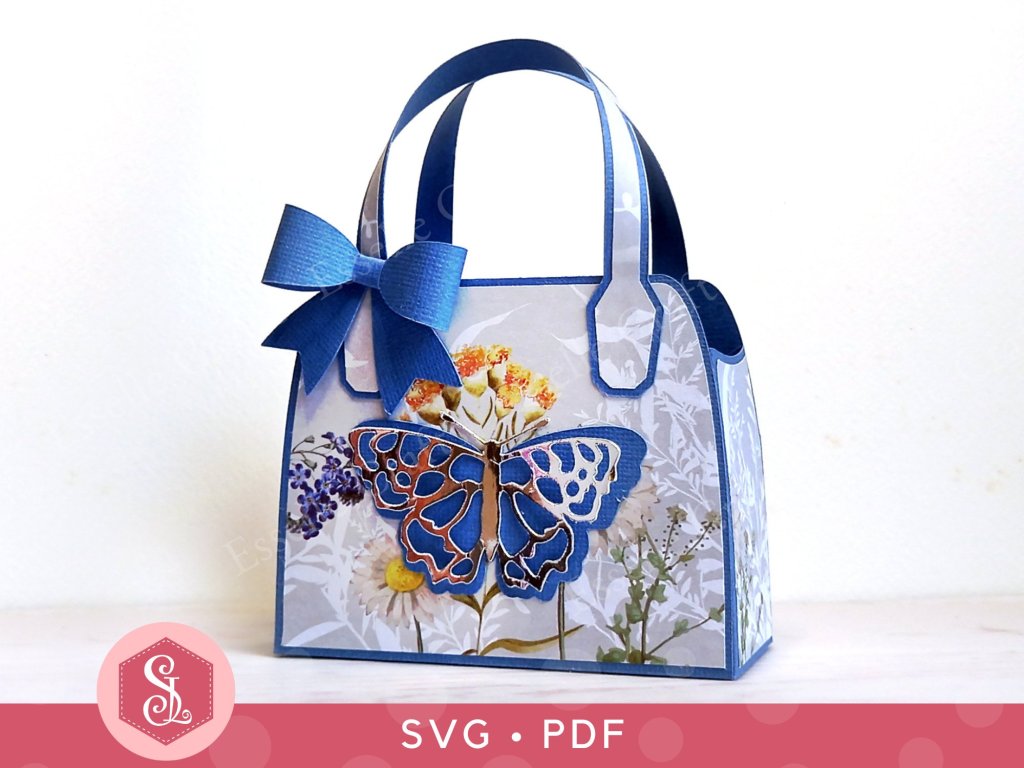
It’s very similar to these mini gold handbags that I made using the same template.

Black and Gold Upcycled Favour Bags by Esselle Crafts

I’m completely obsessed with making these bags now, and will definitely be making more!

Upcycled Favour Bags by Esselle Crafts

Watch this space!

Suzanne

3D Papercraft Projects · Favour Boxes

Black Cat Favour Box

Following on from my previous post, where I introduced you to my Tabby Cat Favour Boxes, I have now made a Black Cat version – perfect for Halloween treats!

Black Cat Favour Box by Esselle Crafts

Easy to assemble, you can make the cat head box in any colour you wish (it doesn’t have to be black) and adapt the colour of the eyes, nose and whiskers to match! Ideal as little table favours or for a cat-themed party, you can fill them with sweets, chocolates or small gifts.

Black Cat Favour Boxes filled with Halloween Candy

Available from my Etsy shop, the template comes as an SVG cut file, as well as a PDF if you prefer to cut out by hand.

Two Black Cat Favour Boxes

PLUS you get an optional extra white face patch to create a bi-colour cat face, like a tuxedo cat!

Two Black Cat Favour Boxes

To make one of these cat boxes, you will need:

Black Cat Favour Box template (SVG and PDF available)
* Computer and printer to print the PDF templates and instructions
* Double-sided, textured cardstock (220-250gsm / 80-92lb recommended)
* Craft glue / double-sided tape

If you are not using a digital cutting machine, you will also need:

* Craft knife / scissors
* Scoring tool
* Ruler

Watch my video tutorial showing how to assemble the box and be sure to follow the tips below:

TIP 1 : After gluing the side panels on, gently curve the sides using your fingers or a bone folder before the glue dries. This will make assembling the box much easier and give it a neater finish.

Assembling the black cat favour box side

TIP 2 : Instead of using plain black cardstock on the side panels, why not use a spooky halloween patterned paper! Here I’ve used a spider web design on the box on the left.

Black Cat Favour Boxes by Esselle Crafts

TIP 3 : Make sure that the (grey) whiskers / mouth panel and the (black) eyes panel completely cover the cut out sections. They should line up like this:

Assembling the black cat favour box face

The cat box measures approximately 11cm (W ) x 9.5cm (H) x 4cm (D)  /  4.3″ (W ) x 3.74″ (H) x 1.6″ (D), however, this is only meant as a guide, as the templates can easily be re-sized to suit your needs.

Black Cat Favour Boxes Blog by Esselle Crafts

I hope that I have now inspired you to create your own little cat favour boxes (whether black or tabby) and I can’t wait to see what you fill them with!

Suzanne

3D Papercraft Projects · Favour Boxes

Tabby Cat Favour Boxes

These little Tabby Cat Favour Boxes make the perfect gift box for any cat lover! Easy to assemble, you can make the tabby cat head in any colour you wish and adapt the colour of the eyes, nose, whiskers and stripes to match!

Three Tabby Cat Favour Boxes by Esselle Crafts

Ideal as little table favours or for a cat-themed party, you can fill them with sweets, chocolates or small gifts. You could even put some cat treats in them like I did – much to Prince’s delight! 🐈‍⬛

Silver Grey Tabby Cat Favour Box with cat treats by Esselle Crafts

Available from my Etsy shop, the template comes as an SVG cut file, as well as a PDF if you prefer to cut out by hand. 

Two Tabby Cat Favour Boxes filled with treats by Esselle Crafts

PLUS you get an optional extra white face patch to create a bi-colour cat face!

Two Tabby Cat Favour Boxes by Esselle Crafts

To make one of these cat boxes, you will need:

Tabby Cat Favour Box template (SVG and PDF available)
* Computer and printer to print the PDF templates and instructions
* Double-sided, textured cardstock (220-250gsm / 80-92lb recommended)* Craft glue / double-sided tapeIf you are not using a digital cutting machine, you will also need:

* Craft knife / scissors
* Scoring tool
* Ruler

Watch my video tutorial showing how to assemble the box and be sure to follow the tips below:

TIP 1 : After gluing the side panels on, gently curve the sides using your fingers or a bone folder before the glue dries. This will make assembling the box much easier and give it a neater finish.

Brown Tabby Cat Favour Box Assembly by Esselle Crafts

TIP 2 : Make sure that the (white) whiskers / mouth panel and the (black) eyes panel completely cover the cut out sections. They should line up like this:

Brown Tabby Cat Favour Box assembly by Esselle Crafts

The cat boxes measure approximately 11cm (W ) x 9.5cm (H) x 4cm (D)  /  4.3″ (W ) x 3.74″ (H) x 1.6″ (D), however, this is only meant as a guide, as the templates can easily be re-sized to suit your needs.

Tabby Cat Favour Boxes by Esselle Crafts

I hope that I have inspired you to create your own little Tabby Cat favour boxes using my template and I can’t wait to see what you fill them with!

Suzanne

3D Papercraft Projects

Layered Butterflies

My Butterfly Favour Bag has been hugely popular recently and I’ve had several people ask if I have any other butterfly designs that could be added to the bag.

Butterfly Favour Bag by Esselle Crafts

This is something that I’d considered doing when I designed the first one and so, as I loved doing it, I have designed three more!

Set of 4 3D layered butterflies for paper crafts

The first one (that comes with the bag) is a likeness of a Small Tortoiseshell butterfly and the others are likenesses of a Peacock, a Monarch and a Speckled Wood butterfly.

I have the whole set of four butterflies available in my Etsy shop as SVG cut files as well PDFs if you prefer to cut out by hand.

Layered butterflies blog post by Esselle Crafts

They are so delightfully versatile and, as well as adding them to the favour bags, they can be used for all sorts of different papercraft projects.

Here I’ve used two of them on a greeting card. 

Greeting card with two 3D layered butterflies cut from paper

The butterflies are super easy to assemble (consisting of only two layers) and look amazing with the top layer cut out of mirror card.

2 3D layered butterflies cut from paper

I can’t wait to see what you use them for! 🦋

Happy crafting
Suzanne

3D Papercraft Projects

Business Card Box Tutorial

I recently updated my business card design to include my new website and some of my favourite 3D papercraft projects, and I’m so pleased with how it’s turned out!

Esselle Crafts Business Card

So, this got me thinking … How can I safely store and present my lovely new set of 100 business cards, whilst keeping consistent with my brand?

And, of course, it had to be a handmade box!

A business card display box made from mint green cardstock and decorated with white spotty card holding 100 business cards.

This is how I made it …

I started by measuring the set of cards and worked out that I needed a 20cm x 20cm piece of cardstock. I chose the lovely vintage mint green colour to match my brand (and my Cricut Explore 🥰). I then used my scoring board to score the lines shown below and drew the diagonal lines at the sides with a pencil.

DIY Business Card Box by Esselle Crafts

I folded and burnished the score lines, then cut the tabs as shown below.

DIY Business Card Box by Esselle Crafts

Next, I added some patterned paper panels to the front (measuring 8.5cm x 1.5 cm) and the two sides (measuring 4.5cm x 5cm with the diagonal lines at 1.5cm).

DIY Business Card Box by Esselle Crafts

I then glued the two larger side tabs to the back.

Business Card Box by Esselle Crafts

Then glued the two smaller tabs to the front and folded the front over, gluing it in place for a neat finish.

A business card display box made from mint green cardstock and decorated with white spotty card holding 100 business cards.

I did the same with the back, folding it over and gluing it in place. This also gives the back extra strength.

A business card display box made from mint green cardstock and decorated with white spotty card holding 100 business cards.

I love how it looks, and I know that my business cards will now be safe and nicely presented for anyone who wishes to take one 🥰

Will you be giving this a try?

Happy crafting!
Suzanne

Favour Boxes · Teapot Favour Boxes

PDF Rose Tea Party Set

In anticipation of warmer, sunny days and with Mother’s Day on the horizon, I have created this pretty printable rose tea party set!

PDF Rose Tea Party Set by Esselle Crafts

Consisting of a beautiful teapot box with removable lid and a matching teacup and saucer these easy to assemble favour boxes are certain to delight and will be the talk of the party!

PDF Rose Tea Party Set by Esselle Crafts

I’ve also included a larger version of the saucer, which will make a perfectly matching tea plate / side plate, just right for holding wrapped chocolates or biscuits!

PDF Rose Tea Party Set by Esselle Crafts

The templates are available as full colour PDFs and are designed for use on A4 photo quality paper (white, glossy 220-250gsm / 80-90lb recommended), however they can be re-sized before printing. All of the instructions are written clearly in English.

PDF Rose Tea Party Set Blog Post by Esselle Crafts

To make your very own rose favour box tea set, you will need:

Rose Tea Party Set templates (PDF)
* Computer and printer to print the PDF templates
* Plain white cardstock or photo quality paper (glossy 220-250gsm / 80-92lb recommended)
* Craft glue / double-sided tape
* Craft knife / scissors
* Scoring tool
* Ruler

Approximate dimensions of teapot box: 16cm (W ) x 10.2cm (H) x 7.8cm (D) / 6.3″ (W ) x 4″ (H) x 3.1″ (D).

Approximate dimensions of teacup: 11cm (W ) x 4.7cm (H) x 8cm (D) / 4.3″ (W ) x 1.85″ (H) x 3.15″ (D).

Approximate dimensions of tea plate: 12cm (W ) x 1.2cm (H) x 11cm (D)  /  4.7″ (W ) x 0.5″ (H) x 4.3″ (D). 

Watch my video tutorial showing how to assemble the boxes and be sure to follow the tips below:

TIP 1 : Printing the PDF templates onto glossy photo paper will give the boxes a realistic, shiny finish.

PDF Rose Tea Party Set by Esselle Crafts

TIP 2 : Match the patterned hexagon with the pattern on the saucer (and the tea plate) to give it a seamless look.

PDF Rose Tea Party Set by Esselle Crafts

TIP 3 : For the teapot lid, start at the left side and tuck the six flaps into each other so that they all meet in the centre.

PDF Rose Tea Party Set by Esselle Crafts

You can print and make as many of these items as you wish and fill them with lots of little treats! Perfect for Mother’s Day celebrations, wedding favours, afternoon tea parties and so much more!

PDF Rose Tea Party Set by Esselle Crafts

I really hope you like this pretty tea set and will feel inspired to create your very own! 

Suzanne